All messages you send to your constituents should be in compliance with the CAN-SPAM Act of 2003. Salsa CRM does not add Unsubscribe options to your email automatically. To run a Mail Merge...
- Open the Word Processor by choosing Manage > Documents > Word Processor from the main menu.
- If you are using Google Docs as your default word processor, click the Other Word Processing Options button in the top right.
- If the ARE YOU SURE? window displays, asking you want to save before leaving this screen, click the Discard Unsaved Changes and Continue button.
- From the Options drop-down field, select Run a Mail Merge with additional options. The Mail Merge window opens.
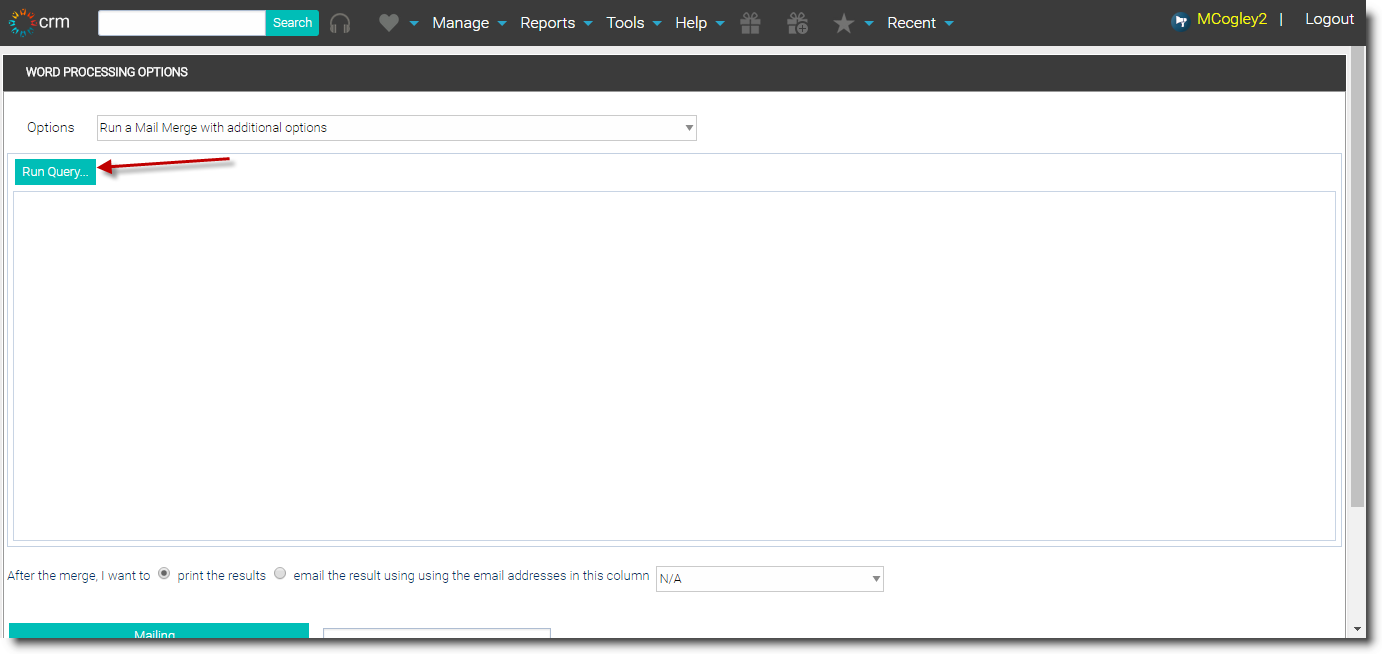
- Select the Run Query button located at the top of the screen. The Advanced Query Wizard launches. Note: If a previous query results appear, ignore and click the Run Query button.
- To start with a brand new query, follow the steps in the Advanced Query Wizard: Creating a Mail Merge Query article.
- To start with an existing query...
- Click Open existing query definition.
- Select the query row you want to use.
- Click Next in Step 1.
- Click Next in Step 2.
- Click Finish in Step 3.
- To start with the stored results from a previously run query...
- Click View results of previous query.
- Select the query results row you want to use.
- Click Next in Step 1.
- Step 2 of the Advanced Query Wizard is skipped because a query is not run. Click Finish in Step 3.
- The Query Wizard closes. There is now a count of returned records listed next to the Run Query button. Every output field in the query also displays in the Mail Merge Wizard as an indicator of the merge fields you can use in your document template.
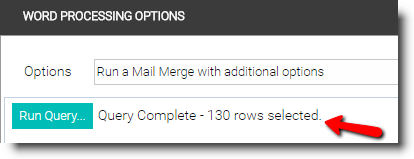
- After the merge, you want to email the result using using the email addresses in the appropriate column you select.
- The merge can create a simple email message or an Email with the merged document attached. Select the option you would like.

- If, on the I want the merge to create option, you chose to include an attachment option, you will be able to select the document you wish to use as the merged attachment by selecting the Select Document button. NOTE: Email attachments, which are created using the word processor, can be text, html, doc and .rtf type documents.
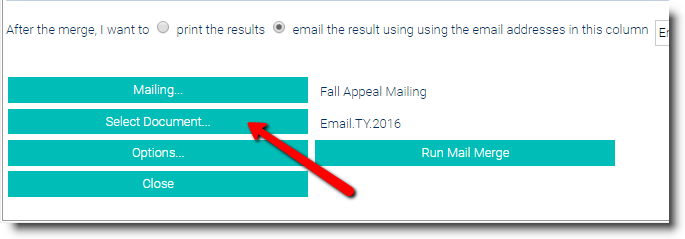
- Select the Select Document to select which document will serve as the body, or text, of your email. These documents, created in the word processor, can be html or text only. NOTE: When you choose to save an email to a constituent record, it will appear under the Documents node of the constituent record. Once the document has been selected, the document description will appear to the right of the button.
- If you would like to record that these constituents received this mailing, select the Mailing button.
- Select the Options button to choose the Print Merge Options you would like to apply to this merge. On the Print Merge Options window you have the following options:
- File Format Options: Save a merged document as a PDF and/or Save the merged ‘.rtf’ document as a ‘.doc’ file. (If a letter was created using the built-in word processor, the file type is typically ‘.rtf’.)
- Save to Database Options: Allows you to save the merged email content and/or the merged attachment document to the constituent’s record.
- Household and Deduplication Options: Choose to allow only one merge per: Constituent ID, Address based on Line 1 and Postal Code and Email Address. (If you select Constituent ID, Spouse ID will become available for selection, likewise, if you select Address Line 1, Line 2 becomes available for selection.)
- The deduplication options ensure that multiple mailings are not sent to the same constituent or address. By selecting the options shown in the Print Merge Options window, only one letter will be generated. The Constituent ID option will merge any records that have the same Constituent ID. The document will be saved to the constituent’s record.
- Consider the ‘Allow only one merge per Constituent ID or Spouse ID’ options. If the query results list a Constituent ID that is listed previously in the results, Salsa CRM will not send an email to this duplicate constituent.
- Consider the ‘Allow only one merge per Email Address’ option. This indicates to Salsa CRM that you only want one email to be sent to each email address. Once you have made your selection(s), select the OK button.
- Enter the email address in the From, CC, and/or BCC fields.
- Enter the Subject and an Attachment Name
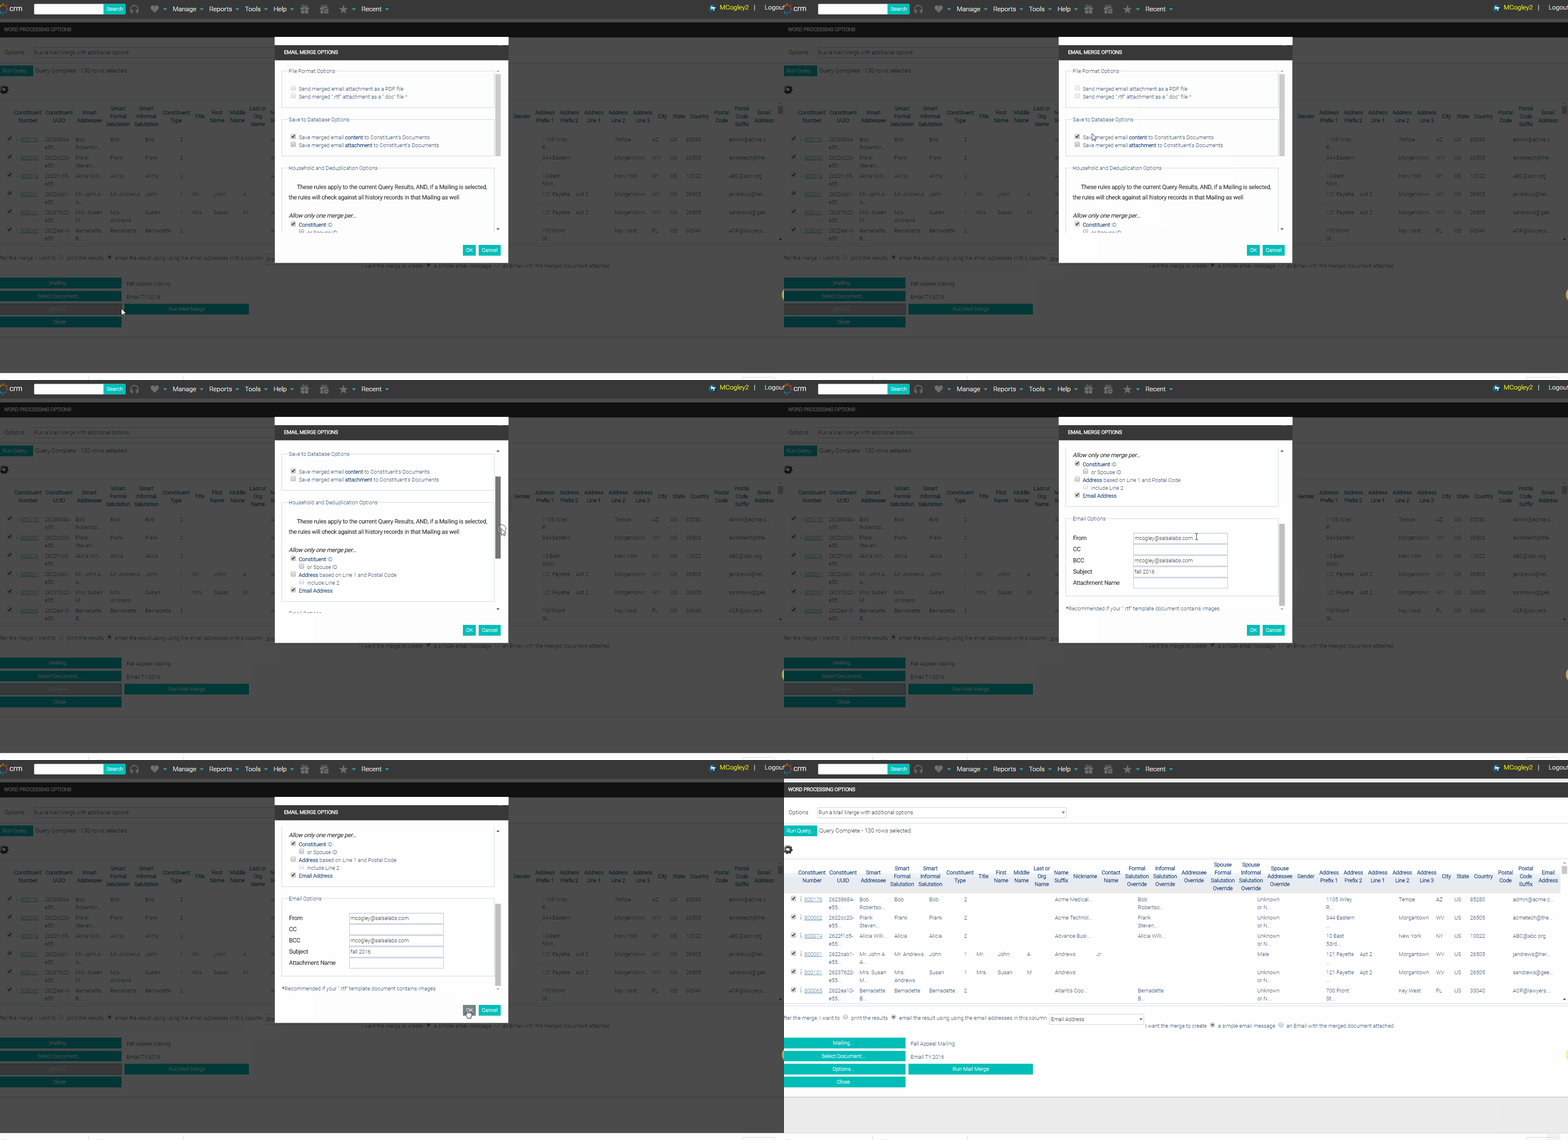
- Once you have selected the Options, select the Run Mail Merge button. The Results open in a new browser tab. At the top of the screen Salsa CRM lists the Total Records, Success Count, Ignored Count, and Failed Count.

Beneath the merge status, there are a series of control buttons.
- The Results screen allows you to view the results of the Attached Document and Email Content. This screen allows you to open and edit the email content and the email attachment. Select the View All button or double-click on the constituent listing for whom you would like to modify the email and/or attachment. The Edit button edits any attachment only, not the content.
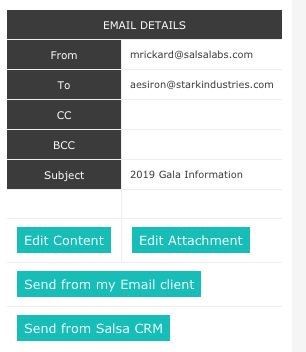
- Click to Edit Content, or Edit Attachment (both are optional). Content is edited in an internal text editor. Attachments are edited in Google Docs, if you have that functionality configured.
- Once editing is complete, click the Save button.
- Send the email in either of two ways:
- Send From Salsa CRM—Send an email using the email server in your general email configuration.
- Send From Email Client—Send an email using the program on your computer that is currently configured to send email. That program should open automatically. Check here for Windows 10 and here for Mac if you're unsure which email client you use.