Set Up the Connection From Zapier to Engage
To connect Zapier to Engage, you first must have an account and plan with Zapier. Sign up for a Zapier account here. To try out Zapier, you can sign up for a free trial. Paid plans are also available with increased function and flexibility. Plans can be upgraded or downgraded at any time.
Instantly connect Salsa Engage with 1,500+ apps to automate your work. Step through the instructions that follow or see the next section for ready-made Zap templates.
- Once your Zapier account is created, go to Zapier and select Make a Zap.
- In the When this happens section, choose the product that will send data to Engage via Zapier. Each 3rd party product will offer its own list of triggers (that is, what action will prompt Zapier to send data to Engage). Select the trigger that you want to use.
- You will be prompted to log in to the account that is sending data. (This can vary based on the third-party: it could be a login, an API key, or a webhook, for example.)
- You will be prompted to test the connection and trigger to see if Zapier correctly received the expected data.
- In the second Do this section in Zapier, search for Salsa Engage (use the 1.1.0 version).
- Choose the action that you want to trigger in Engage (for example, Add a Supporter).
- When searching for an account, enter your integration API key from Engage. You get this in Engage, from Settings > API > Integration API.
- Set up the field mappings between Engage and the third-party application. Note: Be sure that your mappings are accurate, or the integration will not work as you might expect. For questions about mapping, please Contact Salsa Support.
Zap Templates for Salsa Engage
Use a ready-made template below to connect apps commonly used by nonprofit organizations with Salsa Engage.
Add or Update Supporters
Actions that add or update Supporters in Engage must use one of three fields to determine whether a supporter already exists in your account: Supporter ID, External ID, and Email Address. Use the field that is available in your source application to link to the Engage value.
Supporter ID
Supporter ID is the unique ID assigned to every supporter created in Salsa Engage. In order for this field to be used, the supporter must already exist, so that the ID is known.
External ID
When your other application creates a record, it generates a unique ID of its own to every supporter, called the External ID. This ID does not have to exist in Salsa Engage to be used. When this ID is used in the integration, Zapier will either update an existing supporter with the matching ID or create a new supporter if the ID is not found.
Email Address
When an Email Address is used in the integration, Zapier will either update an existing supporter with the matching Email Address or create a new supporter if the Email Address is not found. If more than one supporter is found with the matching Email Address (Salsa CRM users only), then it will choose the record that was created first.
Search Hierarchy
Salsa will look at the Supporter ID value first to see if there’s a match. If one is found, it will update the record, this includes updating the External ID and Email Address fields if any change is made.
If Supporter ID is not provided, Salsa will search for a match on either External ID or Email Address if both are provided. If a match is found for either External ID or Email Address, it will update the matching record.
NOTE: the integration will not accept a duplicate External ID or duplicate Email Address and will issue an error if either submitted value is already stored with another supporter record.
Add Charges or Refunds
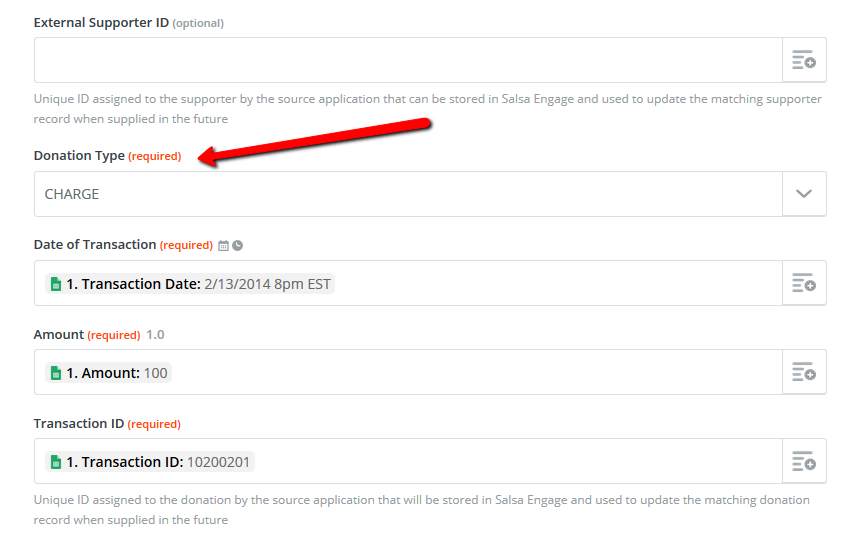
Salsa’s integration with Zapier requires that the source application sends whether it is a successful charge or a refund. When setting up your zap, you must choose either Charge or Refund action.

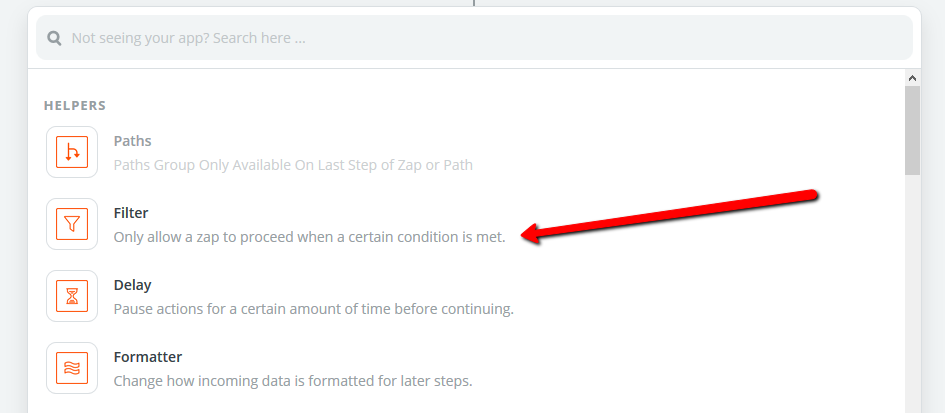
In order for either a charge or a refund to be stored in Salsa, you will need to set up two zaps: one for charges and one for refunds. For each, set a filter that sends data only if the donation contains the appropriate type of update.

For example, your source application has a field called "Donation Status" and a status of "Success", which means the donation was successful. Similarly, a "Donation Status" of "Refunded" means that the donation was refunded. To configure the successful donation zap correctly in this hypothetical situation, you would add a filter on the "Donation Status" field where the field "Exactly Matches" a value of "Success." Then, when configuring the Salsa action, you would set the Donation Type to Charge. To configure the refunded donation zap, you add a filter on the "Donation Status" field where the field "Exactly Matches" a value of "Refunded."
Turn on both zaps and Zapier will send any successful donations to Salsa as a Charge and any refunds as a Refund.
Add Supporters to Groups
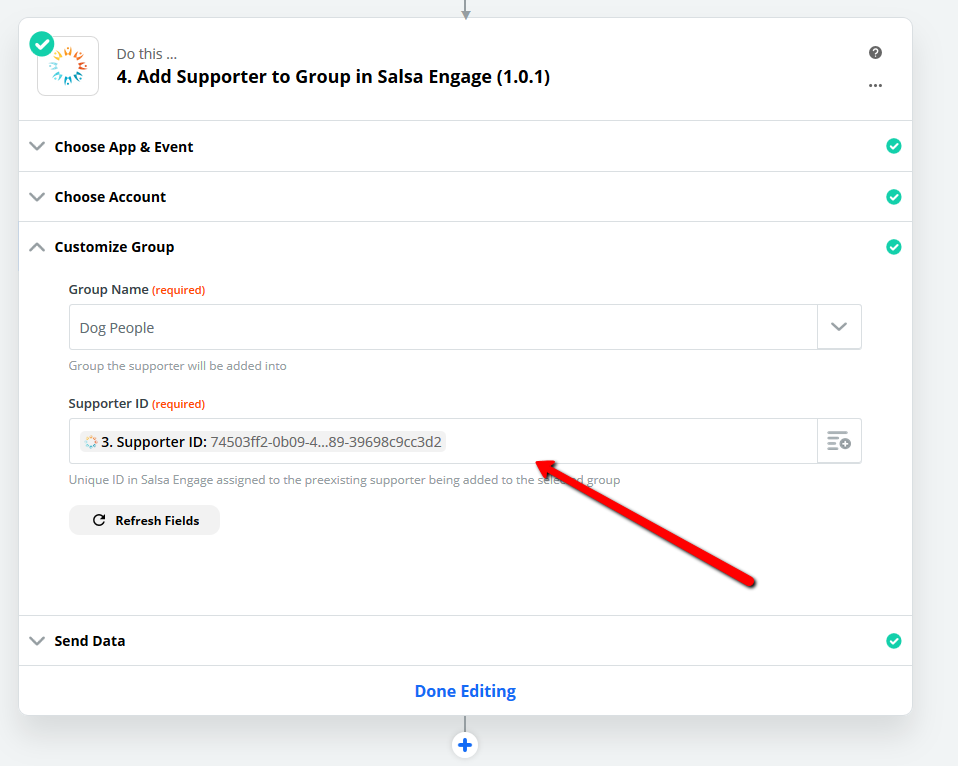
The Add Supporter to Group in Salsa Engage action requires linking the Supporter ID. If your source application stores the Supporter ID...
- Choose the App & Event.
- Choose the Account.
- Choose the Group name.
- Choose the Supporter ID field from your source application.
- Click Done Editing to finish.

If your source application doesn’t store the Supporter ID...
- Create a multi-step zap that first performs either the Create or Update Supporter or Create or Update Donation and Supporter action.
- Add the Add Supporter to Group in Salsa Engage action in the second action of the zap. The steps to construct this action are above.
- Map the Supporter ID provided by the first action.
Map Funds, Campaigns, and Appeals
Salsa CRM users can optionally map Fund Campaign, or Appeal values for donations submitted through Zapier to the Create or Update Transactions or Create or Update Donation and Supporter actions. The Fund, Campaign, and Appeal values must pre-exist in the CRM before sent through Zapier. If no Fund is mapped, Salsa CRM will add all donations to the Salsa Engage Default Fund.
Map Custom Fields
Optionally map custom information about supporters to Supporter Custom Fields or custom donation information to Activity Custom Fields. Here’s a brief overview of the difference between the two fields:
- Supporter Custom Fields—Used for non-standard supporter data such as favorite color, parent (this could be a yes/no field), How did you hear about us? (this could be a drop down of options/"Single Choice" field), etc. Supporter custom fields can be synced with Salsa CRM.
- Activity Custom Fields—Used for particular data points tied to a donation, such as a Gift Memo. They are transactional. When submitted through Zapier, they will be attached to the donation record and not directly to the supporter. Salsa supports Activity Custom Fields for all activity types, but currently donation activities can only be submitted through Zapier.
To map data to custom fields,
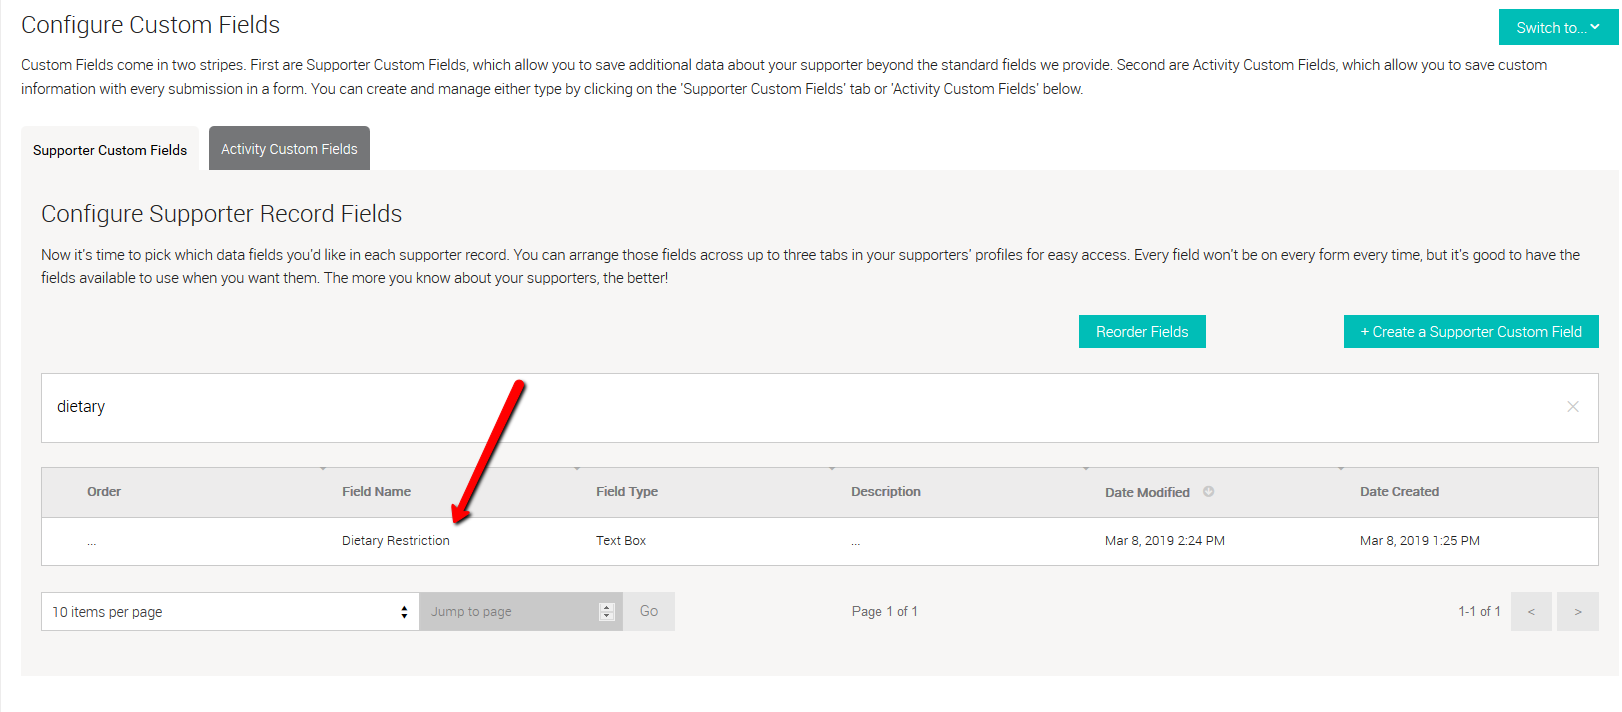
- Copy the name of the custom field, such as Dietary Restriction, from Salsa Engage.

- Paste the name of the field into the first text input.

- Then map the field from your source application by selecting it from the list.

- Use the plus button on the right under the current mapping to add more custom field mappings.
