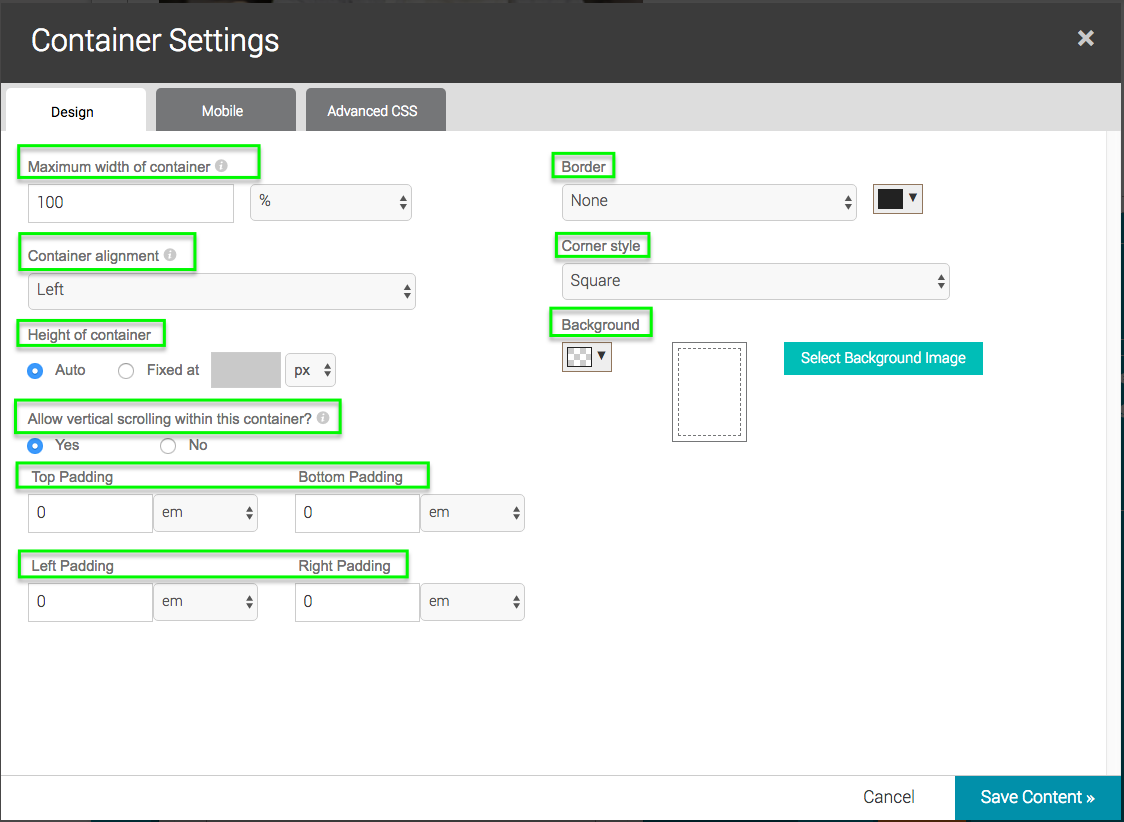
Element Container Design
Control the element padding, width, height, vertical scrolling within the element, border, corner style, and background. To adjust the element's mobile settings...
- Click the element's Container Settings "gear" button.
- On the Container Settings screen, click the Mobile tab at the top.
Mobile Display Options
All Salsa Engage forms are responsive by default. However, you may want to make further adjustments to any element based on the size of the display you expect your supporters will be using to view your forms or emails.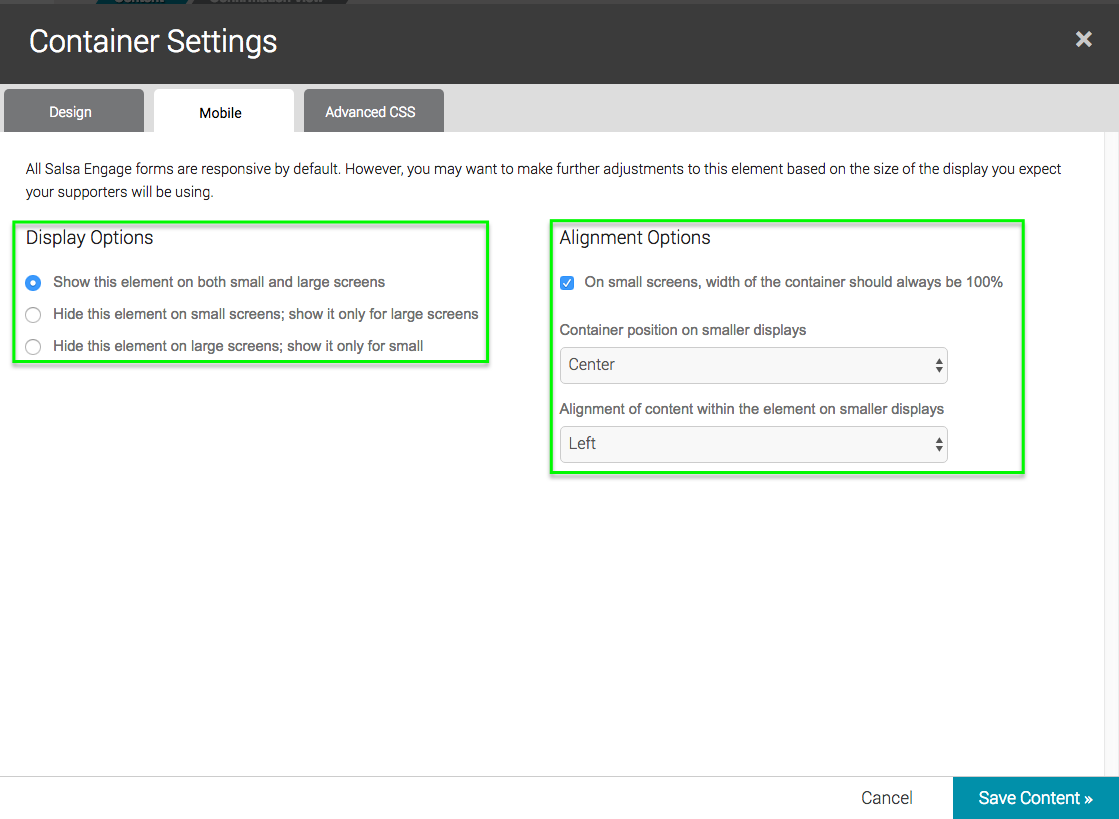
To adjust the element's mobile settings...
- Click the element's Container Settings "gear" button.
- On the Container Settings screen, click the Mobile tab at the top.
- Control if the element displays with the following Display Options:
- Show this element on both small and large screens.
- Hide this element on small screens; show it only for large screens.
- Hide this element on large screens; show it only for small.
- Control the element alignment (Engage forms only) with the following Alignment Options:
- Check the box whether, on small screens, the width of the container should always be 100%.
- Container position on smaller displays: Left, Center or Right.
- Alignment of content within the element on smaller displays: Left, Center or Right.
Custom CSS
Cascading Style Sheets (CSS) is a style sheet language that web developers use to define HTML styles (e.g., fonts, colors, spacing) for web forms and, to a lesser extent, emails. This article covers how you can add CSS to customize the look of your Engage forms (that are not embedded in existing websites) and email blasts. CSS can affect the look and feel of your activities beyond what you can normally do in the Visual Editor.
Only users with advanced CSS skills should use this feature. For more information on CSS and guided tutorials, please click here. Salsa Support team members cannot provide support for building custom CSS. We do not provide code samples at this time.
If you wish, you can write your own CSS for your Engage forms and your emails. The styles you define will be included in the final output. These styles will not be applied in Edit mode. This keeps them from bleeding over into the Engage CSS. However, you will see them in the Preview and Published versions.
Engage forms that are embedded within existing websites using our embed widget use the CSS of the website in which they are embedded. Sometimes those website CSS styles overwrite our styles and will overwrite any standard or custom CSS defined in your form. Make changes to the website CSS to control your Engage form. Web developers should have access to your website CSS.
Any custom CSS you write takes priority over Engage's default CSS, and you may run into cases where your code conflicts with Engage's default CSS. If your custom CSS is being overridden by the default Engage CSS, you will need to add the important rule to your custom CSS. For example...
.class_name {
 background: #3a5c92 !important;
}
The "important" syntax shown above will enable your custom CSS code to override the default Engage CSS code.
Keep in mind that different browsers, devices, and email clients can vary widely in their support for certain CSS declarations, and they may not even support CSS functionality. For that reason, some CSS functionality is restricted to only Engage Activity forms and will not work on email blasts.
Add Custom CSS to Form or Email
If you would like to change the styles of your form or email elements, you can write your own custom CSS for your form. Keep in mind that support for certain CSS declarations can vary widely between and may even not be supported by different browsers and devices. Only those with advanced CSS skills should use this feature. To add custom CSS to your form or your email...
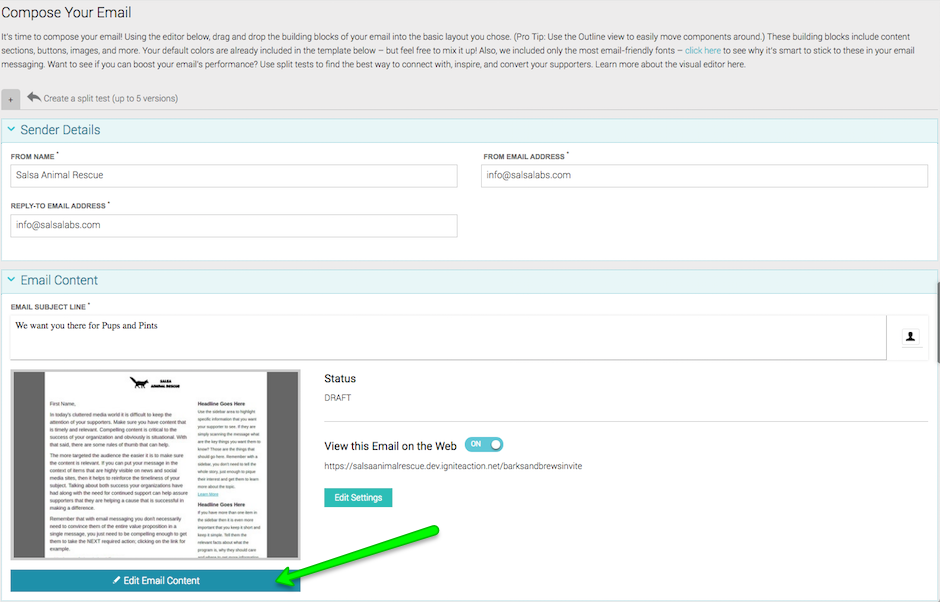
- On the form Compose or Create The Email screen, click Edit Content (or Edit Email Content).
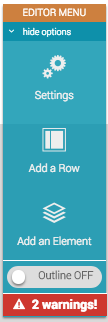
- Click the Settings button on the Editor Menu.
- Click the Custom CSS tab.
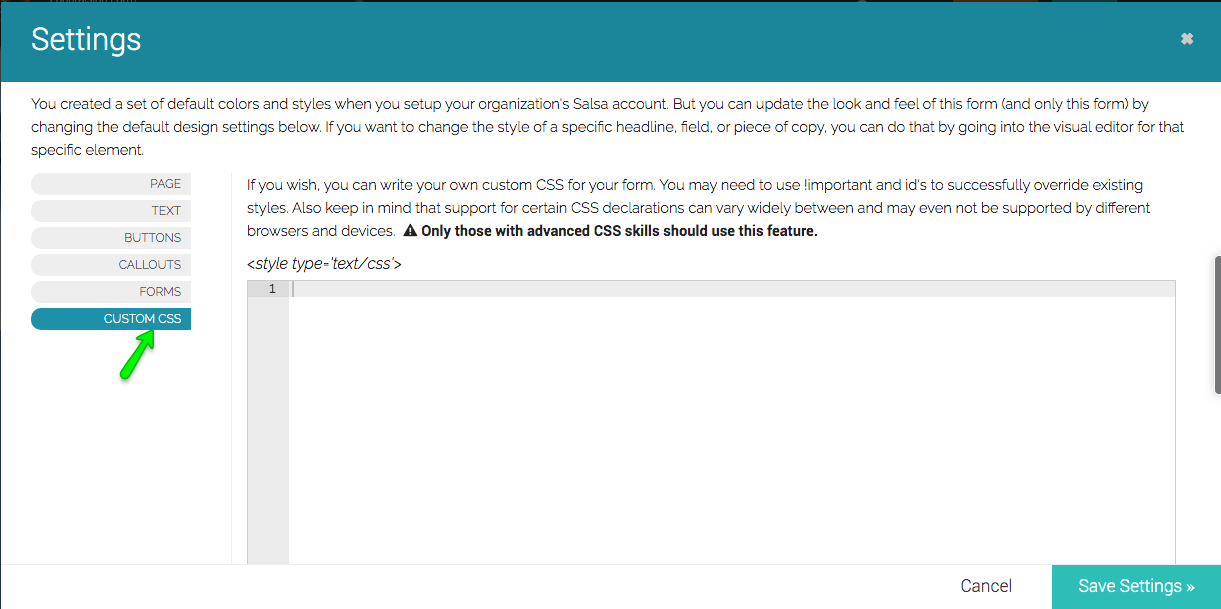
In the image above, the style tag is implied and does not need to be added manually.
@import is supported in our form Custom CSS. The @import rule allows you to import a style sheet into another style sheet. The @import rule must be at the top of the document (but after any @charset declaration).
NOTE: This is supported for form CSS only.
Custom CSS Per Element
Add classes to individual elements on Engage forms only. Each element container has a unique ID, and Engage displays that ID in the Container Settings screen. If you wish to target styles to specific elements, we recommend using the "Inspect" function of your browser (Chrome or Firefox) to inspect the elements of your preview or published form, to get the class names, then add them into your CSS. To add classes to an element...
- Click the element's Container Settings "gear" button.
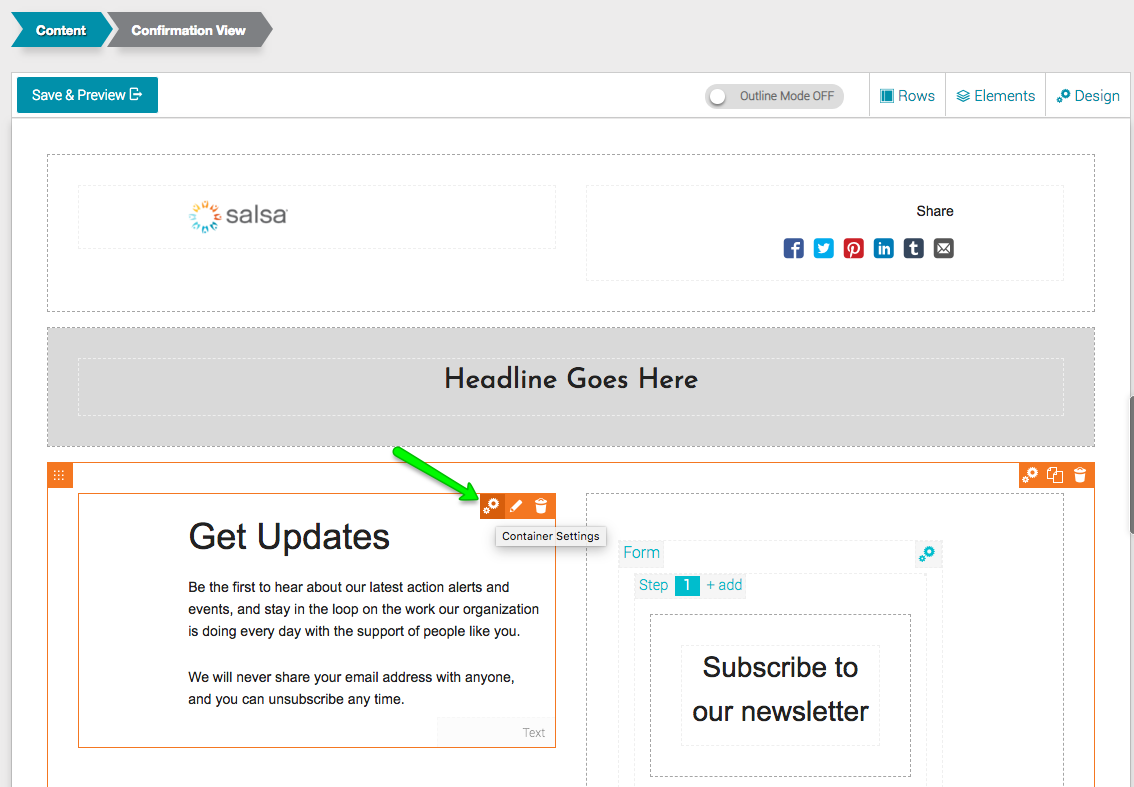
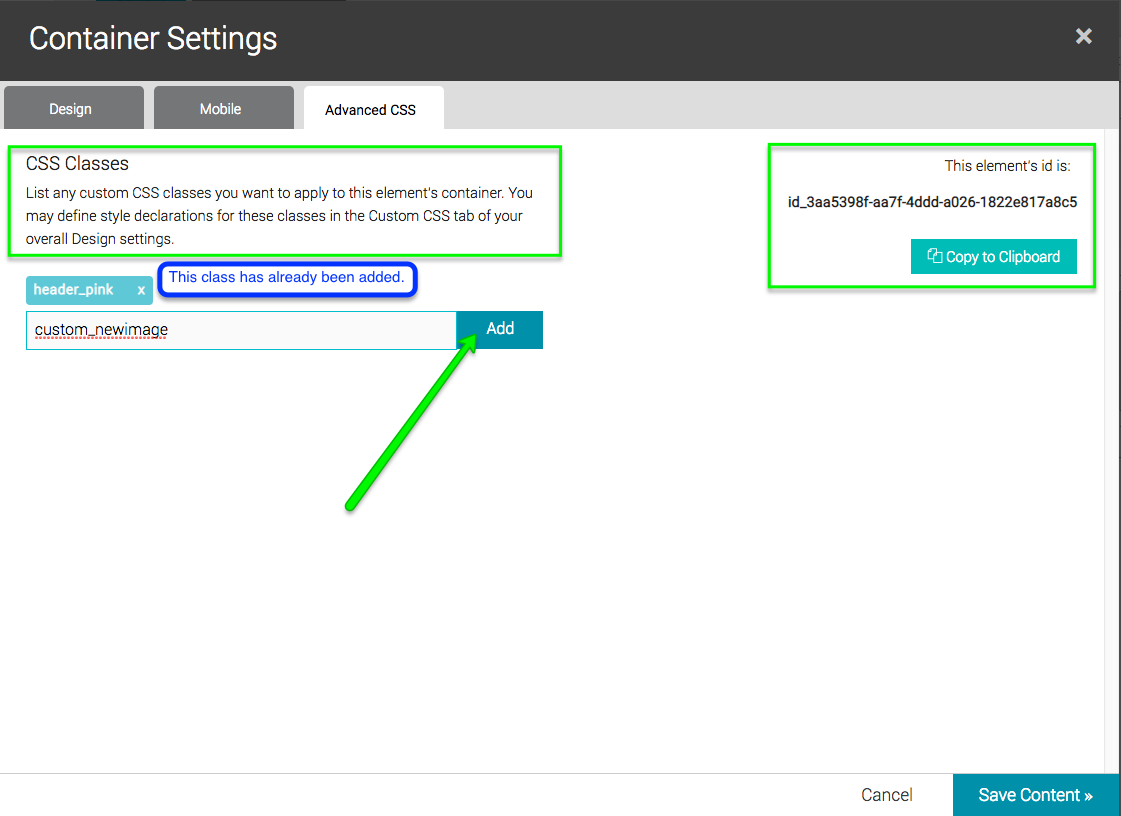
- On the Container Settings screen, click the Advanced CSS tab at the top.
NOTE: This tab is available only for form elements and not email elements.
- List any custom classes you want to apply to the element's container. You can define style declarations for these classes in the Custom CSS tab of your overall Design settings (as described above).
- The element's id is displayed to the right, to be used on the CSS screen of the main form, to define a class for only this element.
Disable Theme Styles
You can disable your Engage theme styles so your form elements inherit the CSS styles from your own website.

- Slide the Theme Styles slider to the left to disable your theme styles.
- Disabling your theme may cause you to lose any custom design settings that you have set for this form. If you save and exit, and then come back and re-enable the theme, the style settings will be reset to the default that you set up in Engage for your organization. To disable the theme styles for this form, click Ok.

- Once disabled, you can write your own custom CSS for your form. Only those with advanced CSS skills should use this feature.
You may need to use !important and id's to successfully override existing styles. Keep in mind that support for certain CSS declarations can vary widely between different browsers and devices. Because Engage element styles rely on specific class names, you may need to add some additional CSS styling to get your embedded form to look exactly as you want. - Use the Copy to Clipboard button to the left to copy base declarations for Engage classes. We recommend that you then paste the base declarations into the box to the right. You can also paste them into your own stylesheet.
NOTE: if you disable the default theme for a Peer-to-Peer or Event Activity, you'll have to style the registration flow through the Engage Custom CSS, not your own stylesheet.
