Engage Event Overview
Create, manage, and measure the success of your free or paid events using Engage's Events tool. Click here to read the Overview article.
Step 1: Getting Started
- Click Activities from the left navigation menu.
- Select the Events tab.
- Click the + Create an Event button to the right of the window.
- The Make Your Selection tab is selected by default. See Make Your Selection for detailed information. Name the form something unique to set it apart from your others.
- Select the Next button in the bottom right to take you to the Setup tab.
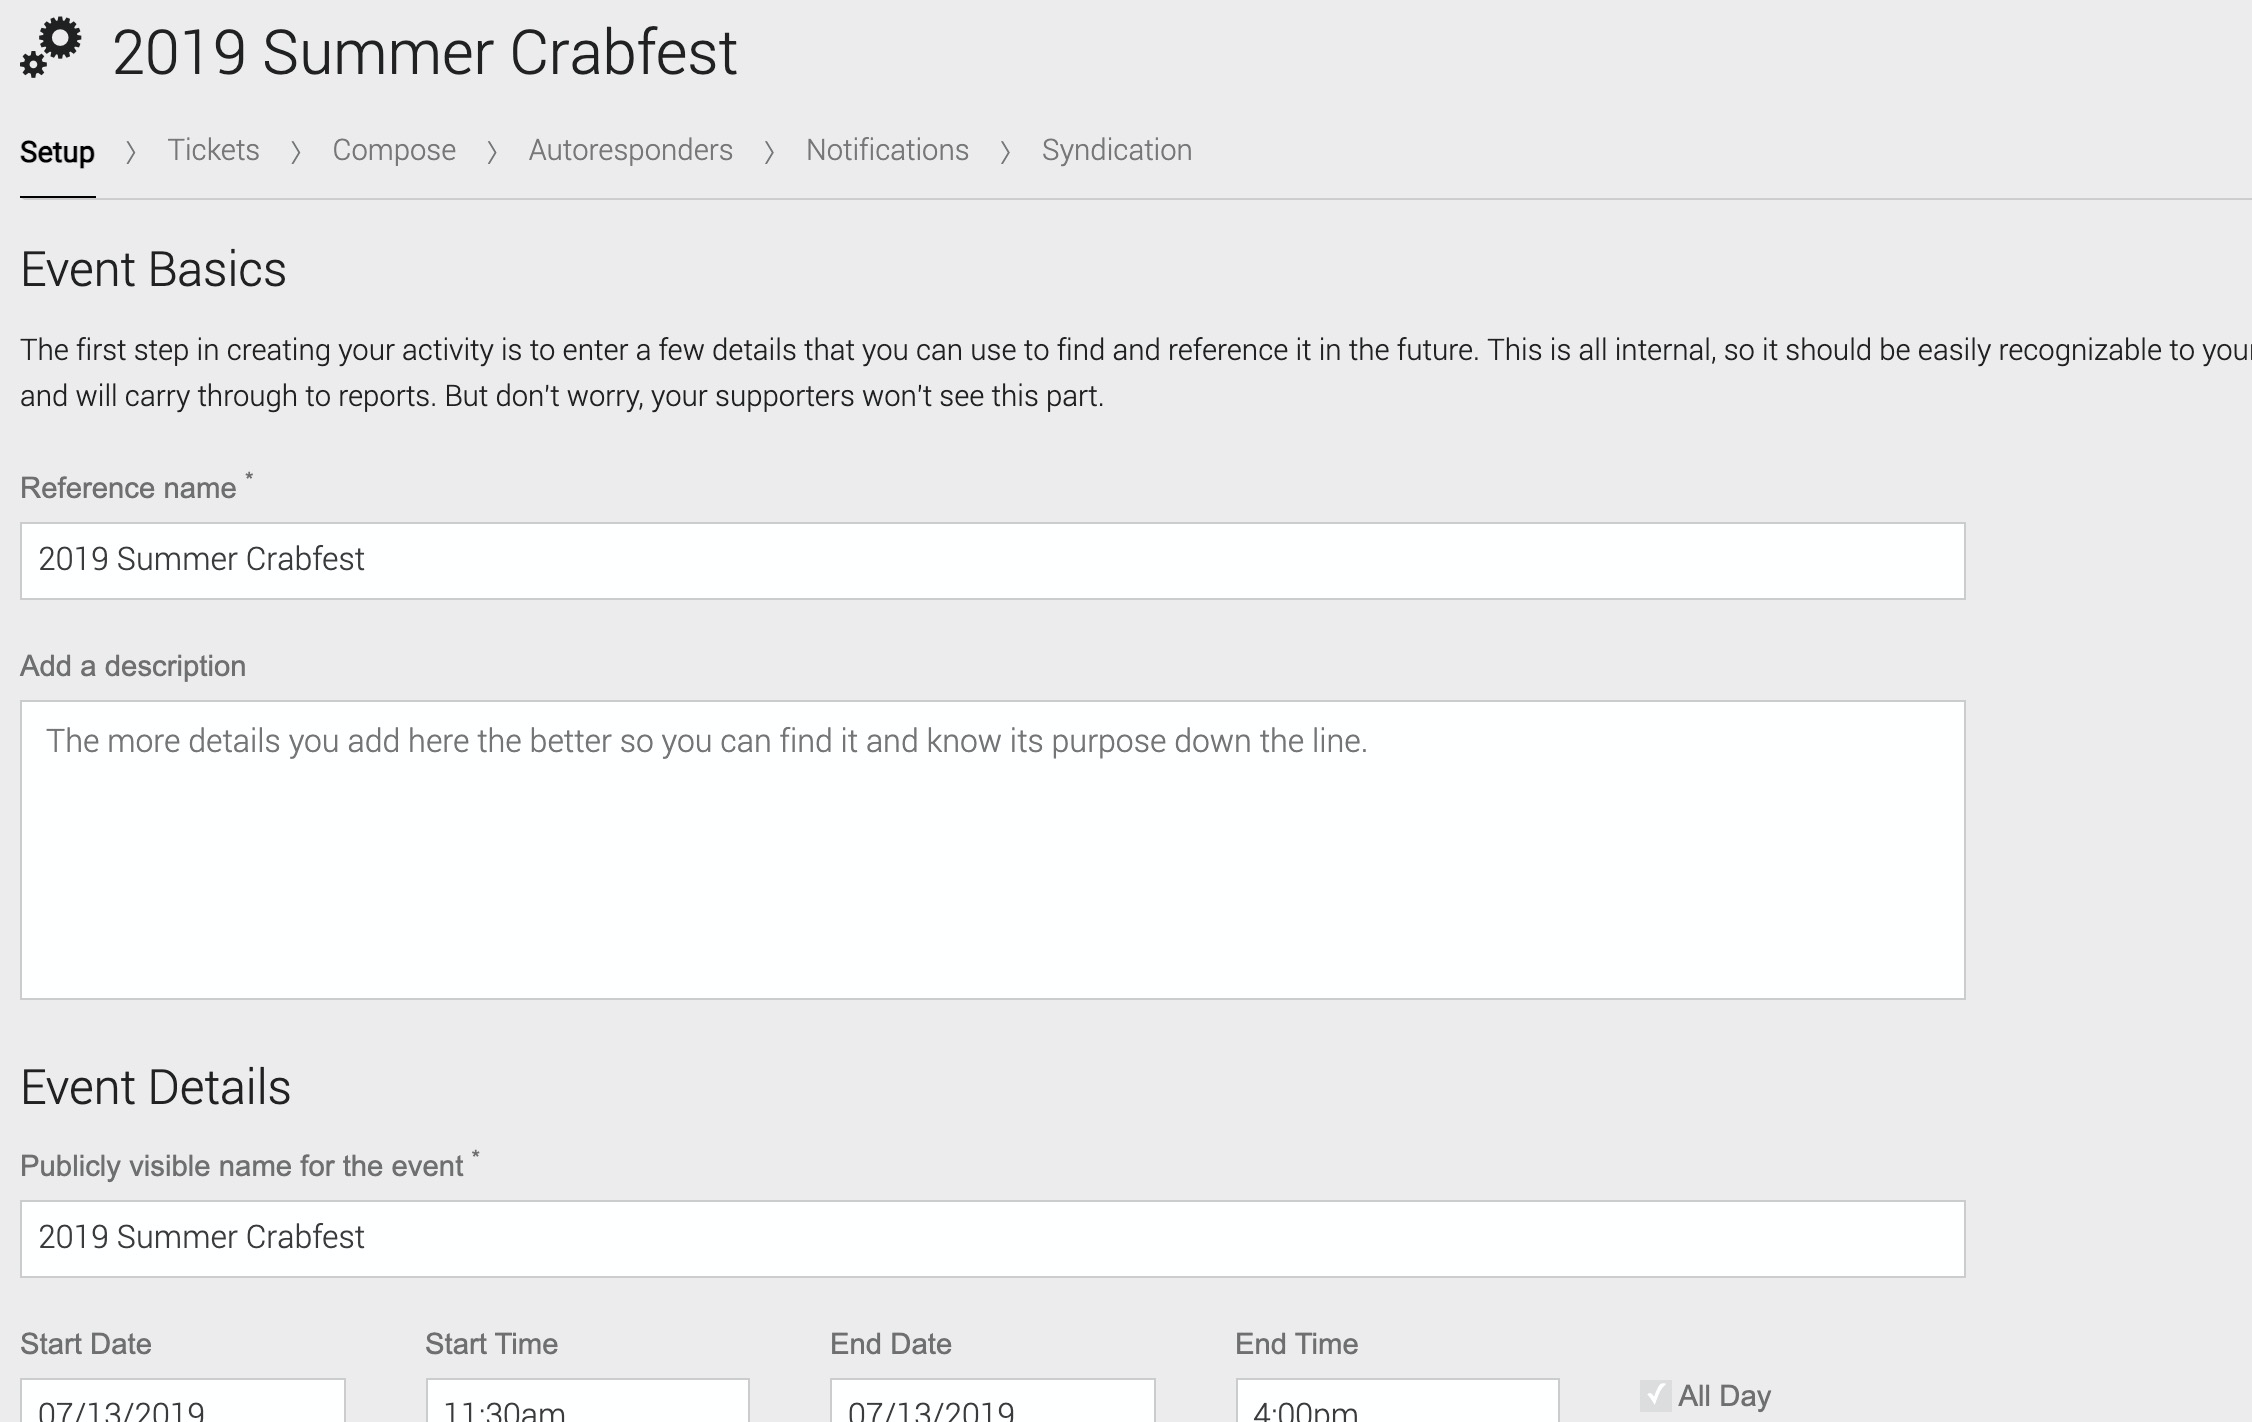
- Fill out the following fields (an asterisk * denotes required fields in the application):
-
- Reference Name—This event name is only used internally as a reference.
- Add a Description—This event description is only used internally as a reference.
- Publicly visible name for the event—This event name is the public-facing name for your Event.
- Start Date, Start Time, End Date, End Time, All Day—Logistical information about your event. You may complete this later.
- Time Zone—This is the time zone in which your event takes place.
- Name of Venue—This is the name of the place where your event takes place.
- Street Address, City, State, Zip Code—This is the address of the place where your event takes place.
Pro Tip: If you are creating a virtual event (an event that is only online), just leave the address fields blank. - Fund, Campaign, Appeal—Set the Salsa CRM Fund, Campaign, and Appeal that will be assigned to donations processed. You can add additional values through Salsa CRM. In Salsa CRM main menu, navigate to Manage > Finances. Check out the Salsa CRM documentation for detailed directions.
-
- Click the Next button in the lower right corner of the screen. the Ticket window appears.
Step 2: Create Tickets
Customize each item for which supporters will register for your event. Internally this page is named tickets, but on your published form they are referred to as items.
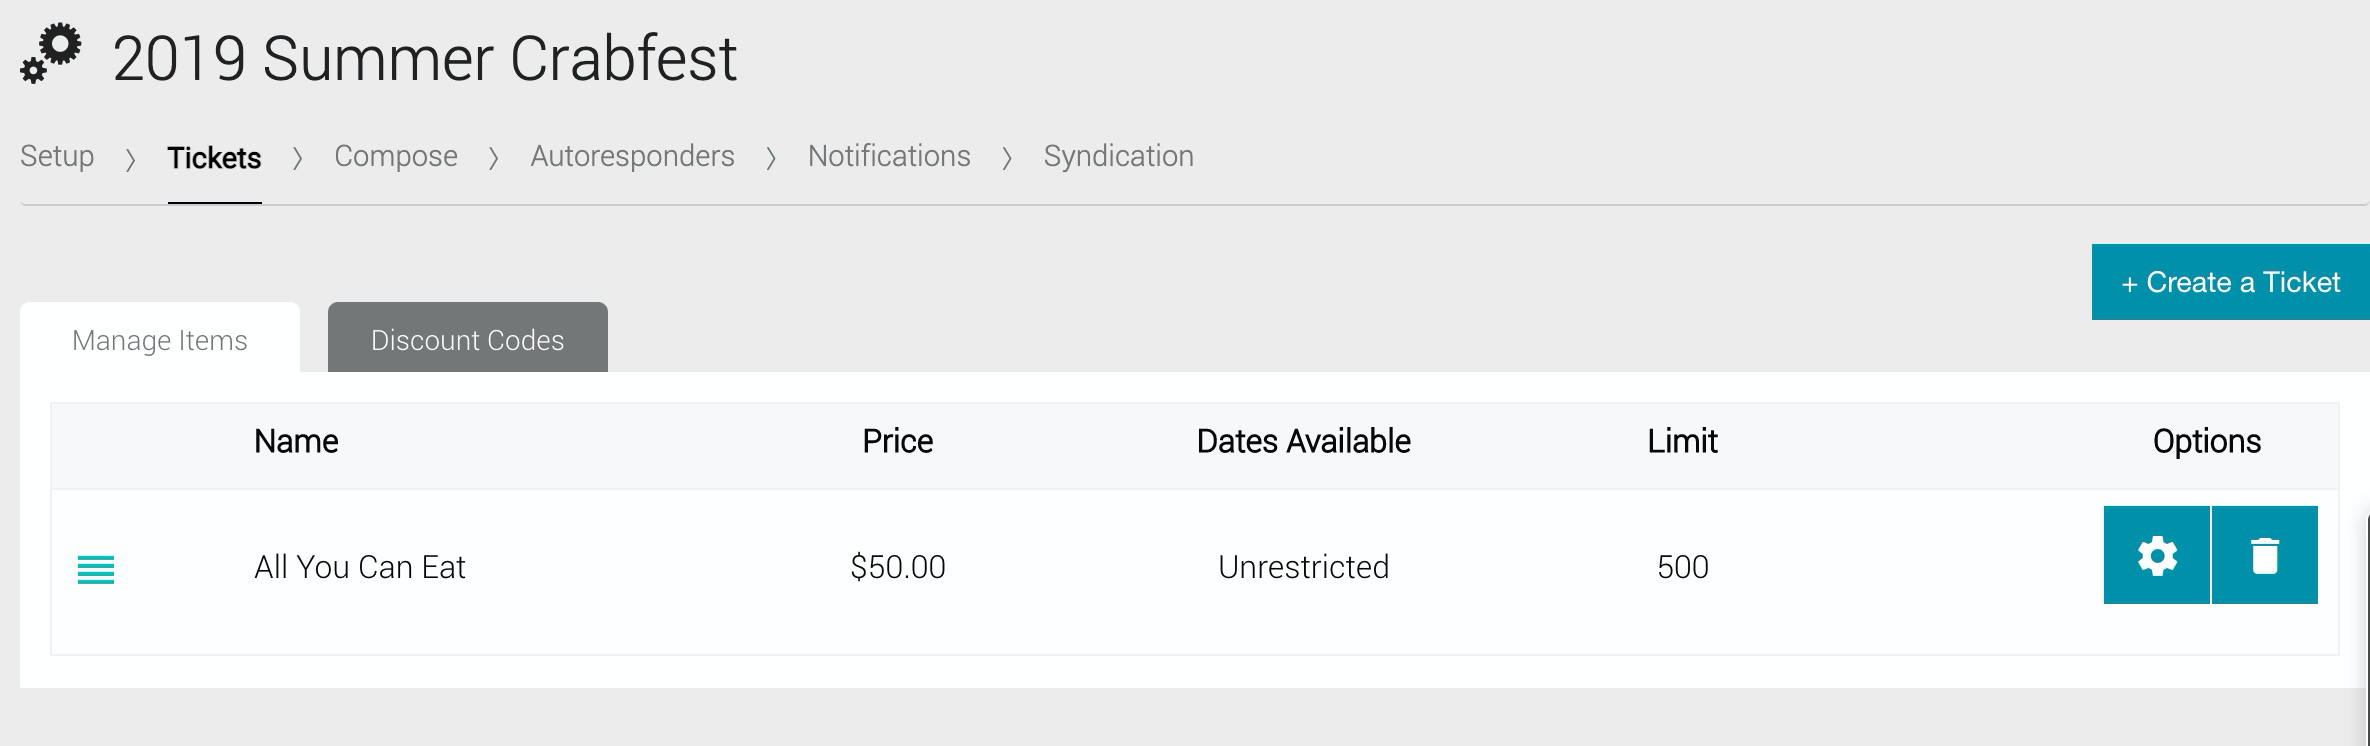
- Fill out the following fields:
- Item Name—This required field serves as the public name for this item.
- Description—This field is not required but provides details necessary for future reference.
- Attendees per Item—This required field associates how many attendees will be counted and processed with this item.
- Price—Engage supports free and paid events. If you enter no value at all for Price, registrants will see "FREE" in the cost column when they register.
- Deductible Amount—Set this to any dollar amount or leave it empty.
- Limit Availability—Set a total number of items available for this type. Each time an item is purchased (or registered if free), the number of available items will decrease by that amount automatically. Leave blank if you have no limit on the number of items available.
- Limit per Transaction—Set a total number of items available for each transaction. Registrants for quantity-restricted event types will be limited to that number upon registration. Leave this blank if there is no limit on the number of items per transaction.
- Restrict by Date—Make this item available only between specific dates. Outside of the dates you set, items will not be visible for registrants.
- Click Save to open the Information Collected tab. This tab helps you define what your supporters need to tell you about themselves when they purchase items. Activate or deactivate default questions or create customized questions.
- By default, First & Last Name and Email Address are enabled. Click on the slider to enable additional settings.
- Click the + Create a Question button to the top-right of the screen to create custom questions.
- Enter a question, a response type, and to which items you want the question to apply. Answers may come in one of the following response types: Yes/No, Select Choice, or Text Box. For example, you may want to create a waiver for your event. Add your waiver language to the custom question. Then, have them respond with a Yes/No choice or a "text box" where they type their name as a "digital signature". You may apply custom questions to a particular item type and or restrict questions to just the purchaser or the registrants themselves.
- After applying custom questions to items, click the Next: Compose button in the bottom right corner of the screen.
Step 3: Compose the Event Page
This step enables you to create your content and page layout, manage the activity's page settings, consider what type of confirmation the supporter receives, select which payment gateway to use (if you have more than one payment gateway configured) and add any third-party tracking to your form. See the Compose page for additional details.
Pro Tip: The best way to learn what options are available for elements that are already on the form is to hover over any element you are interested in, click the pencil icon, and experiment with the various options.
Elements Unique to Events
Add to Calendar - If applied to an Event or Peer to Peer Event, this will give visitors to those pages the option to click and automatically add the event to their calendars.
- Edit button...
- alignment
- size
- style
- font
- border
- corner style
- link to an action, internal page, or external page
Event Dates—Pre-populated with Start Date, Start Time, and End Time Merge Fields. Enables you to add dates to your Event Activity form.
- Edit - font, style, and justification
- Pre-populated with applicable merge fields
Location—Pre-populated with Venue Name, Event Address Line, Event Address Line 2, Event City, Event State, and Event Zip Code Merge Fields. Like the Map element, Location is set during Setup and will automatically populate on Events and Peer to Peer Events pages.
- Edit - font, style, and justification
- Supports Merge Fields - To add merge fields click the pencil icon, then click the person icon to the top right of the window. The Add merge fields window will open.
Map—This element is available only on Events and Peer to Peer Events forms, and it automatically renders based on the location that was entered during the Setup step.
What This Published Page Looks Like
The image below is just one example of how the published main event page will appear to supporters.
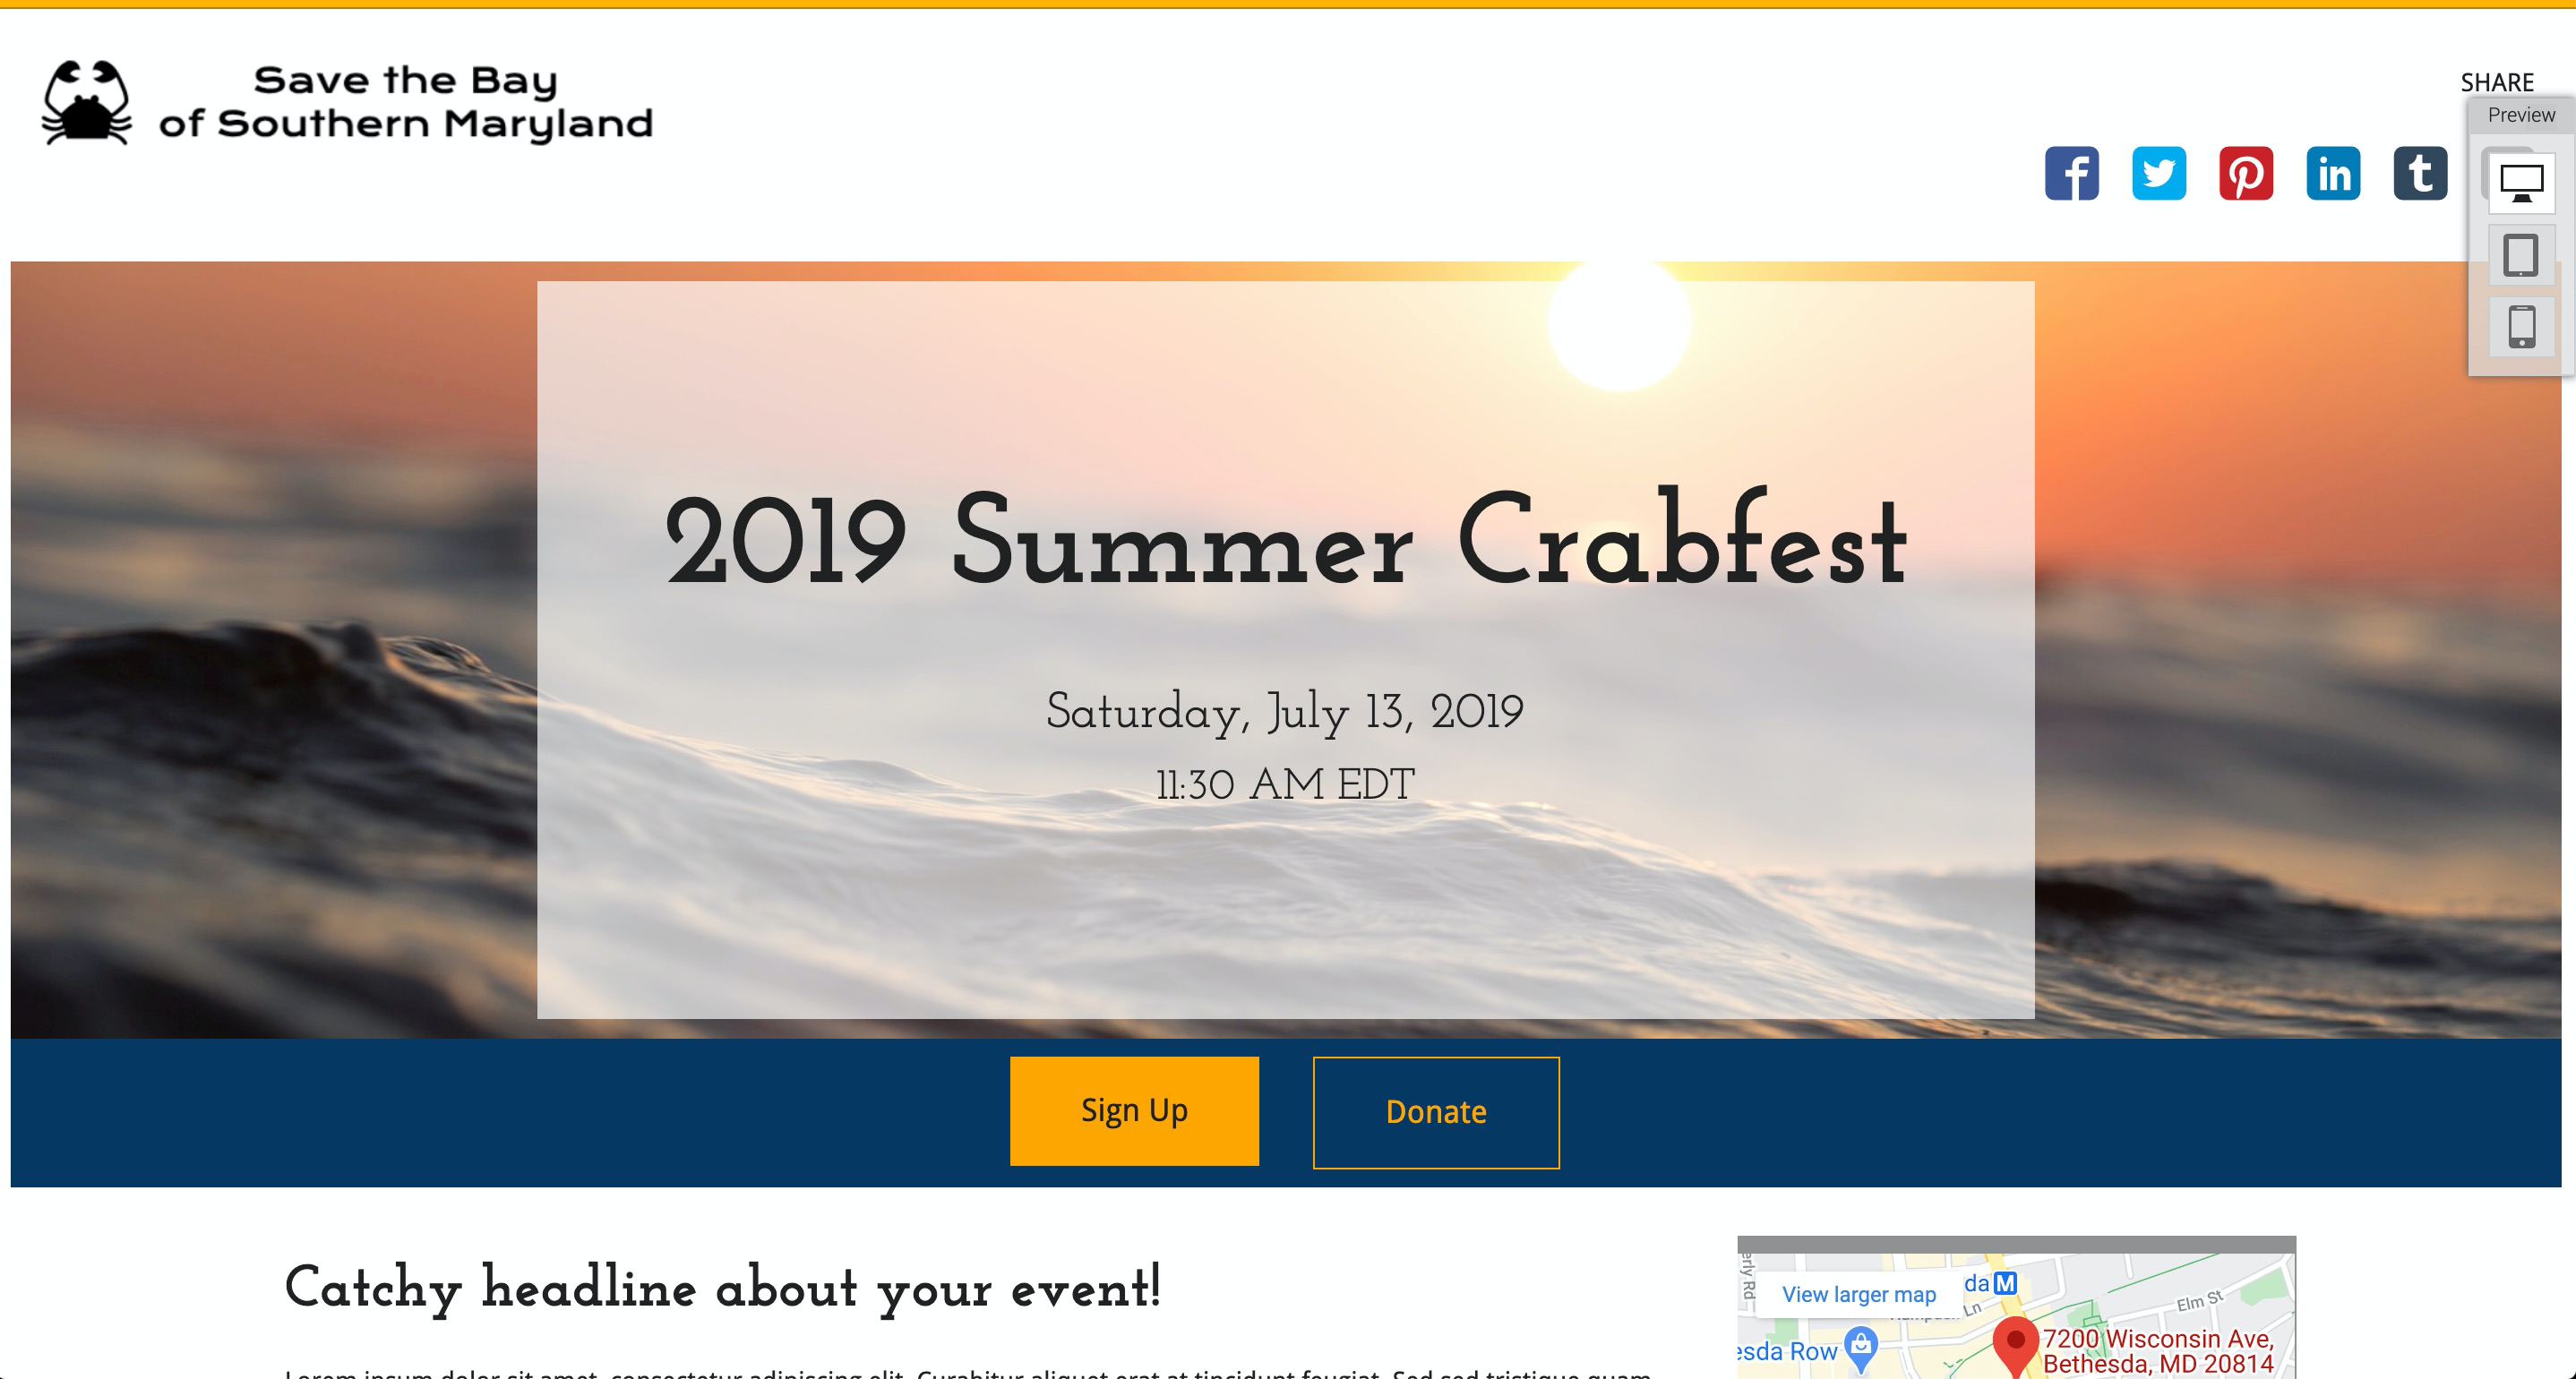
When the form looks the way you want it to, click the Registration link at the top of the page.
Step 4: Compose the Registration Page
Now that you have completed the Event form's main landing page, you're ready to move to the Registration tab. Click the Registration tab at the top of the page. The Registration form window will appear.

You can add content to the Registration Form, but it's important not to provide too much distraction for potential registrants. Preview the look and feel. Then, Save and click over to the Checkout tab.
Edit Registration Workflow
Provide some guidance to your supporters through their event workflow as they sign themselves or others up for your events. Add content above the area where they select their registrations or above the summary content at checkout.

To edit workflow text for Events...
- Click the Activities menu on the left.
- Click on the event you wish to edit.
- Click the Compose tab at the top of the screen.
- In the Activity Content section, click the Edit Content button.
- Click the Registration page at the top of the screen.
- Double-click the Registration element or select the orange pencil icon.

"Heading" Text
This text appears above the Registration selection table. Provide supporters with some general guidance here. Add Individual purchase details or item specifics to the "Heading" Text field.
"Summary" Text
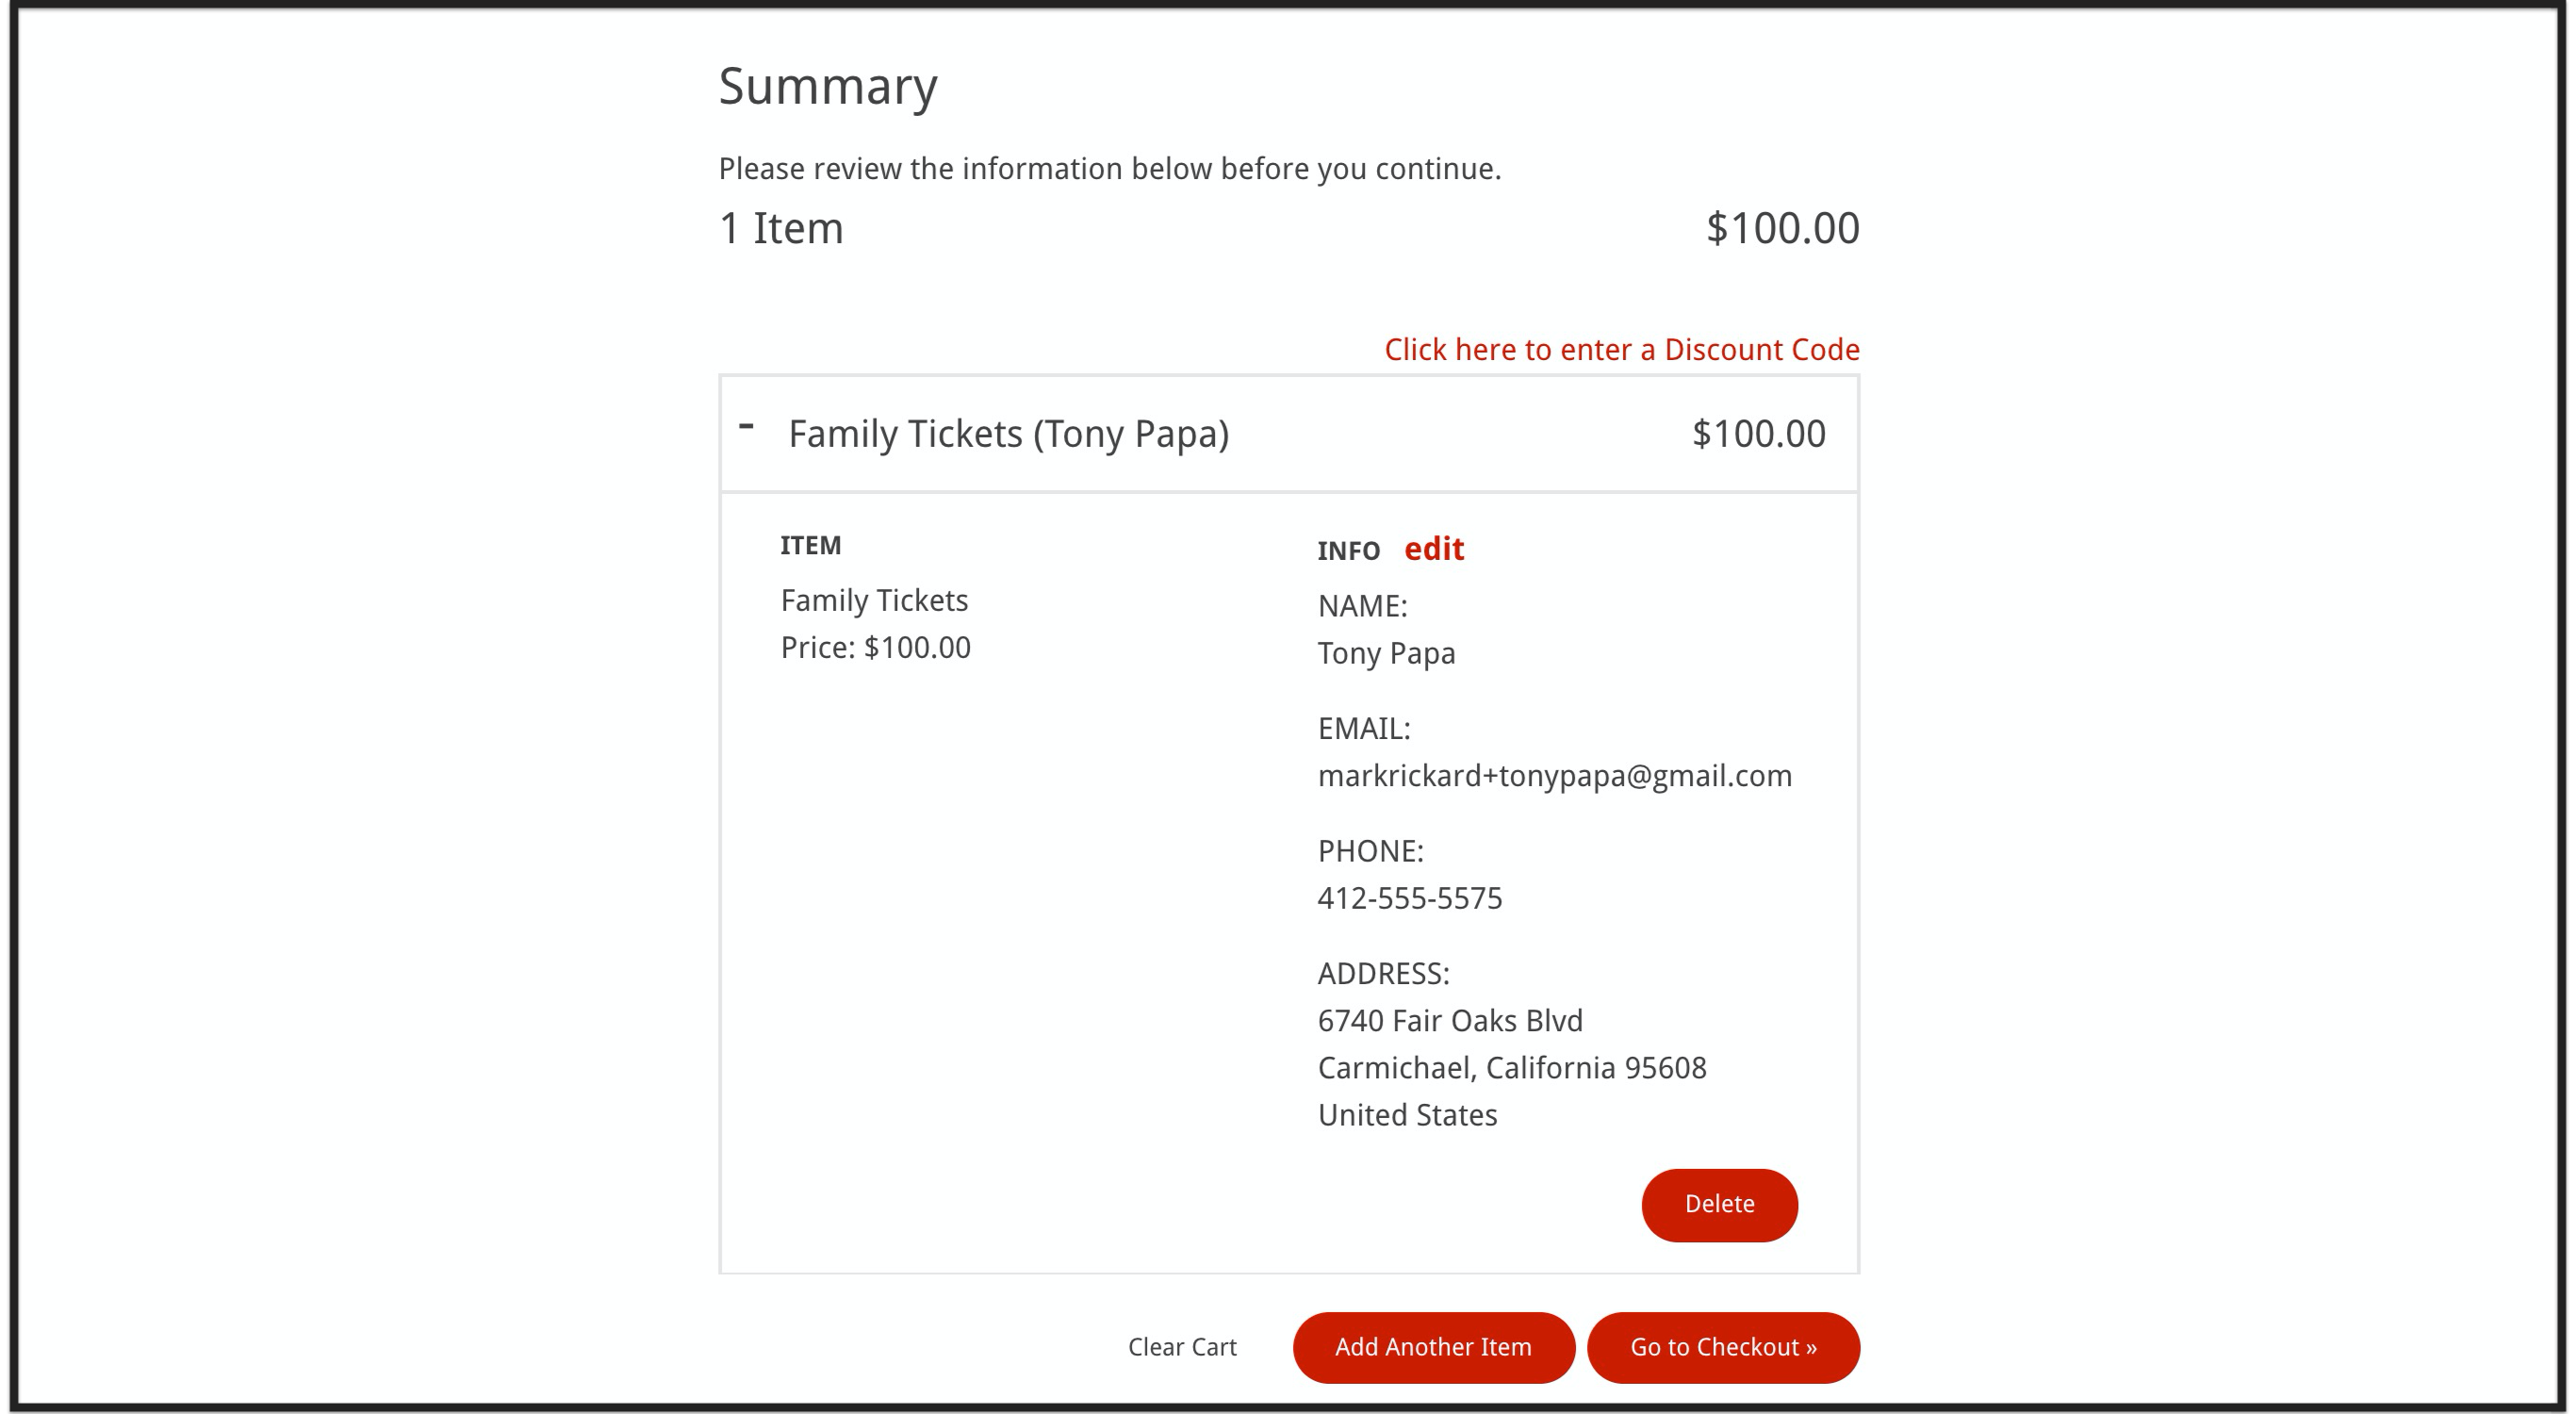
This step shows a summary of all of the registration fields that a supporter has completed so far. From this step, they can edit or delete items, enter a discount code, if available, and then add another registration or move on to the checkout step.
What This Published Page Looks Like
The image below is just one example of how the published registration page will appear to supporters.

When the form looks the way you want it to, click the Checkout link at the top of the page.
Step 5: Compose the Checkout Page
Registrants see a summary of their purchase on this page, enter their credit card information and potentially, make additional donations. This page should be as easy as possible to maximize conversions.
Add or Replace Missing Donation Buttons
If there are no fields or buttons to allow supporters to make an additional donation, you can add them to your form, though most Salsa-sourced templates and syndicated content already have these fields on the Checkout page. Add the following elements to your form...
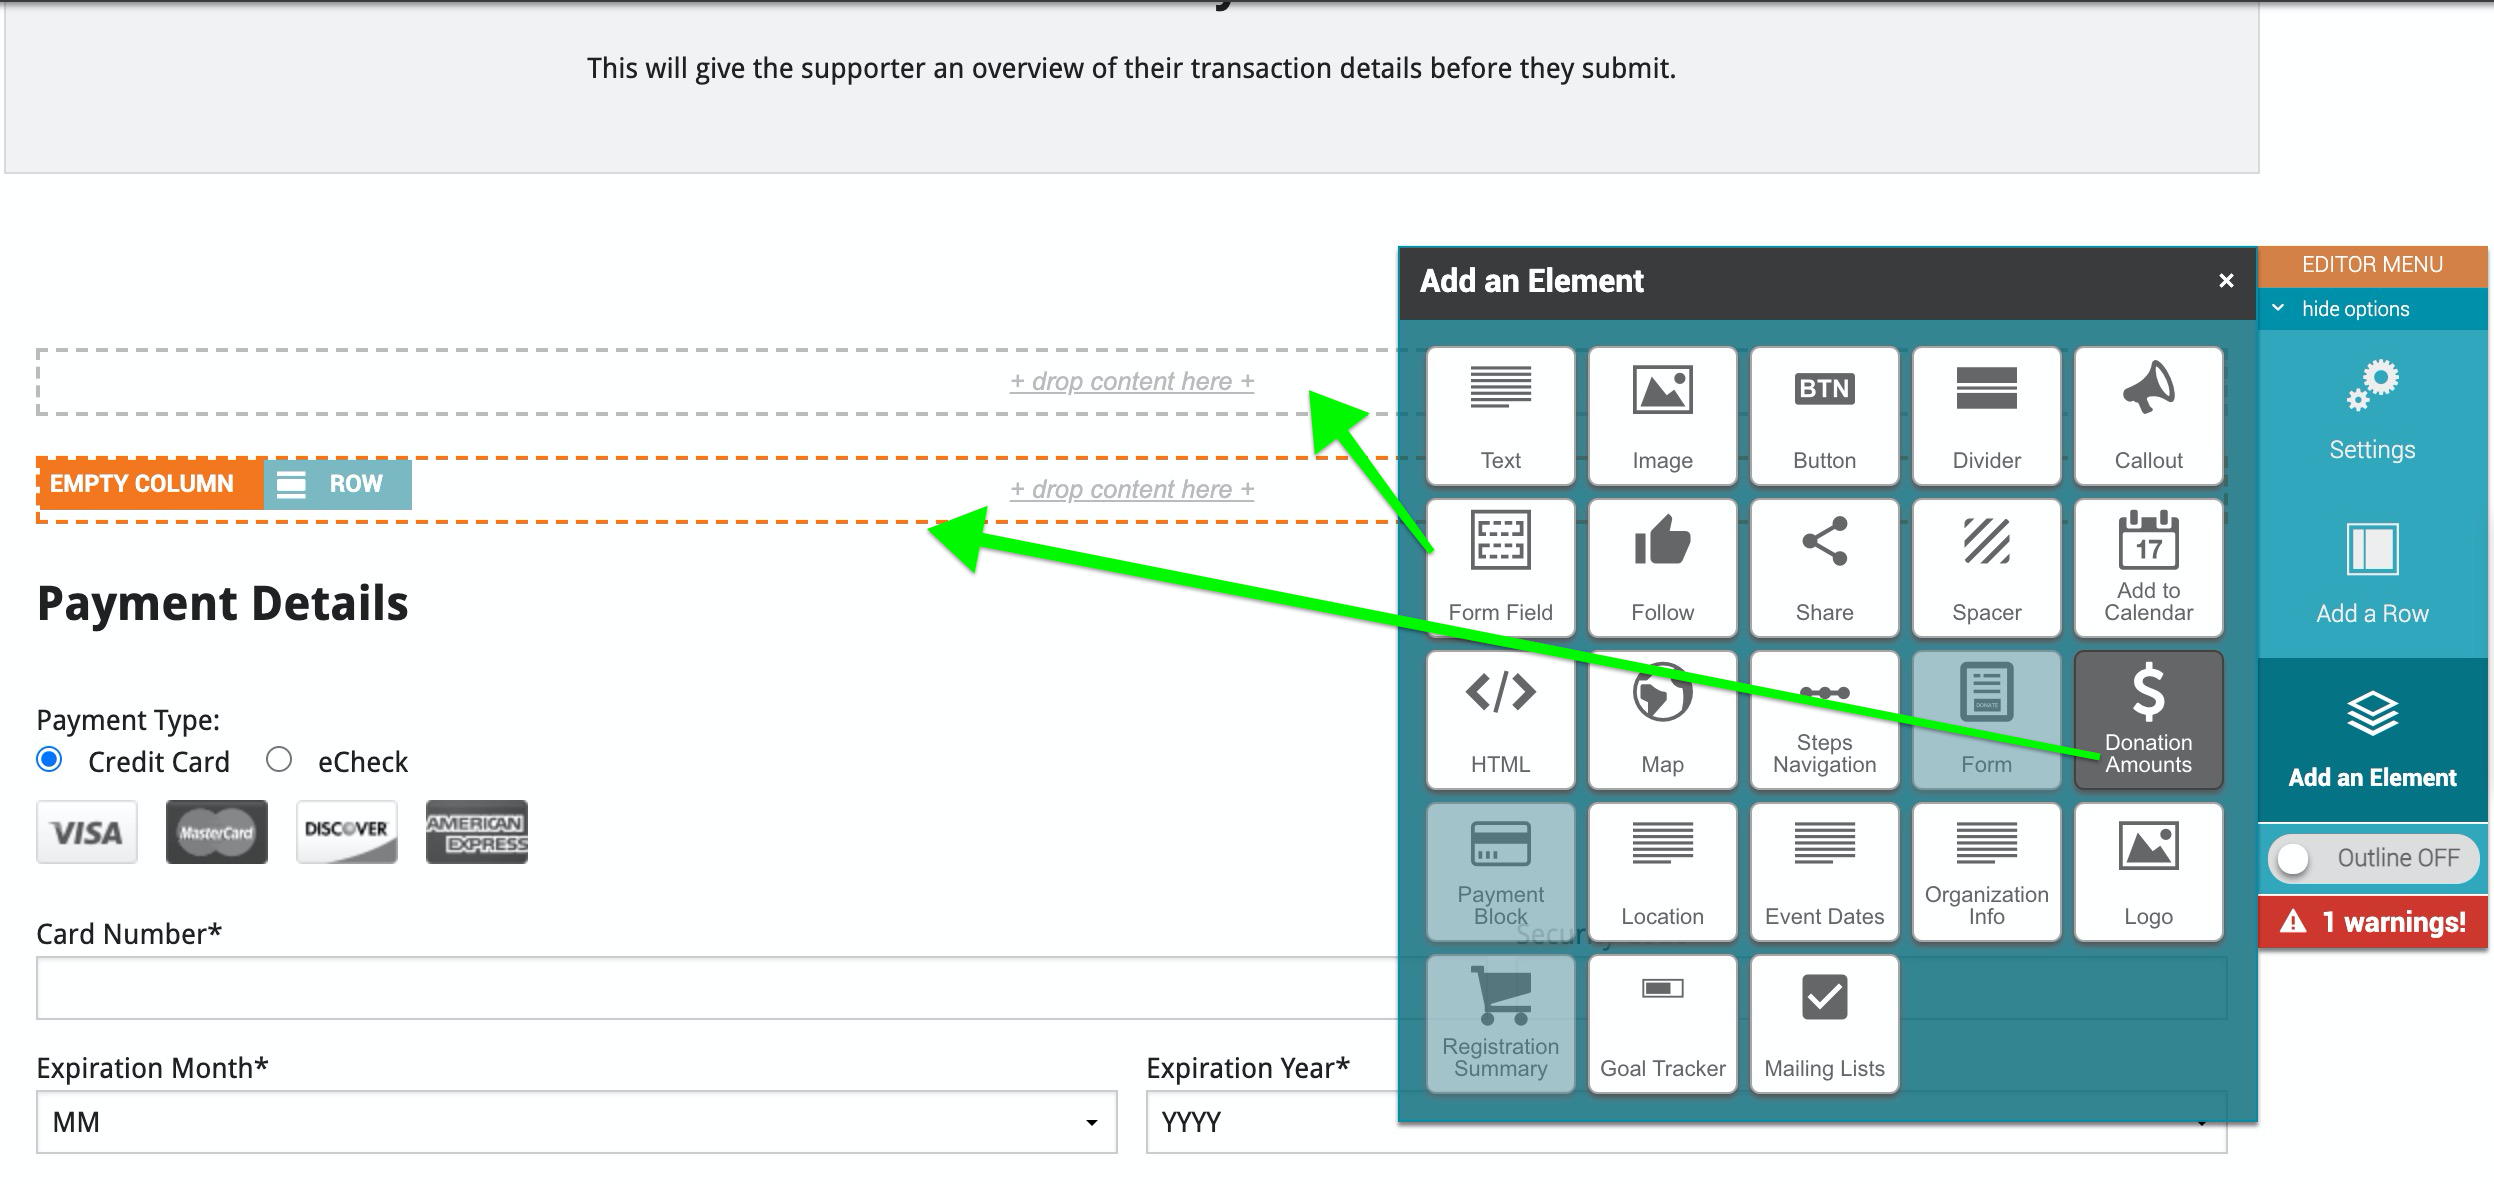
- Click the Add an Element button on your Editor menu.
- Drag the element over to the empty row or column on your form where it is needed:
-
- Form Field—I would like to make a donation
- Form Field—Increase donation amount to cover processing fees?
- Donation Amounts
-
What This Published Page Looks Like
The image below is just one example of how the published Checkout page will appear to supporters.
When the form looks the way you want it to, click the Confirmation View link at the top of the page.
Step 6: Compose the Confirmation Page
This is the page that your supporters will see when they have completed the process. You may choose to direct supporters to a page on your website or you may choose to direct supporters to an internal confirmation page that thanks them for their registration or purchase.
When the form looks the way you want it to...
- Click Exit to exit the edit mode.
- Click Save and Exit to save your changes, or Cancel and Exit to exit without saving your most recent changes.
- Click the Next» button in the lower right.
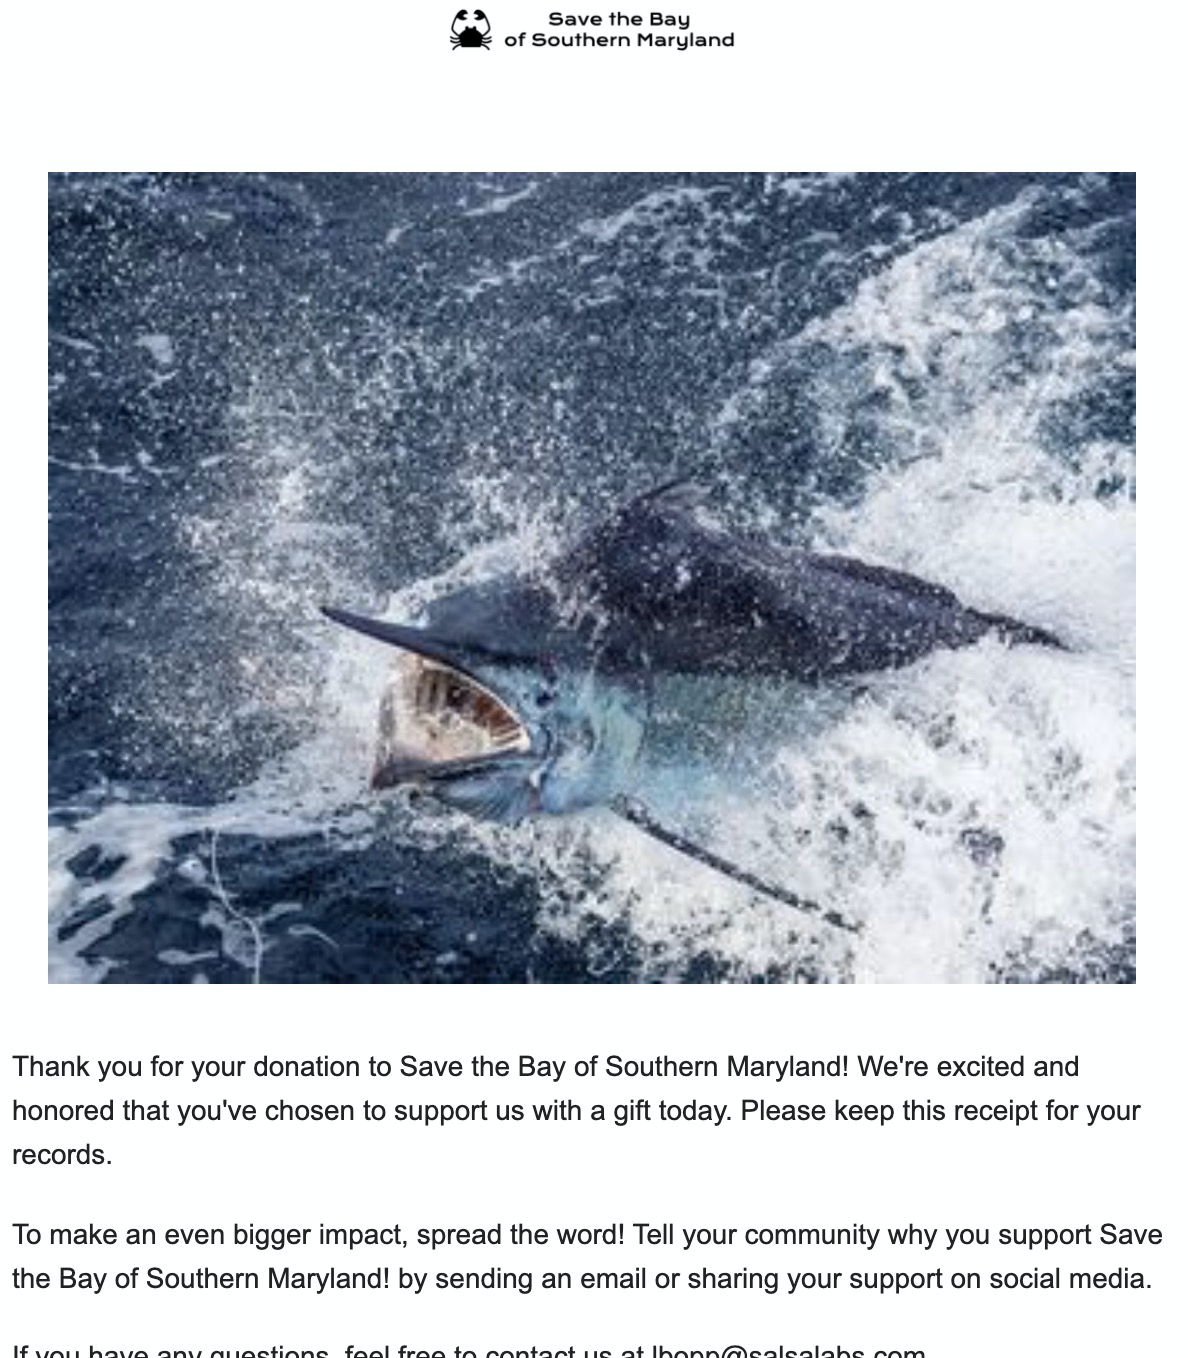
What This Published Page Looks Like
The image below is just one example of how the published confirmation page will appear to supporters.

Step 7: Customize Autoresponders
You can choose whether or not to include an Autoresponder in this form by selecting the appropriate radio button under the Autoresponders tab. Learn more about Autoresponders and how to configure them here.
On this same screen, click whether to include the tax-deductible amount of the supporter's payment in the payment summary of your autoresponder.
What This Email Looks Like
The image below is just one example of how the default autoresponder email will appear to supporters.
Step 8: Publish Your Event
Once you have everything set up the way you want it, publish your event at the bottom-right corner of the window.
NOTE: If you change your mind, you can "unpublish" (make private) your Event by using the gear icon to the left of the controls at the bottom of the window. If you choose to republish the event the Publish This Event» button is renamed Republish This Event».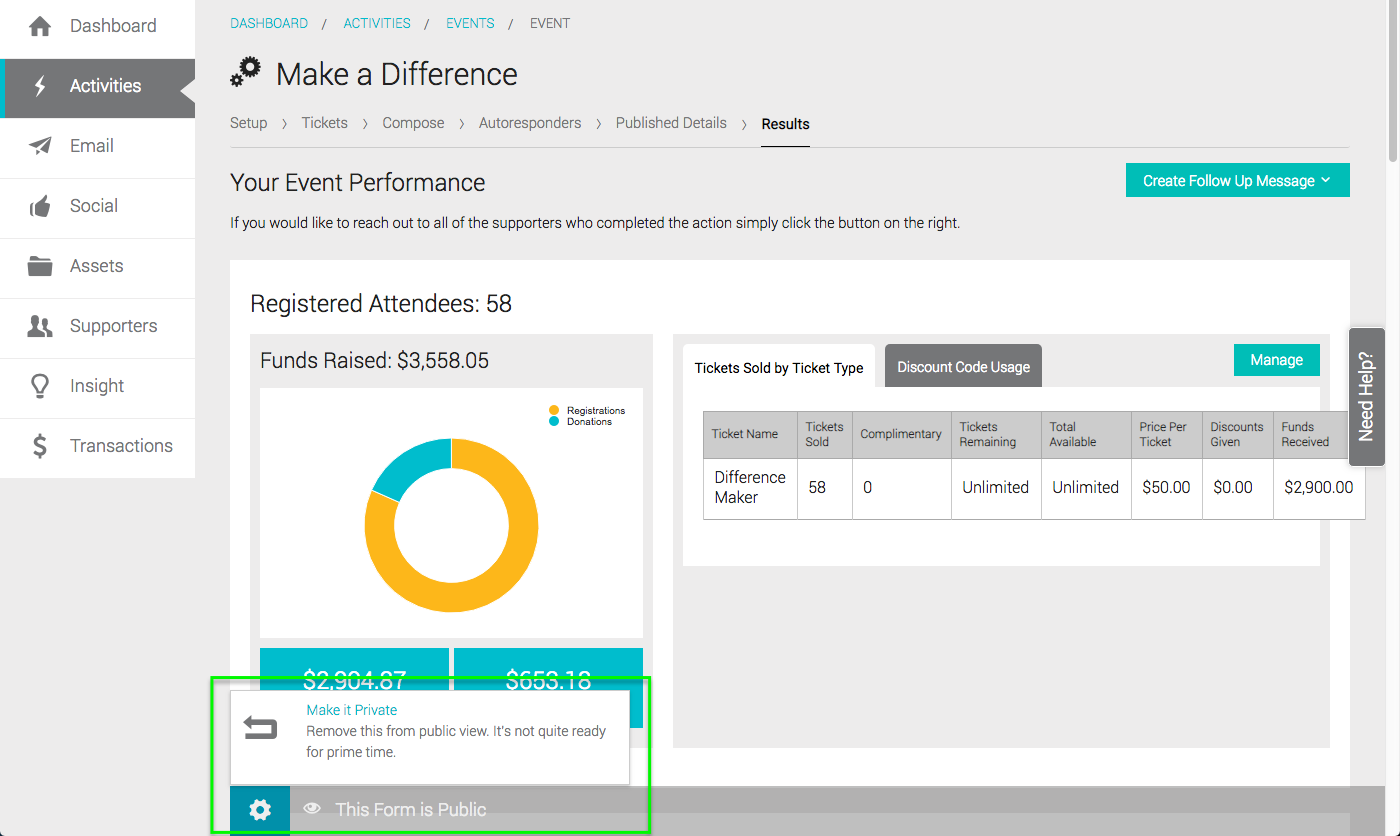
Published Details & Promotion
Now that your Event Form is complete, you'll want to get the word out to as many people as possible.
First, you'll see that your Event is available as standalone URLs, buttons for pages on your website or widgets to be pasted into a page on your site directly.
Click the Promote This via Email button to the right of the window, and Engage will automatically open the Email tool (in the Messaging part of Engage). "Sent to" will default to your entire supporter list. You can choose to restrict the email to certain segments or leave it as-is and send the email out to everyone. See the Email help page for additional help on sending emails.
Analyze Results
On the Results tab, you will find new reports once you have published an event form and collected at least one registration on the form. The first report you will see at the top is the total registered attendees on this particular form.
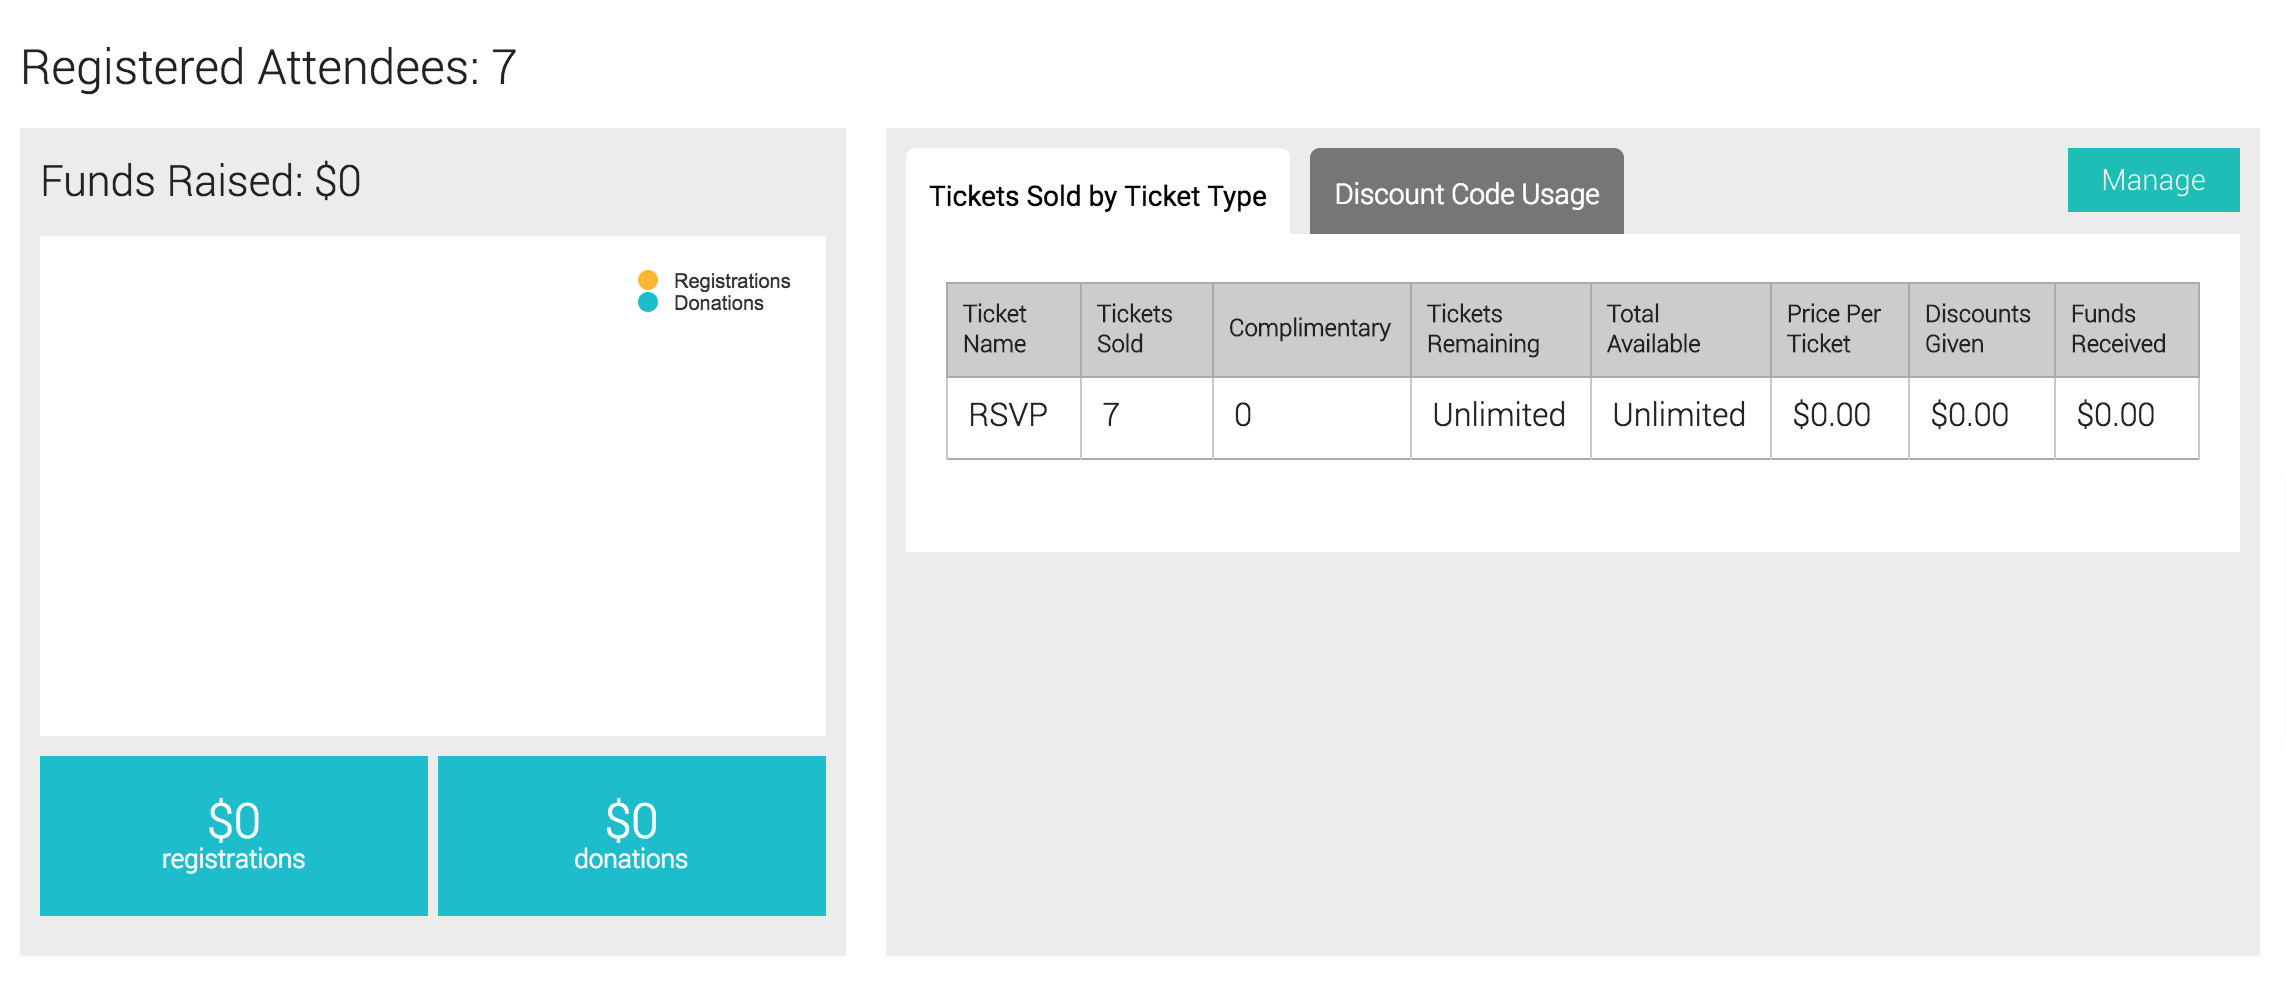

To the right, you'll see an option to change the timeframe (30 days, 90 days, 1 year, or lifetime) of when the data for the graphs in the lower section is pulled.
If you have a specific date range you want to filter by, click the date drop-down and select the range of days and click Apply.
See Performance Statistics for Actions and Messages for detailed information.
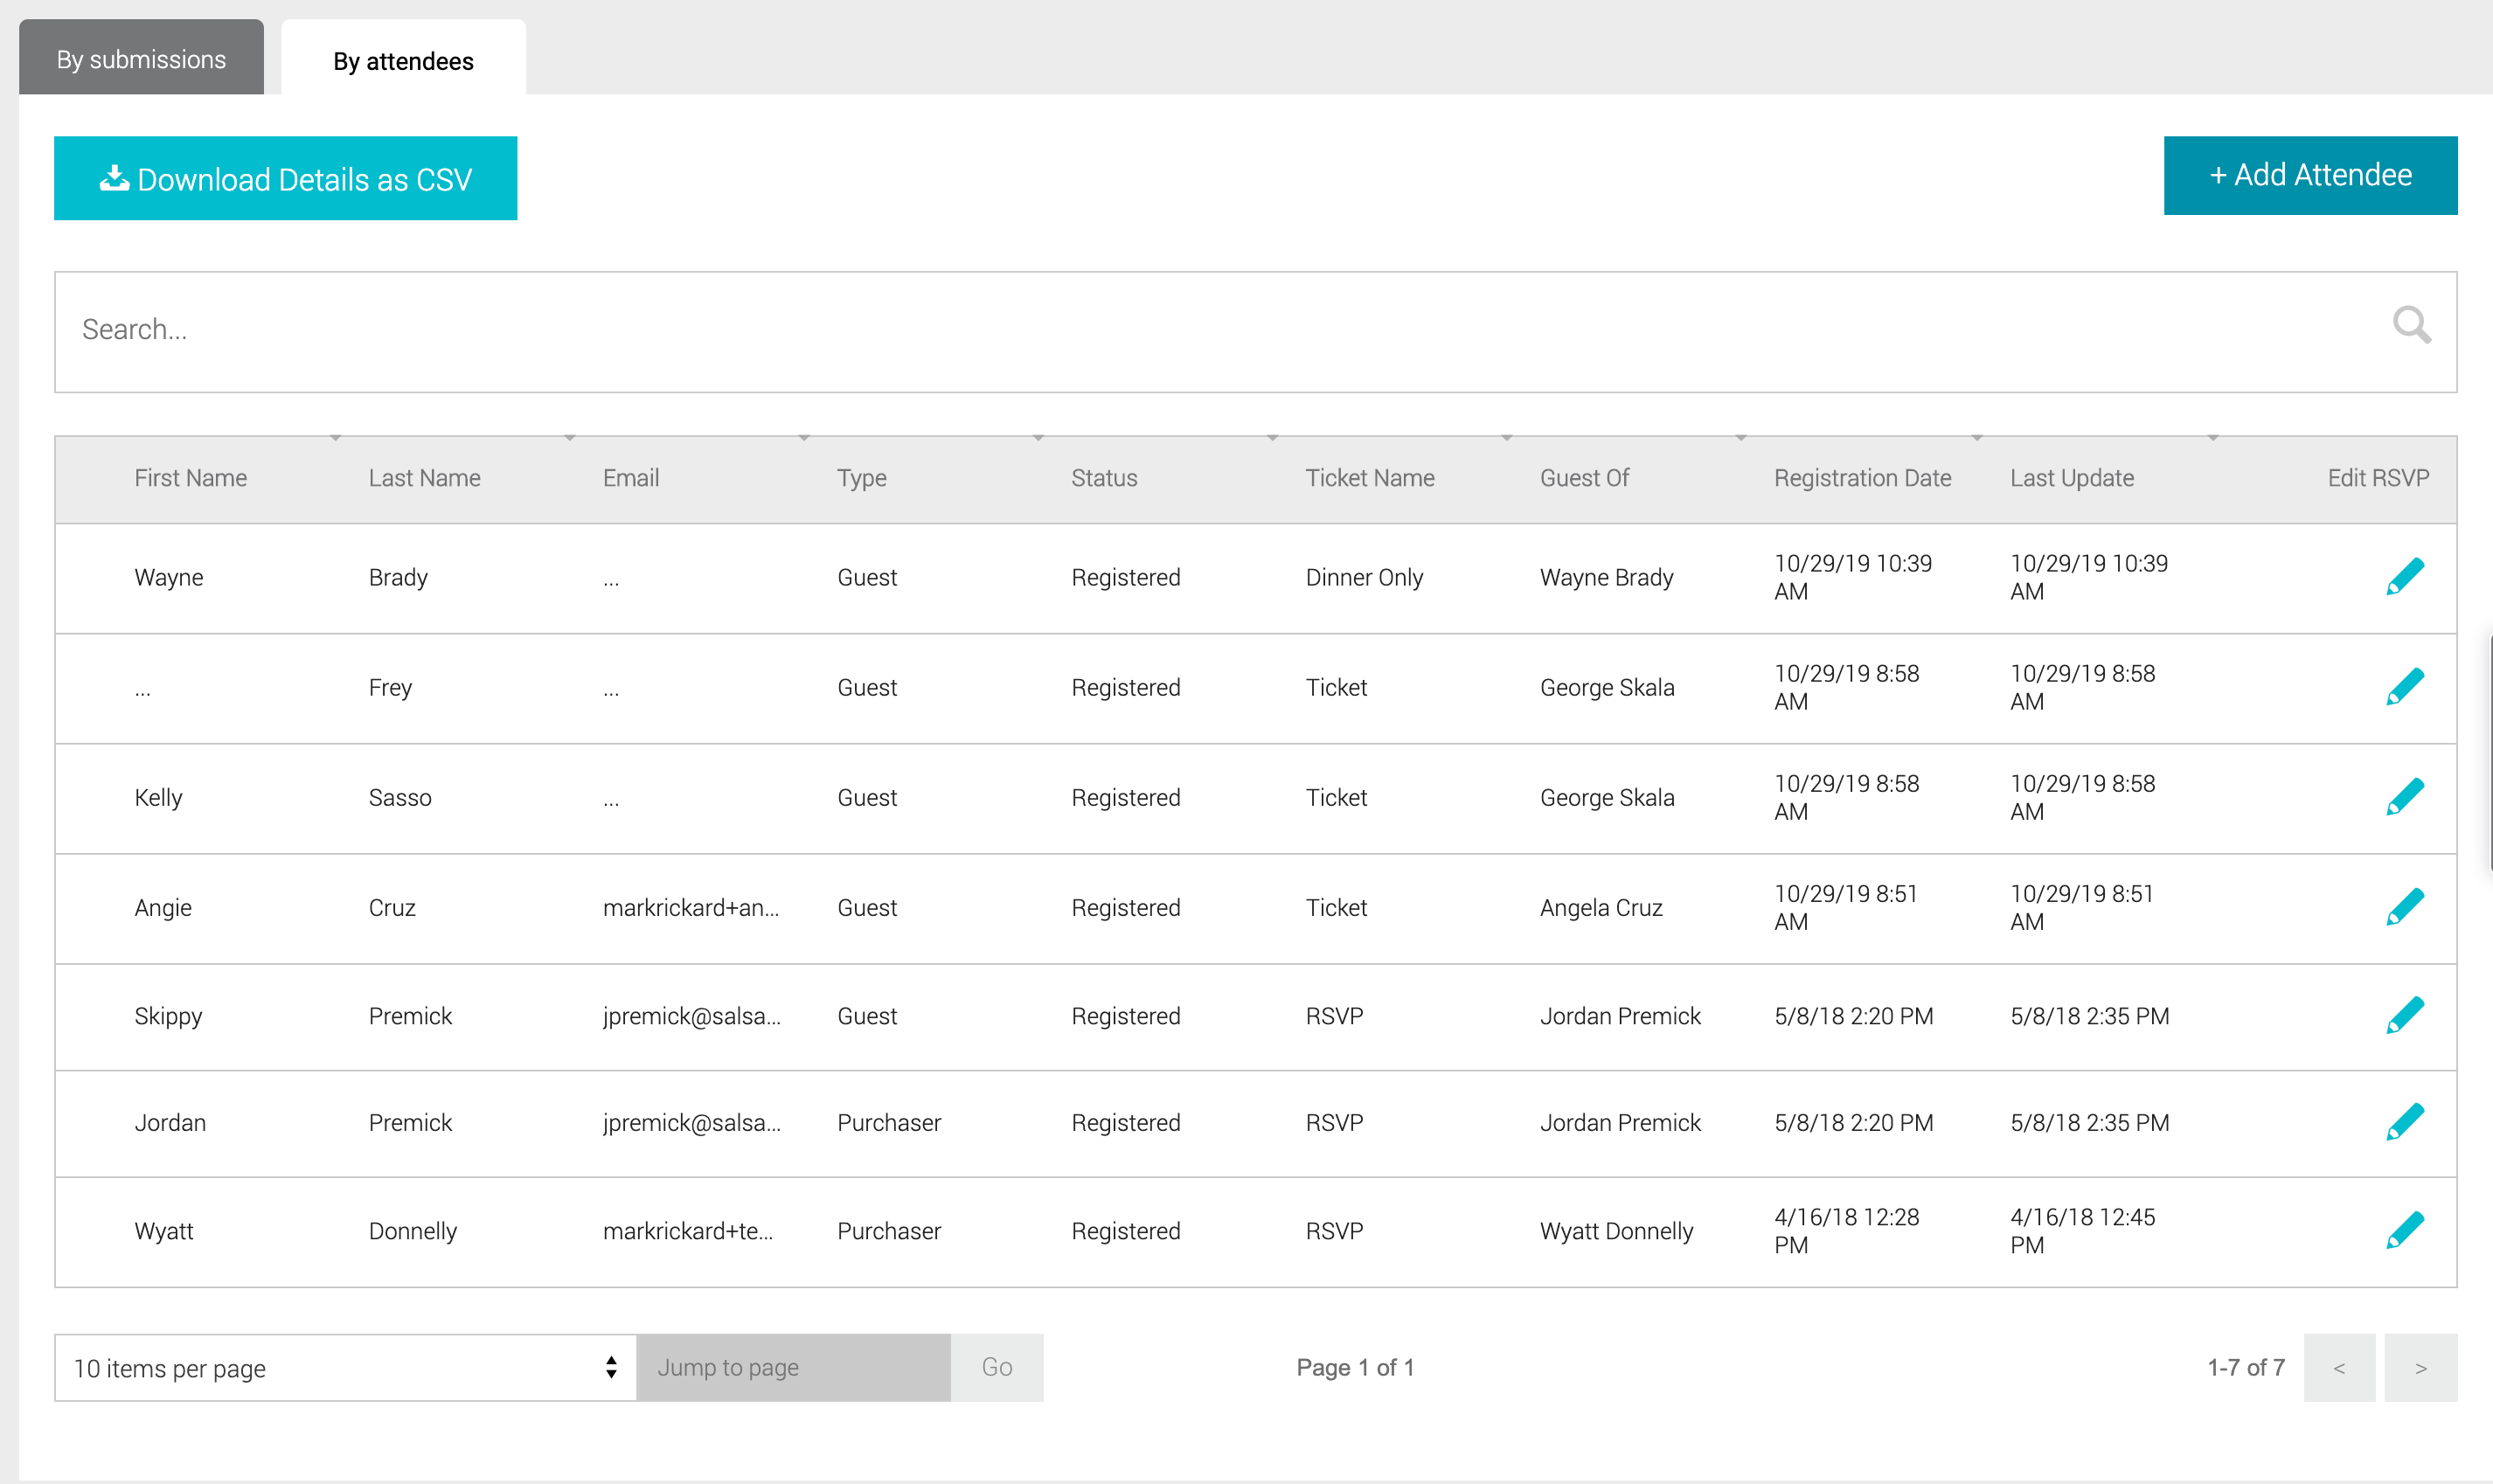
Registrants, Submissions, and Attendees
At the bottom of the Results tab, you can find two tabs. One tab shows the number of unique registrations or submissions. The second tab shows the number of unique attendees for this event. If you Download each list as a CSV file type, you will gather more data about these submissions or attendees than displays in the table.