
Add an Asset
Before you add an asset to Salsa Engage, you must have the asset on your computer.
The first time you log in, since you may not yet have assets in your library, you may only see a large field that says Click here (yes, here!) to upload a file from your computer.
To add an asset...
- Click the + Add Asset button.
- Click Click here to upload a file from your computer. Your computer's file browsing window will open.
- Find the asset that you want to load into Salsa Engage, and then click Open. The image will be added to Salsa Engage. You'll be able to find all of your assets in three ways:
- Choose the Thumbnail View
 to see as many asset thumbnails as possible on a single screen.
 - Choose the List View
 to see assets thumbnails, file name, source, and upload date.
 - In the search bar in the upper-right corner of the window, type in any part of the file name that you want to find, and then press Enter.
NOTE: All asset images must be less than 10MB in size. An informative error message displays when assets larger than 10MB are uploaded.
Delete an Asset
- Hover your mouse over the image. The trashcan icon appears in the top-right corner of the image.
- Click the trashcan icon. The image will be deleted from Salsa Engage.
Delete Multiple Images
- Hover your mouse over the image that you want to select. A select checkbox appears in the top left corner of the image.
- Click the select checkbox. Repeat for any additional images that you want to delete.
- Click the trashcan icon next to the Select all button above the thumbnails.
Edit an Asset
To edit an asset...
- Hover over the image you want to edit. The Edit This button will appear.
- Click the Edit This button. The Edit Asset Details dialog box will open. It features controls to edit, delete, rename, and describe the image.
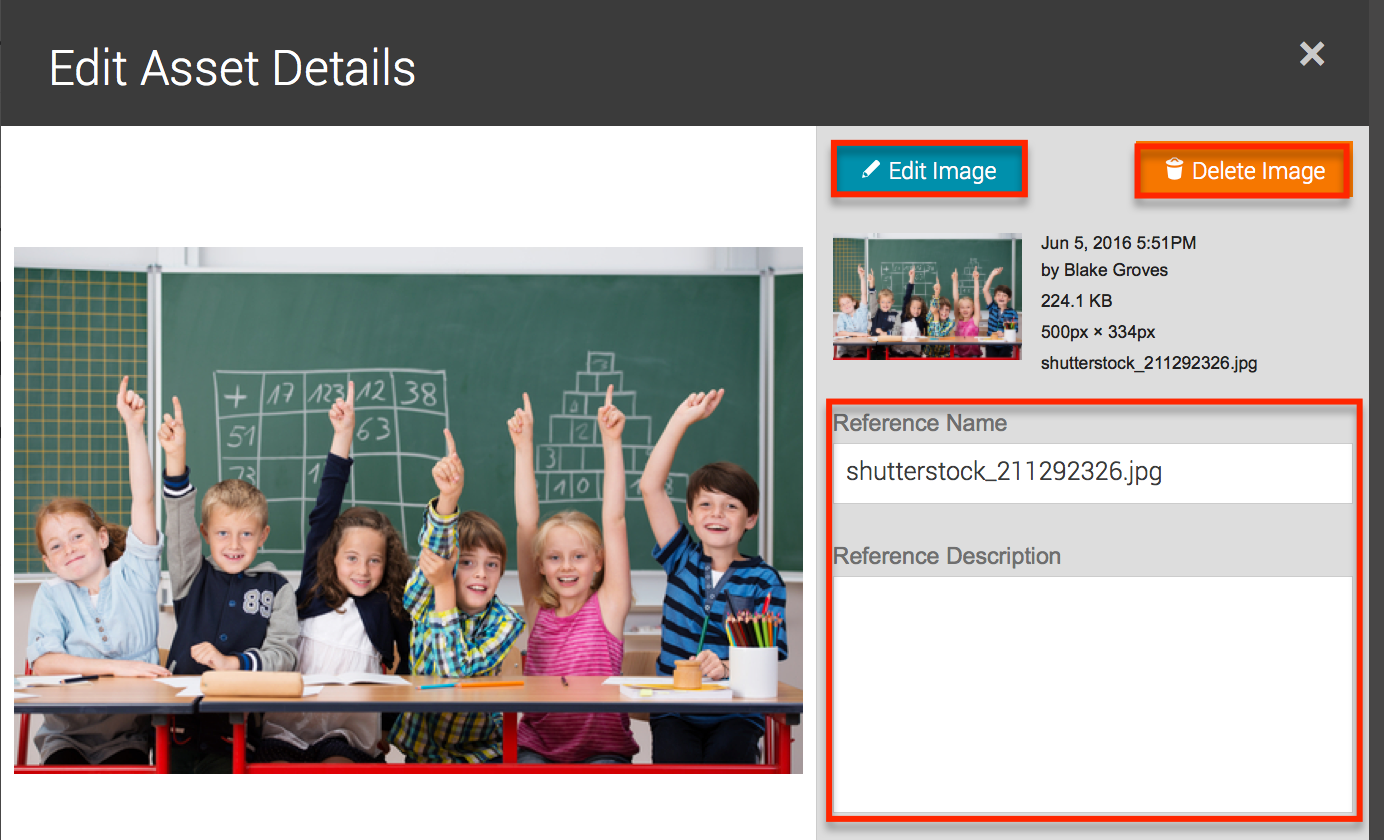
- If you update the Reference Name or Reference Description, click the Update » button, at the bottom-right corner of the window, to save your changes.
Edit Image
- Click the Edit Image button in the Edit Assets Details dialog box. Basic photo editing tools will open.
- Make all of the changes that you want, and then click Save. A copy of your file, with edits, will be saved on the Images tab.

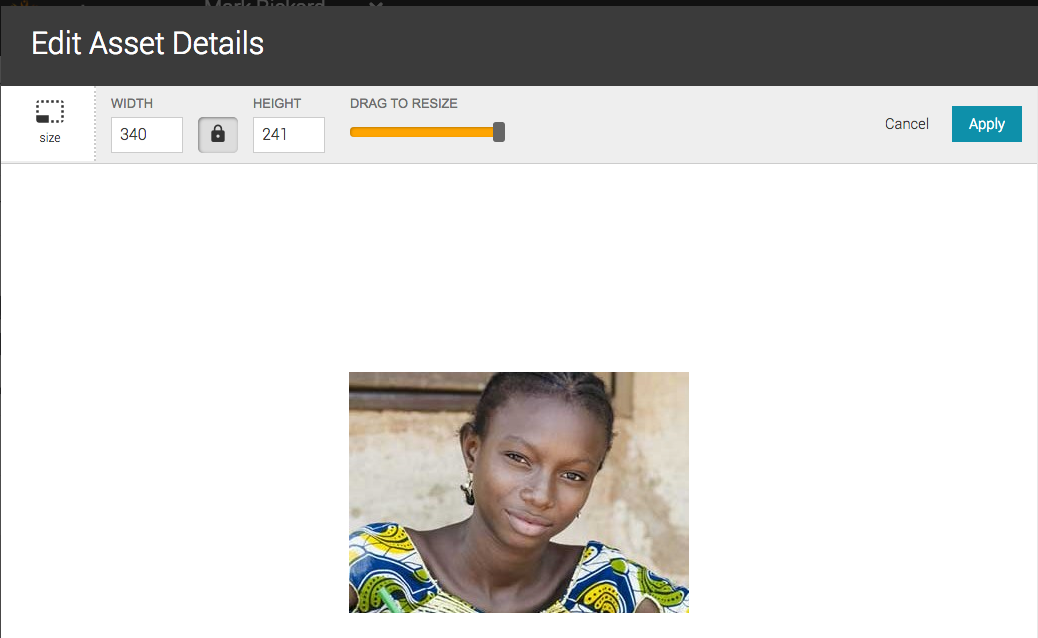
- Size lets you determine the pixel height and width of the image.
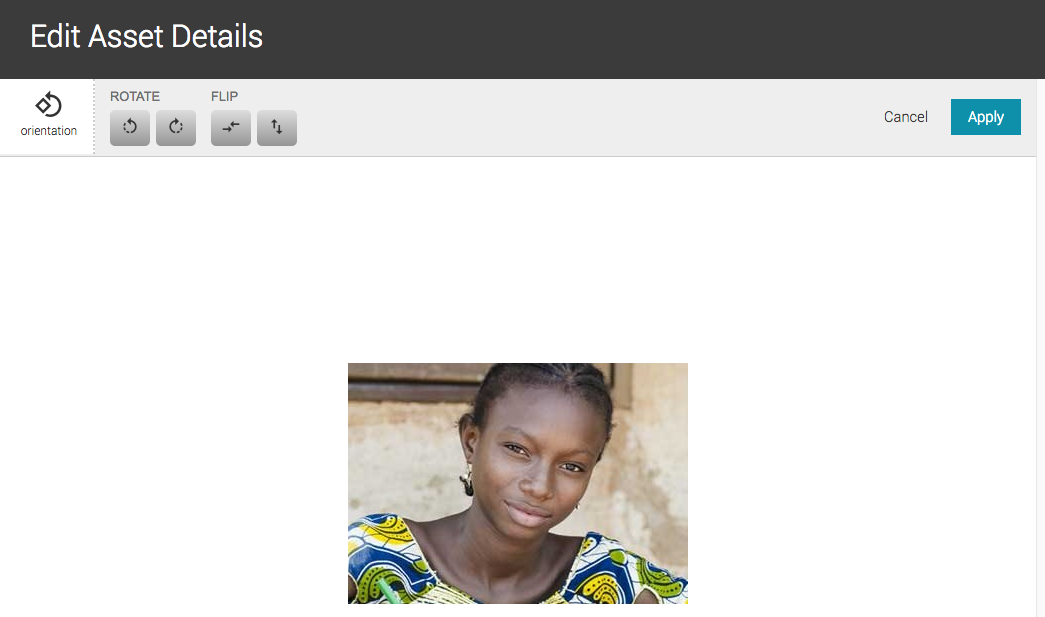
- Orientation lets you rotate and flip images to create a mirror image horizontally or vertically.
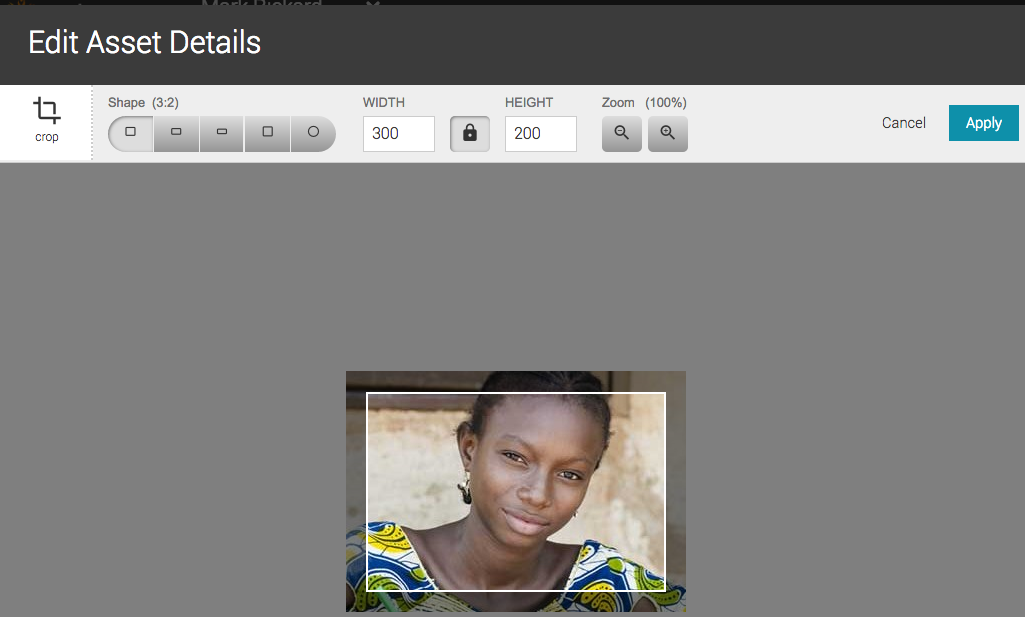
- Crop lets you choose custom width & height ratios as well as being a traditional cropping tool.
Template Images
This tab displays images that are contained in the templates that you have cloned. For example, if you cloned a Fundraising Activity that contained a photo, that photo will appear here. If you delete an image from this tab, it will also be deleted from the template in which it appears. For more information about templates, click here.
Template Library
This tab contains pre-designed activities and email templates that have been shared with you by other organizations. You can clone content from here into your Activities and Emails lists, where it will appear alongside content that you have created. For example, if you clone a Fundraising Activity template, it will appear in your list of Activities on the Fundraising tab. You can then modify and use that template as you wish. Note, if you do not clone a template, it may be overwritten or deleted at any time by the organization that shared it. For more information about templates, click here.
Select multiple items and click Clone Selected to copy them all to your Engage account at once. Click Use Now to copy a single item and jump right into the workflow.