This help topic provides high-level best practices that will help you to get the best results from the images that you use in Activities and Emails.
To see how to add images to Salsa Engage and then edit them, click here. For detailed information about the Visual Editor and how to use it, click here.
Supported File Types
You’ll be able to add and edit the following file types:
- JPEG
- GIF—Any static GIF can be embedded into your activities or emails. You would upload the GIF just like adding any other image type into your activity or email. Particularly for email, your supporters may experience issues if you add animated GIFs. According to Litmus, there are benefits and downsides to adding animated GIFs to your emails. Microsoft Outlook 2007-2019 email clients do not support animated GIFs.
- PNG
When you save images, use PNG or JPG format. You can use GIF format if you need to keep transparency, but GIF supports fewer colors. A GIF can be good for a logo or icon, but use PNG or JPG for images that have a wide array of colors.
Best Practices
Because Activity and Email designs vary greatly, there is no way to automatically ensure that your images will look great. To get great results, you'll need to test different image sizes with your designs. However, here are some tips on how to get results you'll like:
- Image Size—When you upload an image to use in your Activities or Emails, it is easier to downsize an image than it is to upsize an image.
-
File Size—To ensure that your forms upload promptly, you'll want to keep image sizes to 1 MB or less. Keep in mind that larger files will take longer to load on your supporters' screens.
- Alt Text—Screen readers and accessibility devices recognize alternative descriptions of an image (alt text) when reading a web page aloud to visually impaired supporters. Always include this alt text when you add an image to your Activity or Email.
-
Color Mode or Profile—Colors used online are different from those used in print, so it's important to make sure the colors in your image are set correctly. Web images should be saved with the RGB color profile or mode. You'll want to avoid CMYK (which is what designers use for print) as it won't render accurately online and can sometimes break your embedded image.
- Getting Good Results on High-Density Screens—Many smartphones, tablets, and laptops have high-definition screens that offer a high ratio of pixels per inch. Consequently, lower resolution images may look fuzzy on these displays. To make sure your images look clear on all screens, you can save your web-ready images at double the size needed for the Image Element in your Activity or Email. For example, if your header image is 600 x 200 pixels, you can upload a 72 PPI image that is 1200 x 400 pixels. However, if you want an image to appear at a width of 600 pixels (without padding), you wouldn't want to upload an image that is 5,000px (and then downsize it in the form). In other words, don't use a 5,000-pixel wide image for an email that's going to be only 600 pixels wide; use a 1200 pixel wide image and then resize it down to 50% using the control in the Image Element. Check out this article for more examples of screen vs. print resolution.
- Portrait vs. Landscape—Landscape orientation is when the image is wider than it is tall. Portrait orientation creates a picture that is taller than it is wide. It makes a big difference if you have an image that is wider than it is tall, and the area you need to insert it into is taller than it is wide. The image will necessarily shrink to fit.
- Adding and Editing Images—As stock images are not included in Salsa Engage, you'll need to upload them into Salsa Engage yourself. You can load images in from your computer via the Upload from Computer tab in Assets. Once you've chosen your image, details will be displayed in a frame to the right of the window. From here, you can make the following adjustments to your image:
- Alignment can be adjusted to the left, right, or center within the Image cell.
- Alternate text can be applied. When something causes the image to be blocked in a supporter's browser, this text will appear instead of the image.
- You can create a hyperlink on your image to either internal or external pages.
- In the Caption section, to the bottom of the right frame, you can add, style, and position a caption relative to your image.
- Once you've selected your image, you have control over the image's size and alignment in the form itself. A slider will appear in the upper right-hand corner of the Image cell. You can click and drag the slider to make the image larger or smaller.
- If you want to use an image that is justified to the left or the right with wrap-around text, be sure to first place a multi-column row. Then, put your graphic where you want it, and place your text in the adjacent column.
Common Errors When Publishing
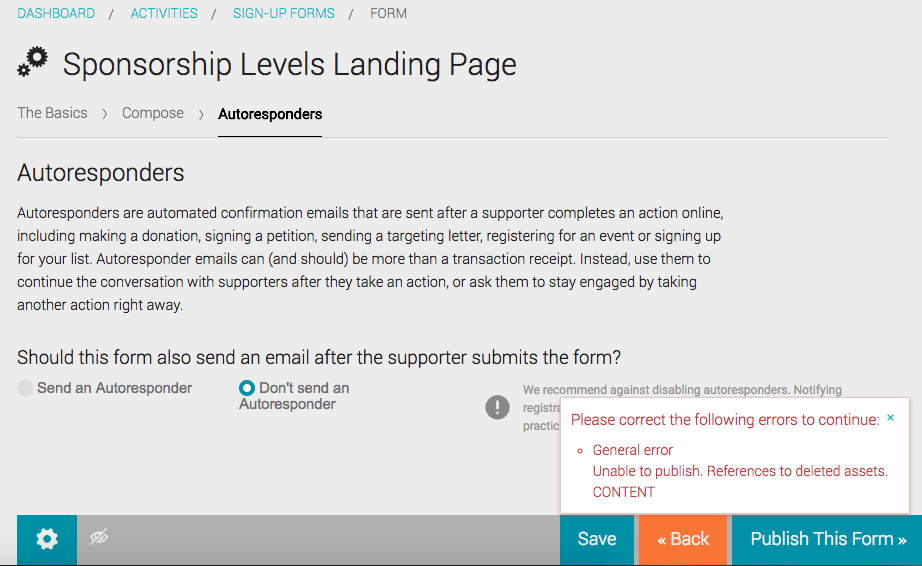
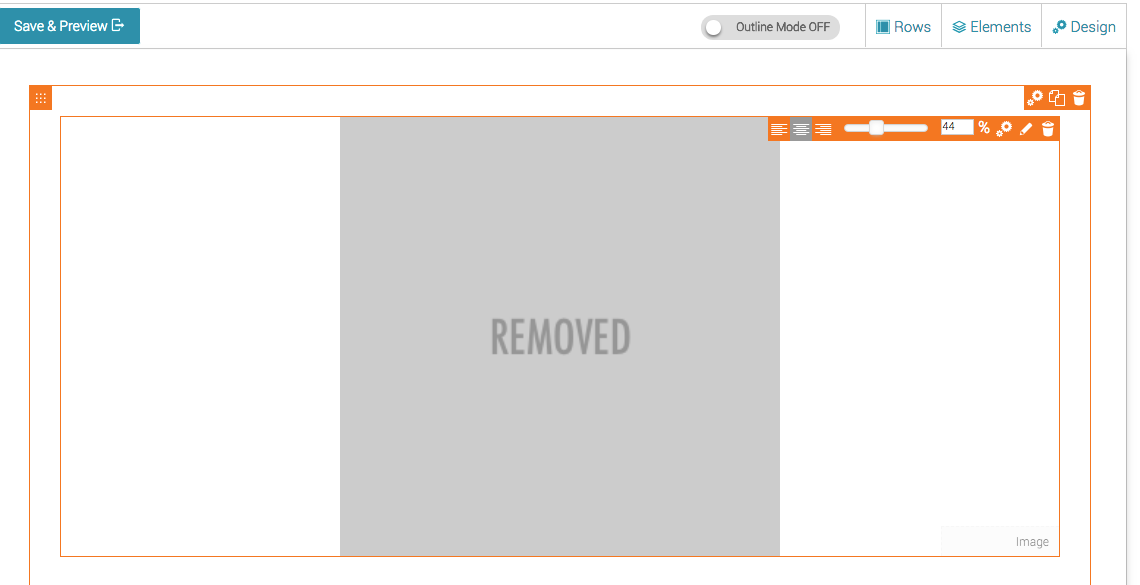
- General Error | Unable to publish. References to deleted assets CONTENT—This is most likely caused by an image being deleted from their assets library, but still being referenced by an image element on your Engage page.

If the image element is sitting directly on the page you can easily see it via a "removed" image placeholder.
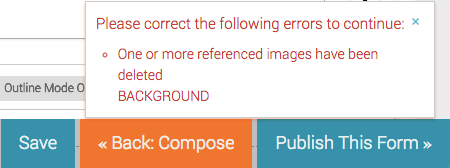
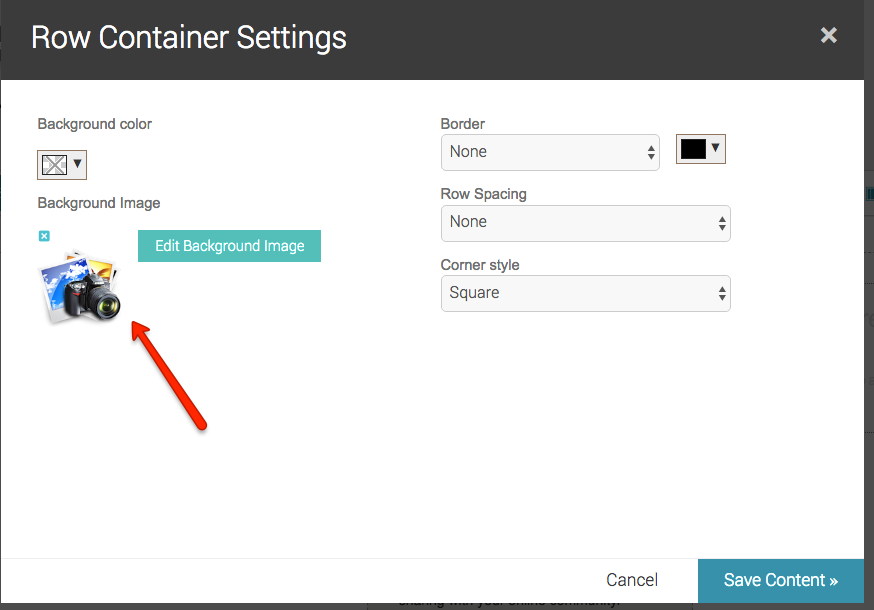
- One or more referenced images have been deleted BACKGROUND—This is most likely a background image that was added on a page, row, or element, but the image was deleted from the assets library.

You can tell this by there being a camera/photo picture in lieu of any other image.
- You will need to check the background image for every page (design > page preferences), as well as the background image for each row/element (gear icon), and look for where there is a background configured, but no image. Make sure to check...
- Content/event page
- Confirmation view
- Registration/checkout pages (if applicable)
- No targets/action page (if applicable)
- Each section of the Event page, Fundraising page, and Team page for a P2P event
- Autoresponders
After removing/replacing the background, you will be able to publish.
