
The Check Wizard is an effective and efficient way to process donation checks quickly. Through the Check Wizard you Import Images, Capture Information, Process Donations, Verify Processed Donations and then Finish the Batch by Printing Letters, Labels, and a Deposit Slip all in one fluid process. To use the Check Wizard, follow the steps below.
- If the checks have not been scanned, scan the checks. We recommend saving each check as a separate file. Save the scanned documents to your computer or network drive.
- In Salsa CRM, from the main menu select Manage and then Batches.
- The Batch Search screen will be displayed. Follow the steps in the Searching for an Existing Batch article for instructions on how to find an existing Batch or the Adding a Batch article to add a new Batch. Open or create the desired Batch.
- From the Explorer screen, select the Check Wizard node.
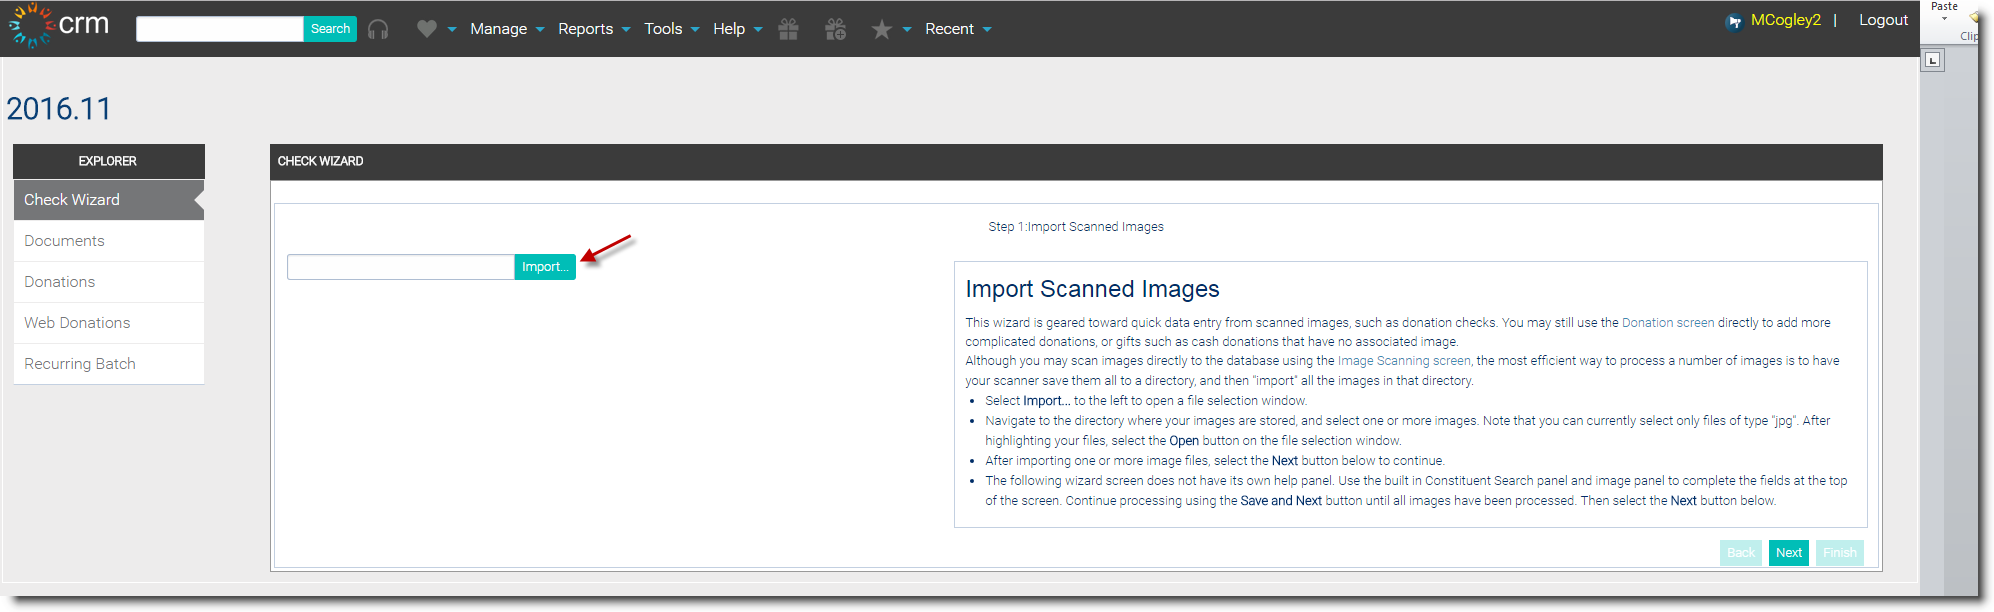
- Select the Import button to import the previously scanned checks into this Batch. The Import Wizard will launch.
- Browse to the location where the saved images are stored. Select all of the desired images and then select the Open button.
- The number of files imported is listed under the Import button. Choose the Next button in the lower right corner of the screen.
- The Step 2: Capture Information window opens. If the ID number of the constituent is not known use the Constituent Search section to enter known parameters and then select the Search, Add or Quick Add button.
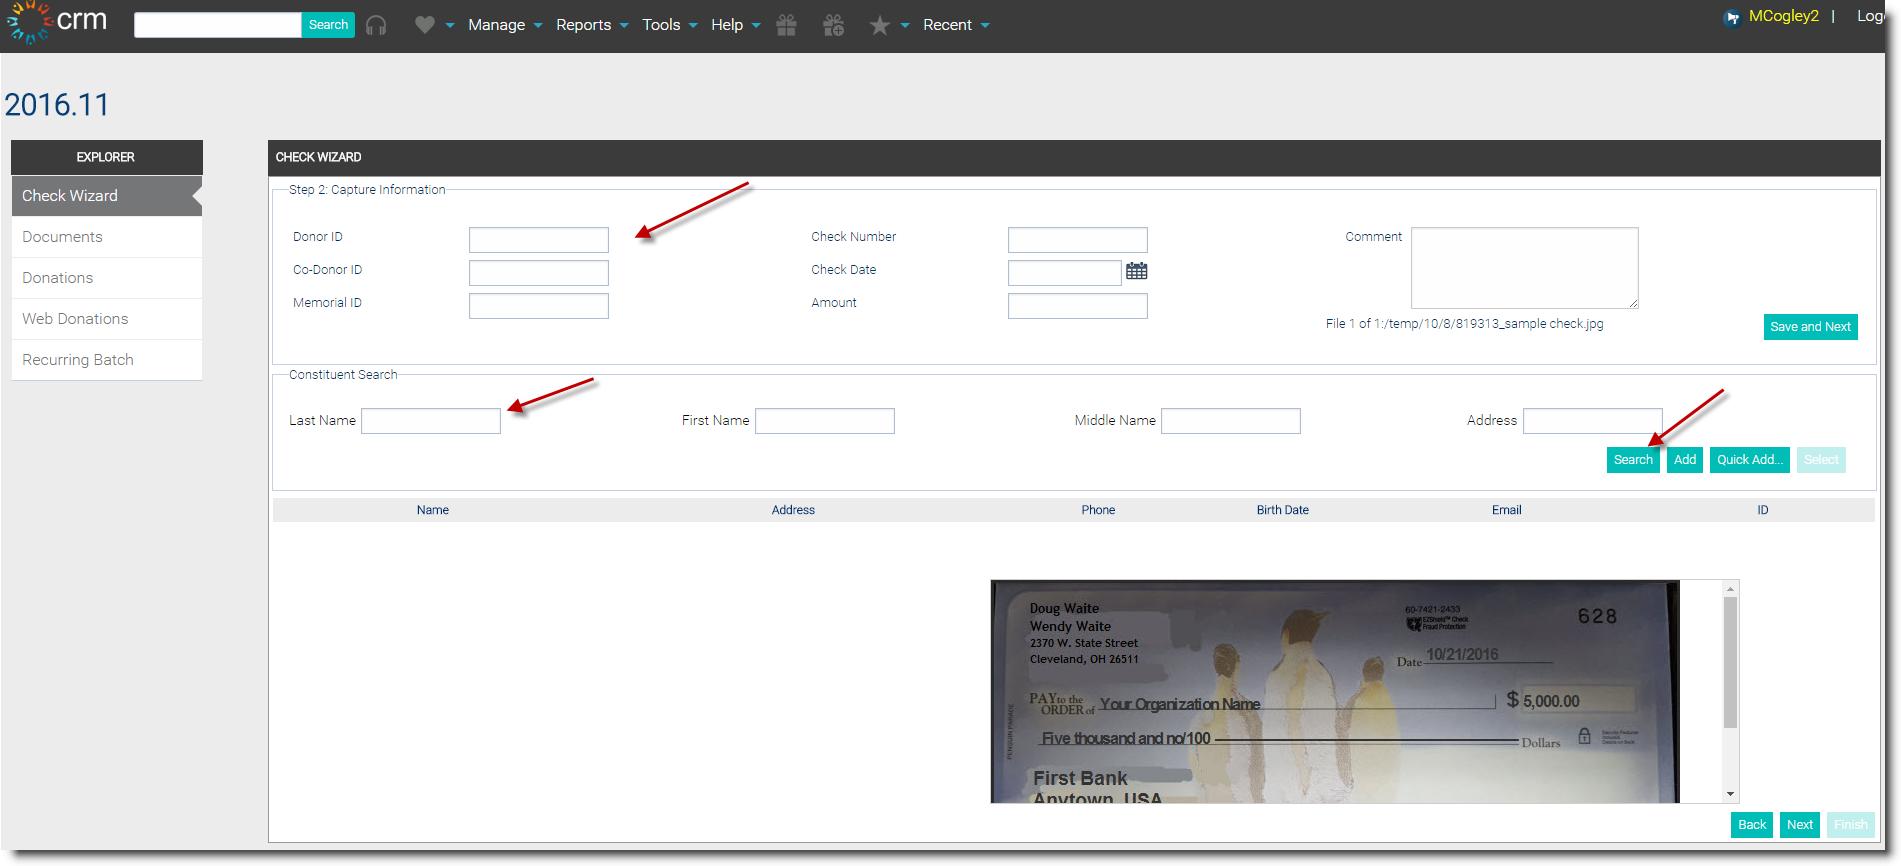
- Place your cursor in the appropriate text box (Donor ID, Co-Donor ID, or Memorial ID). For example, to add Doug Waite's donation, click in the Donor ID text box to add the cursor.
- Click in the Constituent Search Last Name text field. Enter the search terms (such as last name).
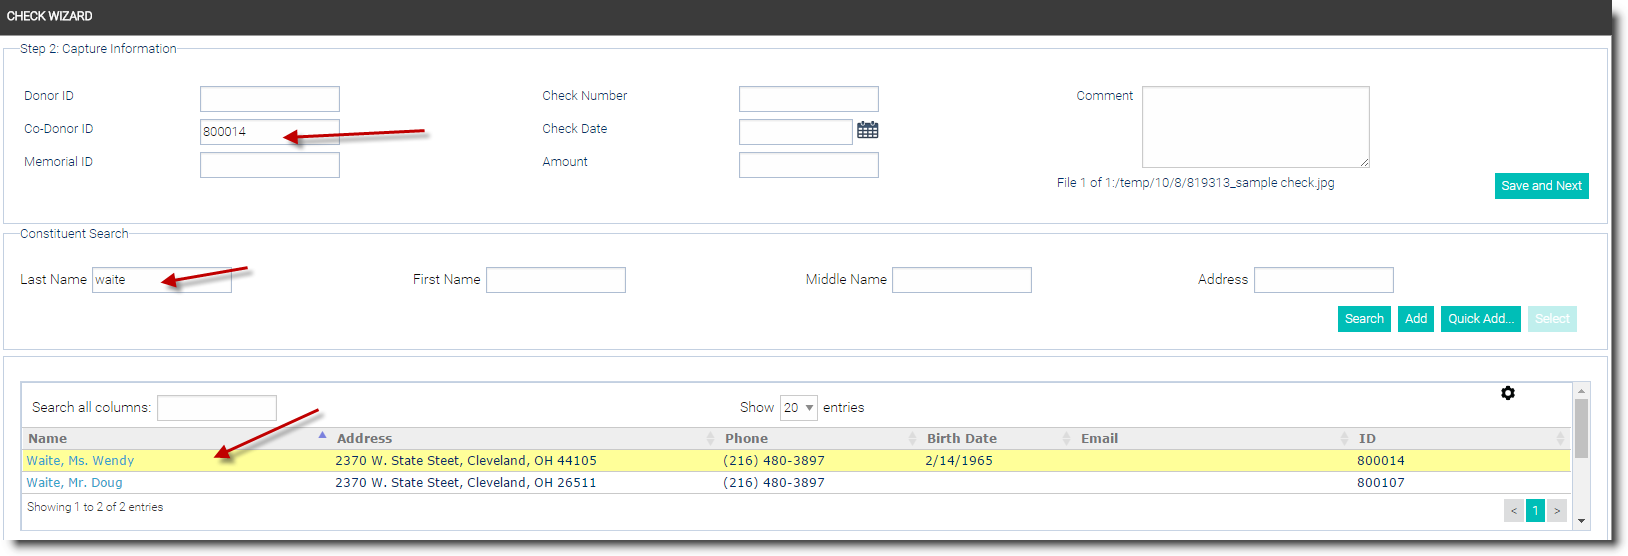
- Double click on the desired constituent and the Donor (or Co-Donor) ID number will automatically be entered into the selected text box. In the example shown below, we entered the co-donor initially. To enter the donor next we would click in the Donor ID text box and double-click Doug's name from the Constituent Search results.
- Enter the check number, check date and amount. Record any comments in the Comment text box.
- Choose the Save and Next button in the upper portion of the window to continue adding the rest of the check images.
- Repeat steps 9-13 until all of the checks have been added.
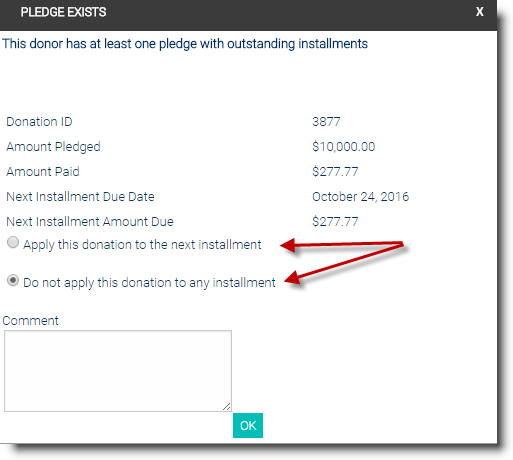
- Select the Next button in the lower right corner of the window to continue. If a donor has outstanding pledge installments, the Pledge Exists pop-up displays. Select to Apply this donation to the next installment or Do not apply this donation to any installment radio button. Click OK.
- The Verify Scanning window opens. Confirm that the proper files have been associated with this Batch. If there is a file missing or other errors, select the Back button to return to the previous screen.
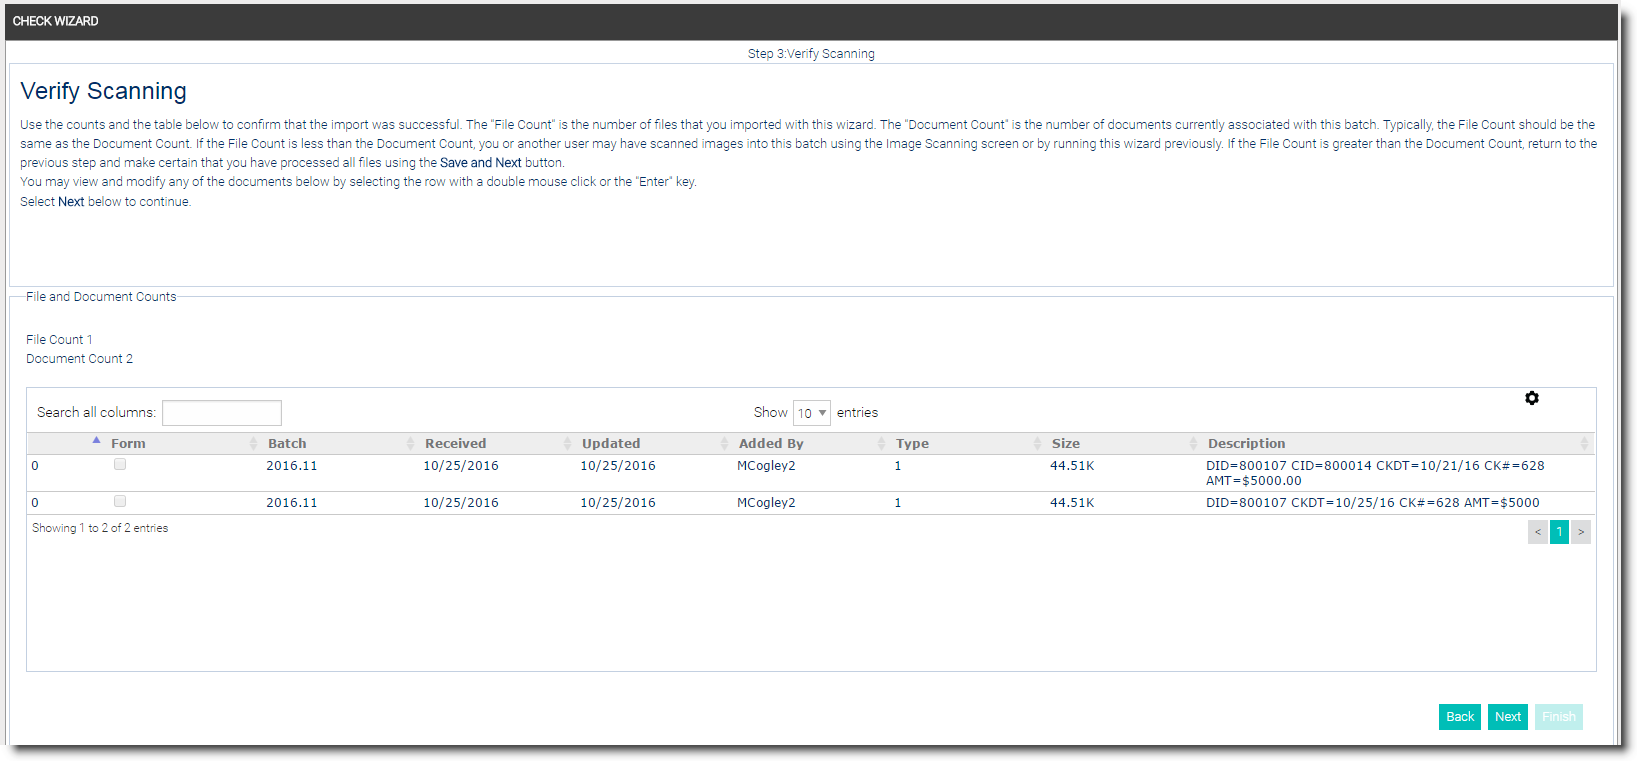
- Once the files have been verified, select the Next button.
- Choose the Process Checks button.
- The Donation window opens. Select Save and Next to process the checks that are associated with this Batch.
- Select the Close button for the Donation window when all of the checks have been processed. You will be returned to Step 4 of the Import Wizard. Select the Next button in the lower right corner of the screen.
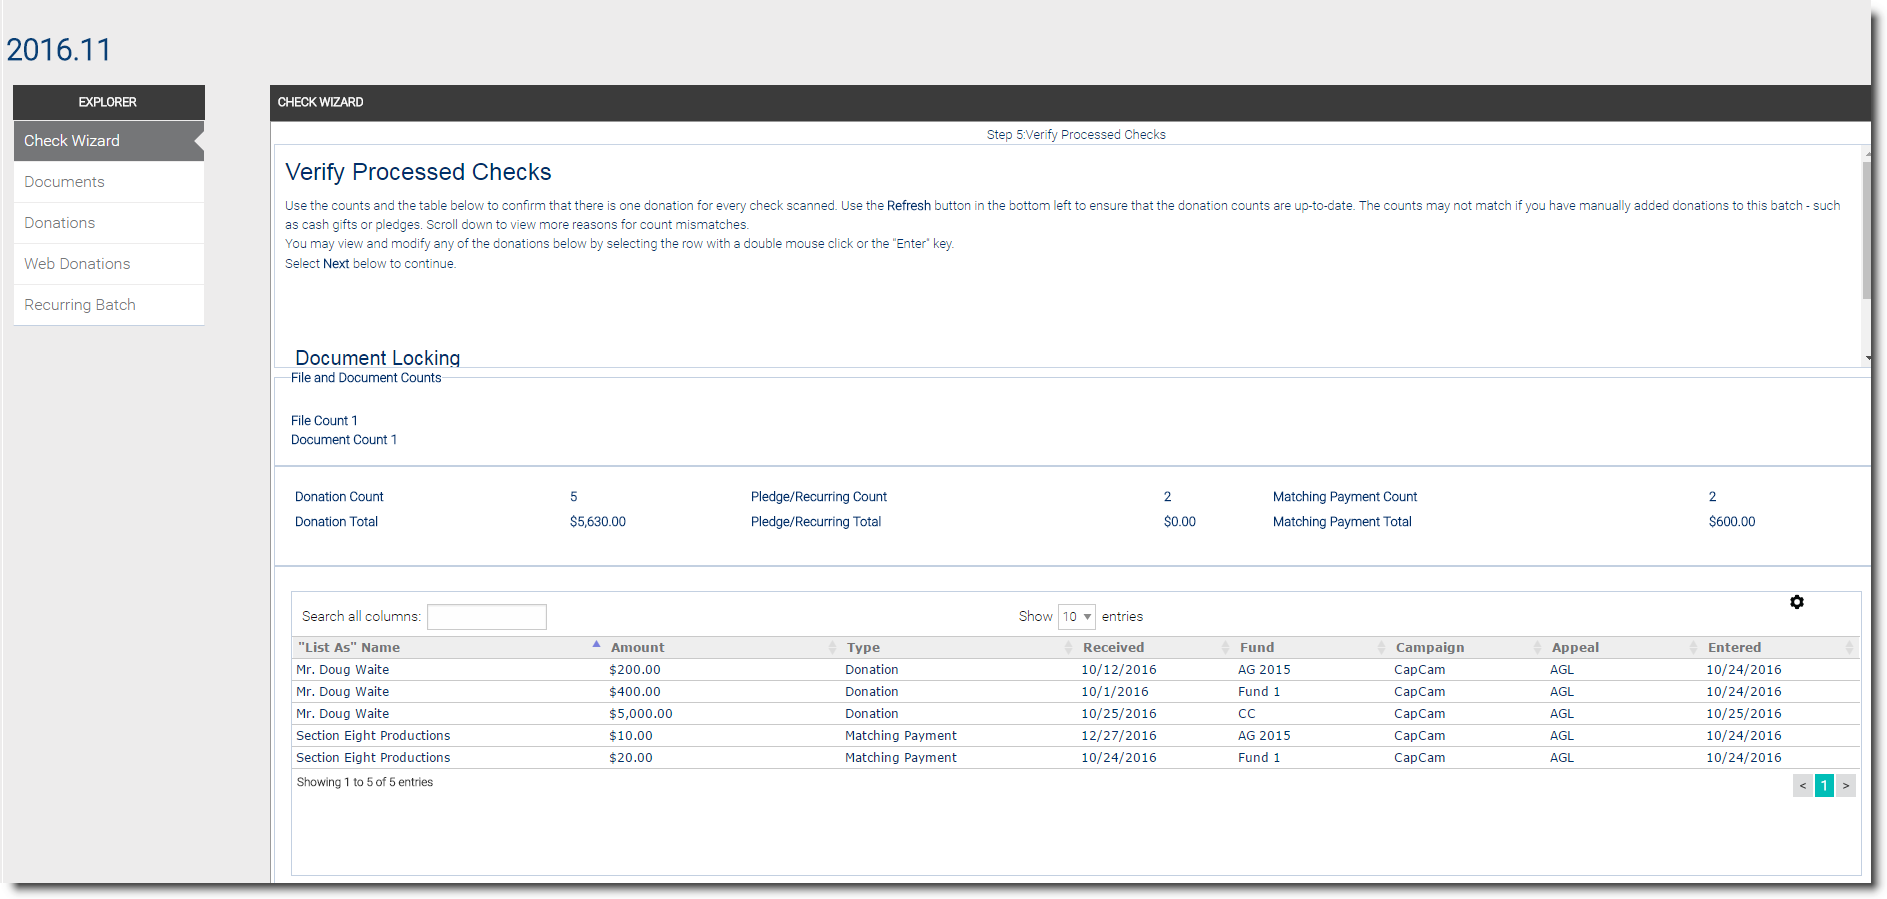
- You will be asked to verify the processed checks. Confirm that the proper files have been associated with this Batch. If there is a file missing or other errors, select the Back button to return to the previous screen.
- Once the processed checks have been verified, select the Next button.
- The Finish Batch window opens. If necessary, choose one of the buttons down the left side of the panel. See the Printing Labels and the Acknowledgment Wizard sections of this documentation for instructions on creating labels and acknowledgment letters.
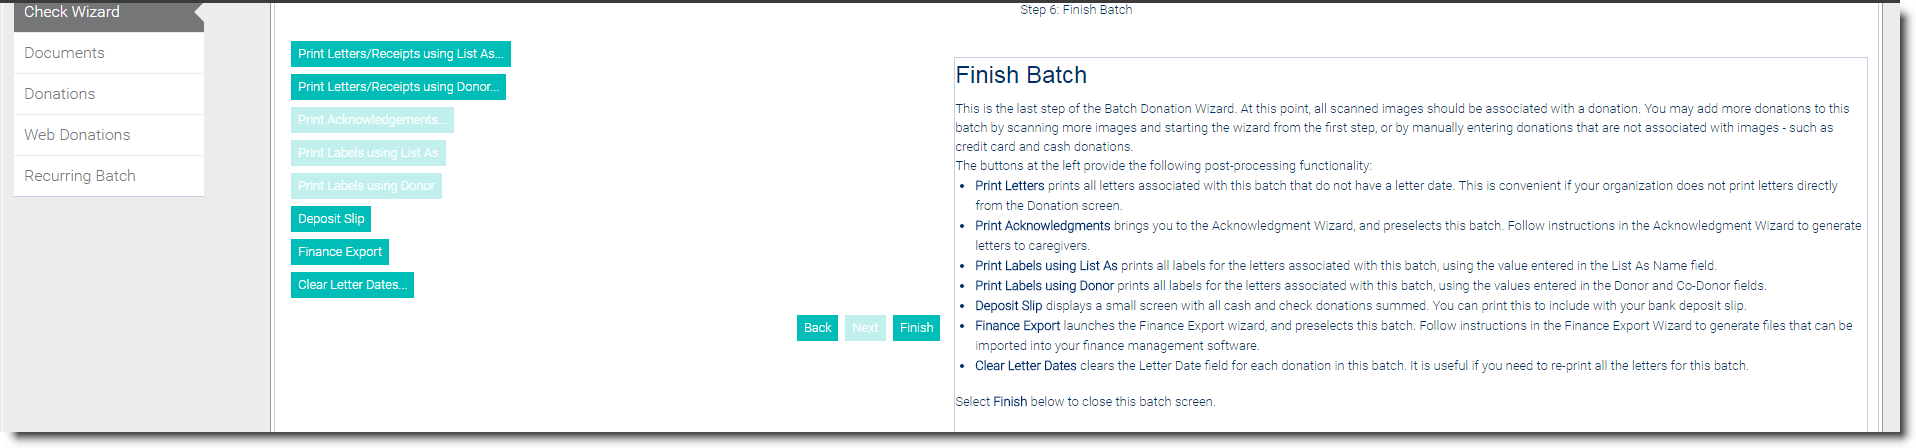
- Select the Finish button. The Batch window closes.