Oftentimes, supporters register themselves for an event. At other times, someone else registers the supporters for the event. On these occasions, the purchaser may want to make a donation when they complete the registrations. Campaign managers may need to reallocate the extra donation to a specific fundraiser or team. This article explains how to reallocate transactions.
There are a few different scenarios for these cases:
- The purchaser is a fundraiser; the donation transaction will be allocated to their fundraiser page.
- The purchaser is not a fundraiser, but only registers one person as a fundraiser; the donation transaction will be allocated to the fundraiser page.
- The purchaser is not a fundraiser and registers several people as fundraisers; the donation transaction will be allocated to the event (we can't split the donation among the fundraisers).
To reallocate a donation from one page to another...
- Select the Activities menu in Engage.
- Select the Peer to Peer tab at the top.
- Access the specific Peer to Peer event.
- If the form is already published, the Results tab should display. At the bottom of the page, you can see a tab labeled By Submissions.
NOTE: You will only be able to update transactions for the Donation transaction type. Click on the transaction (from a supporter to an individual or team) that needs to have funds reallocated. - Click the Reallocate button at the bottom of the Purchase Summary frame.

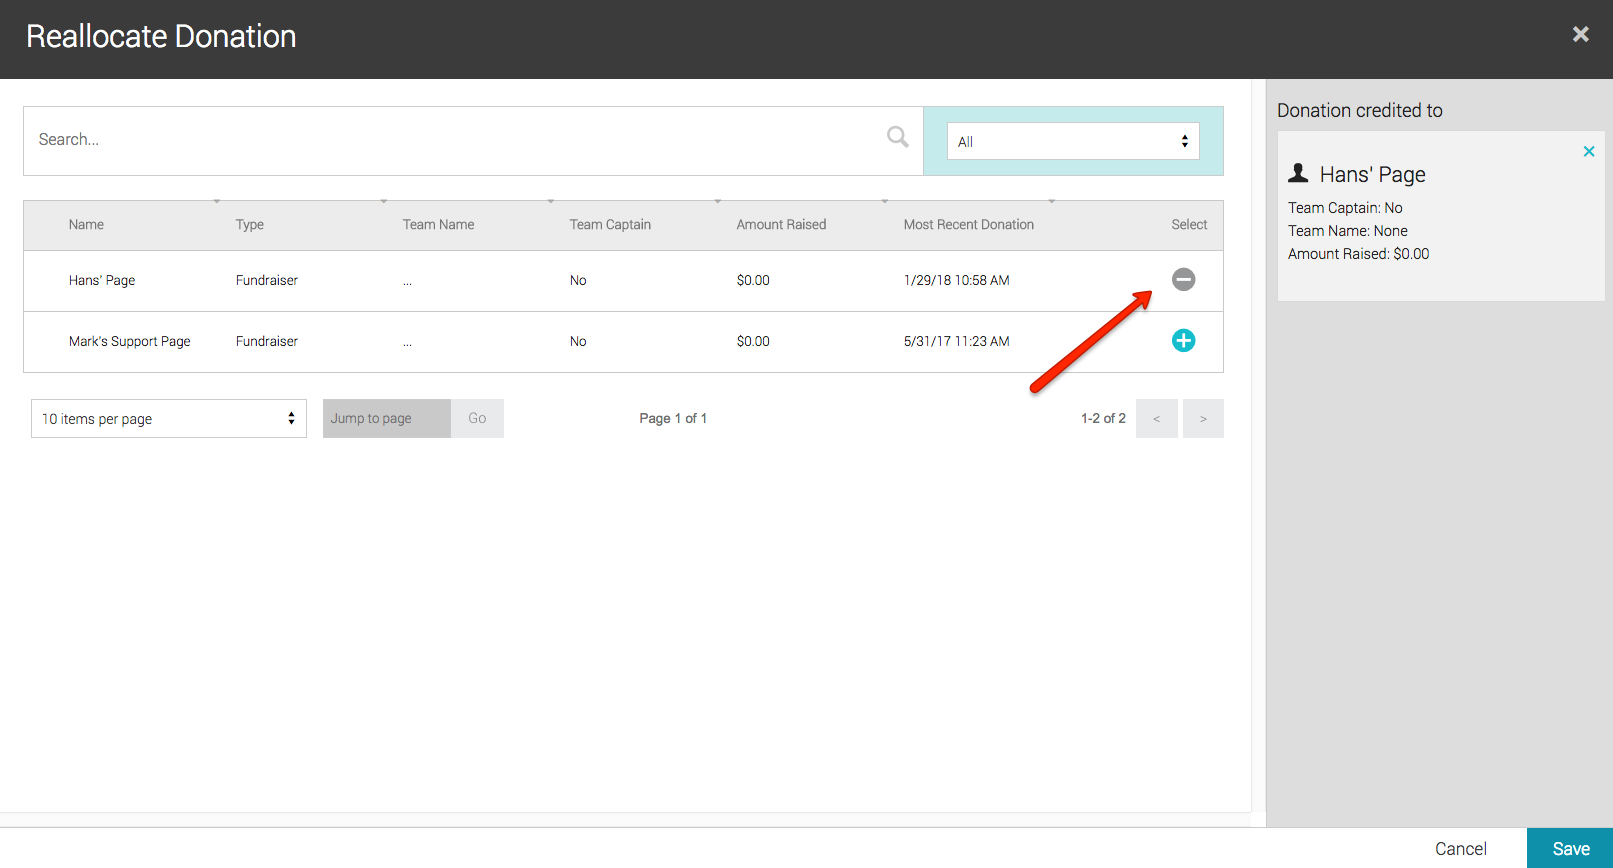
- The Reallocate Donation dialog box will appear. Donations may be reallocated between fundraisers or teams or reallocated from a fundraiser to a team (and vice versa).
- To the right of the table, click the plus (+) or minus (-) icon to respectively allocate or de-allocate the donation. Donations may be allocated to only one fundraiser or team at a time.

For example, let us say that for a given transaction Team A has a donation allocated to them but Team B does not. If you want to de-allocate the donation from Team A and instead allocate the donation to Team B, click the plus icon for Team A, and then click the minus icon for Team B. Team A will now each have a minus icon, indicating that the donation is not being allocated to them, and Team B will have a plus icon, indicating that the donation is allocated to Team B. - Click the Save button.
