Mailing Lists work by opting supporters into the Mailing List group. You can either...
- Add the Mailing Lists opt-in element on an activity form and give supporters a choice to join.
- Add supporters via the “Add Supporters who submit this form…” box on the compose tab of an activity form.
In some cases, you might prefer to use Mailing Lists as a way to gather information about what supporters would NOT like to hear about. In that case, you can use Mailing Lists as suppression lists that are presented on the Subscription Management page, instead of opt-in lists on an activity form.
Why Use a Mailing List As a Suppression List?
- You would like every newly created supporter to receive a certain type of email, like a general newsletter, until they actively opt themselves out.
- You would like to send to an audience whose members are governed by a source that is outside of Engage, including Salsa CRM and Salesforce.
Create Mailing Lists to Use as Suppression Lists
To create and use a Mailing List as a suppression list instead of an opt-in list, follow these steps:
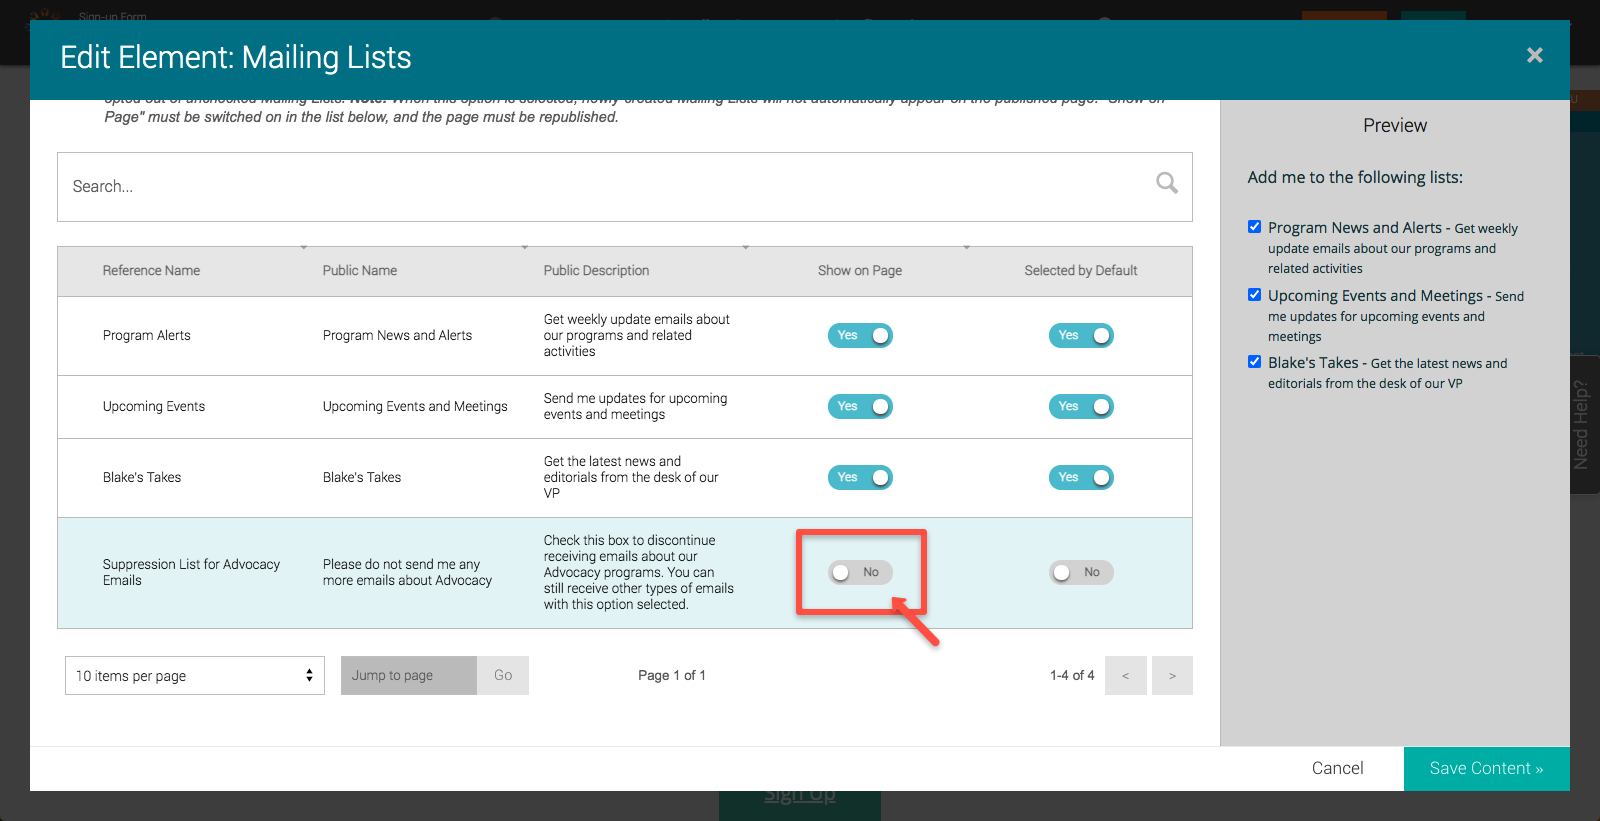
- Create a Mailing List and include a descriptive reference name to your supporters. For example, “Not Interested in Advocacy Emails” or “Suppression List for Advocacy Emails”.
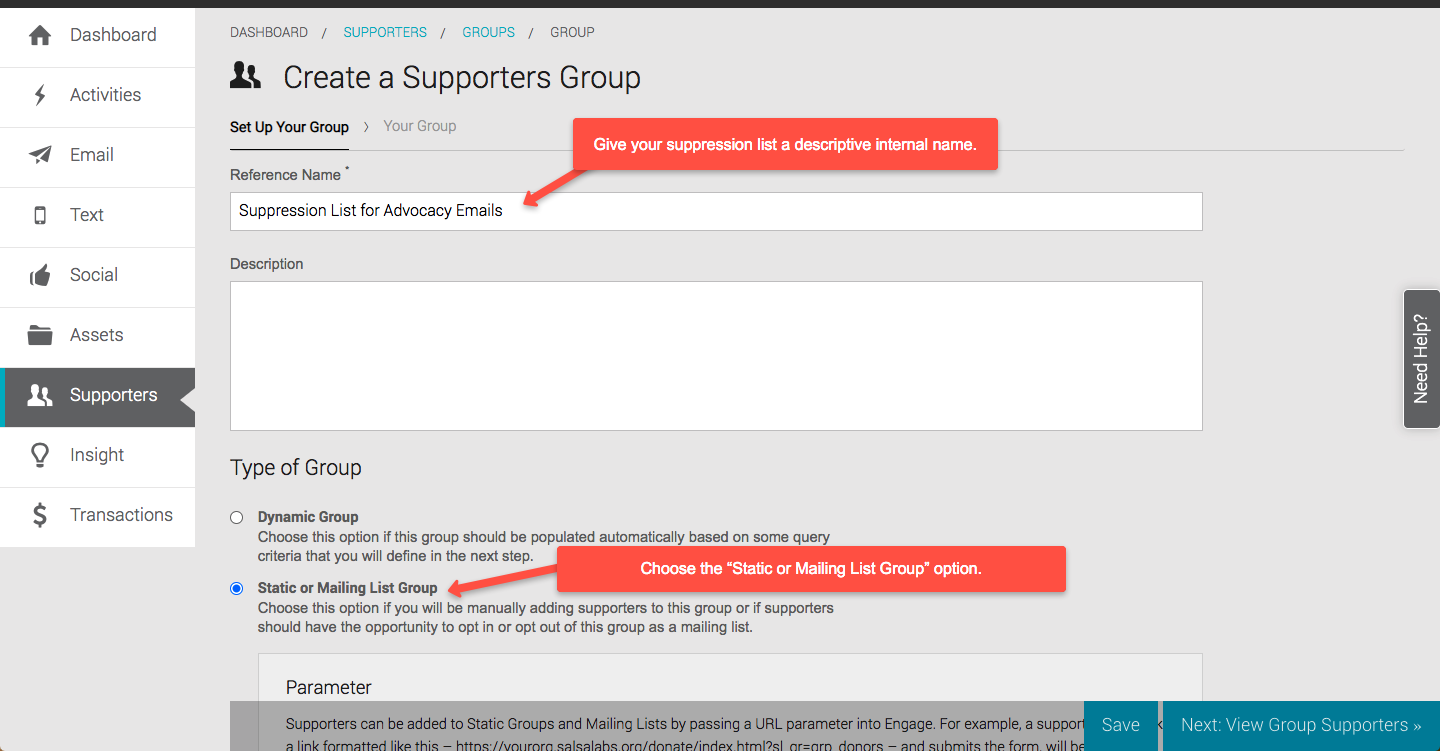
- Toggle “Is this group a Mailing List?” to “Yes”.
- Enter a Public Name that is meaningful for supporters, when they see it on the Subscription Management page. For example, “Please do not send me any more emails about Advocacy” and, optionally, enter a description that the supporter will see with more information.
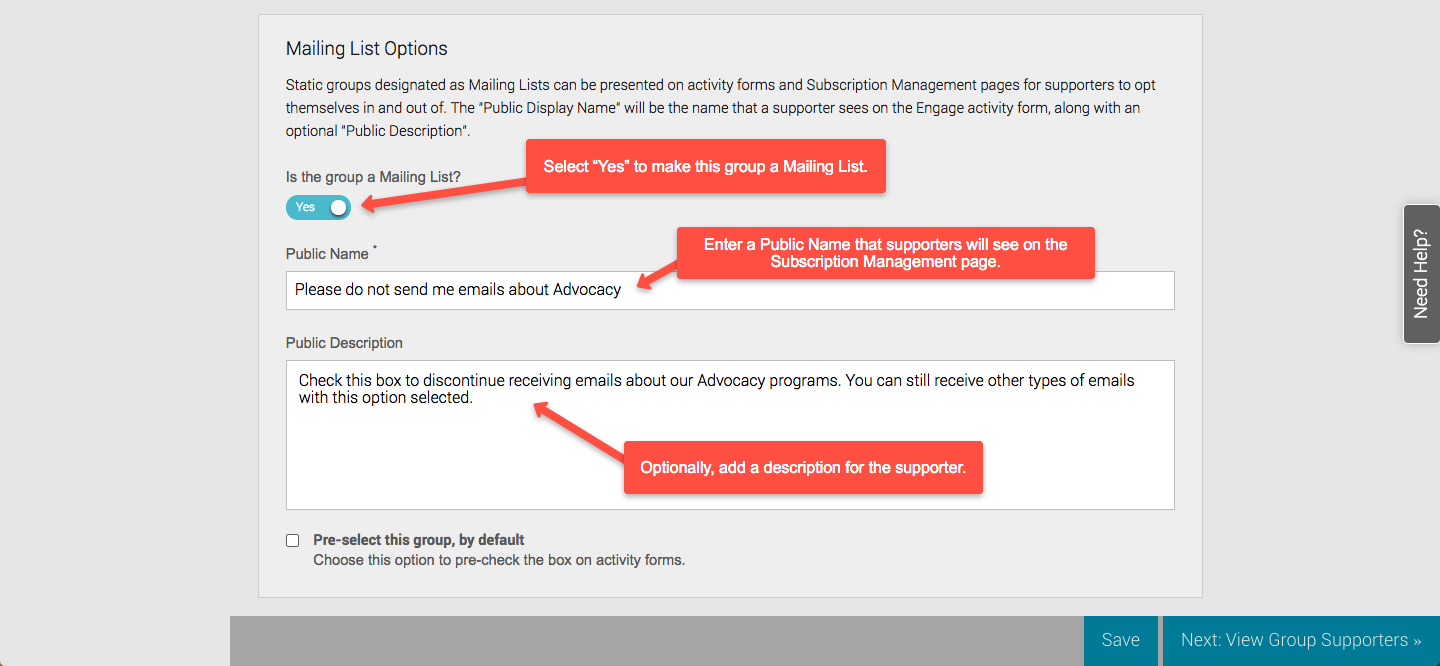
- Click “Save” to save your Mailing List configuration.
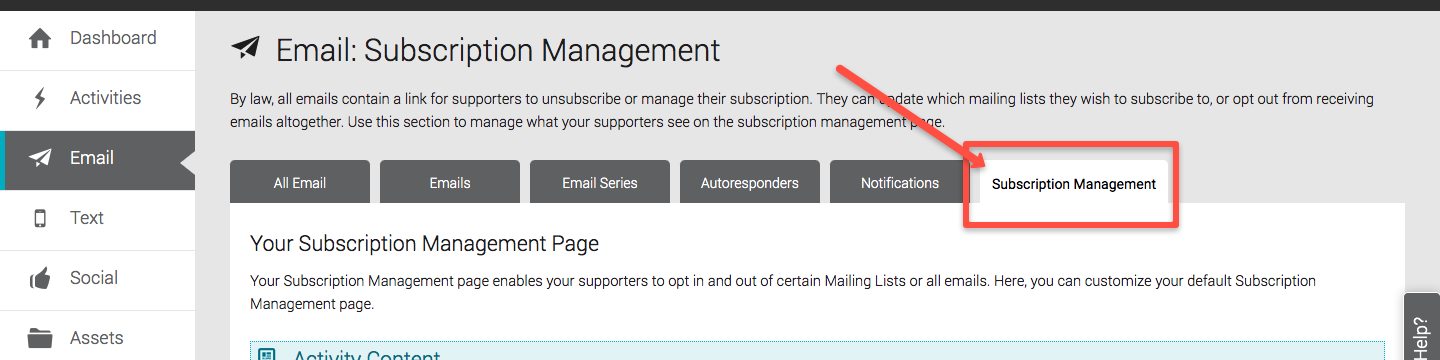
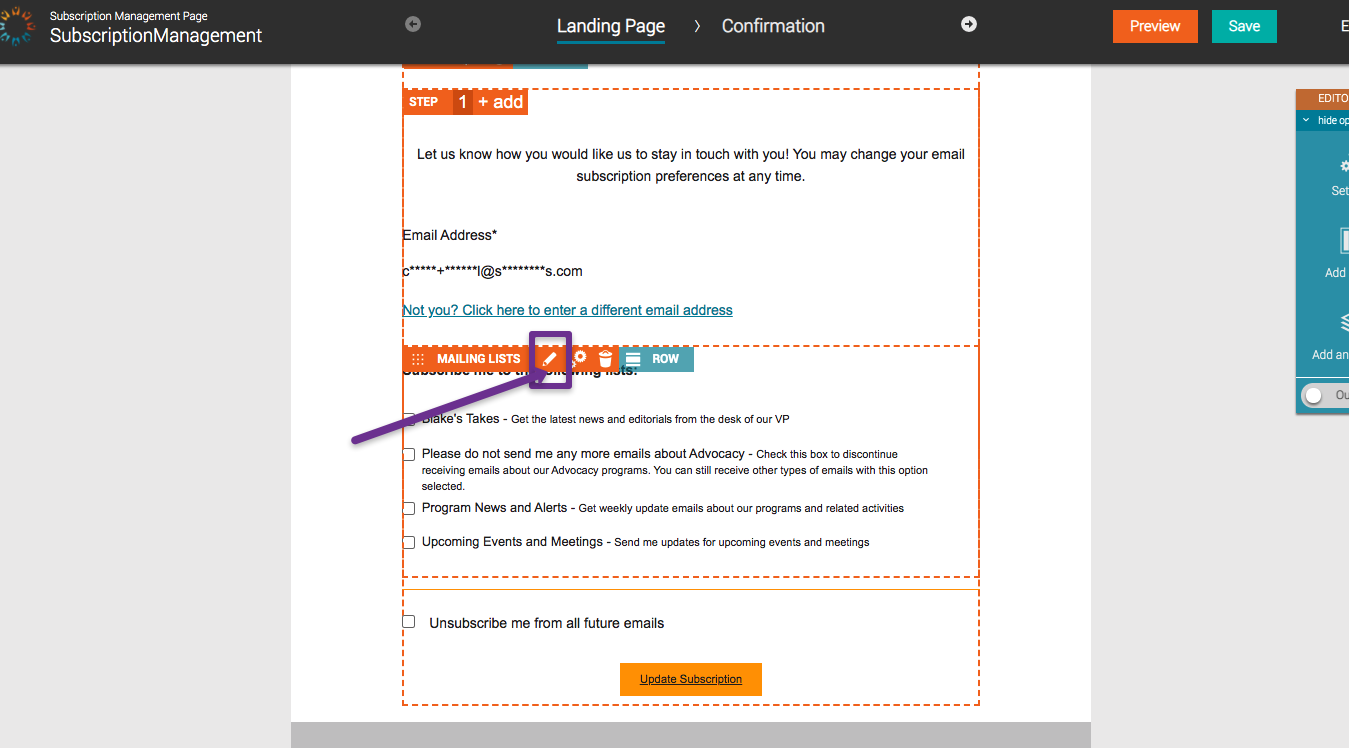
Configure Your Subscription Management Page
- Navigate to the “Subscription Management Page” tab in the Email module.
- Click “Edit Content” to enter the Visual Editor and make changes to the page.
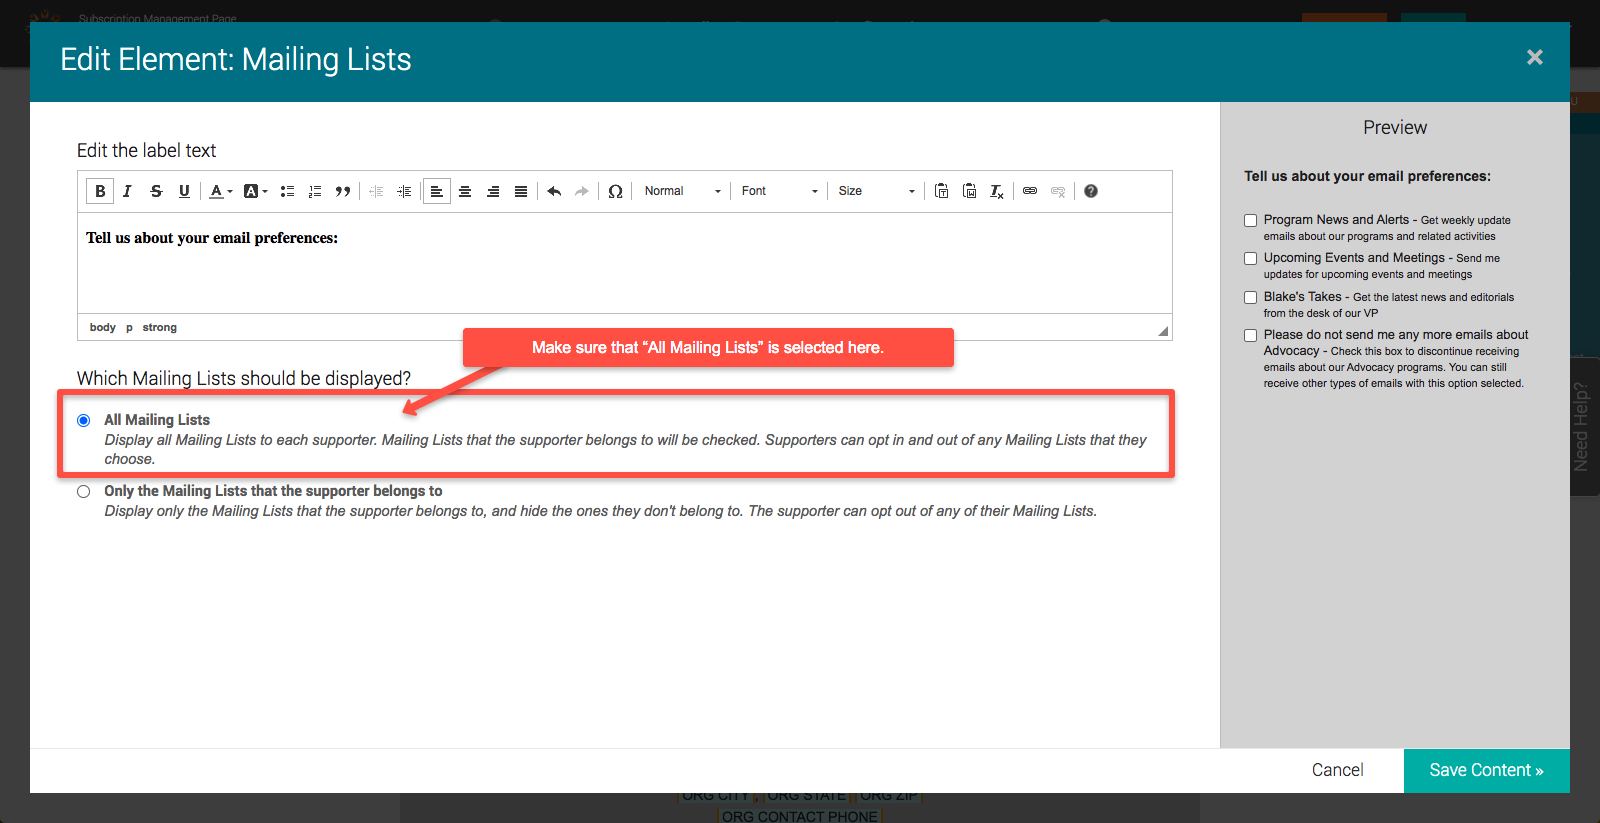
- In the Mailing Lists element, click the pencil or double-click on the element to edit the settings.
- Make sure to select “All Mailing Lists” in this element, so that supporters can see Mailing List groups that they don’t belong to yet. You may also wish to change the label on this section to something like, “Tell us about your email preferences:” or remove the label altogether.
Configure Your Mailing List Opt-In Element
If you’re using the Mailing Lists element on activity forms, you probably do not want to give supporters the option to opt out of Mailing Lists right out of the gate. In that case you will not want to show “All Mailing Lists” in that element. Instead, use the “Only Certain Mailing Lists that I Choose” option.
- On any existing or future activity forms with the Mailing Lists element, click on the pencil icon or double-click on the element to edit it.
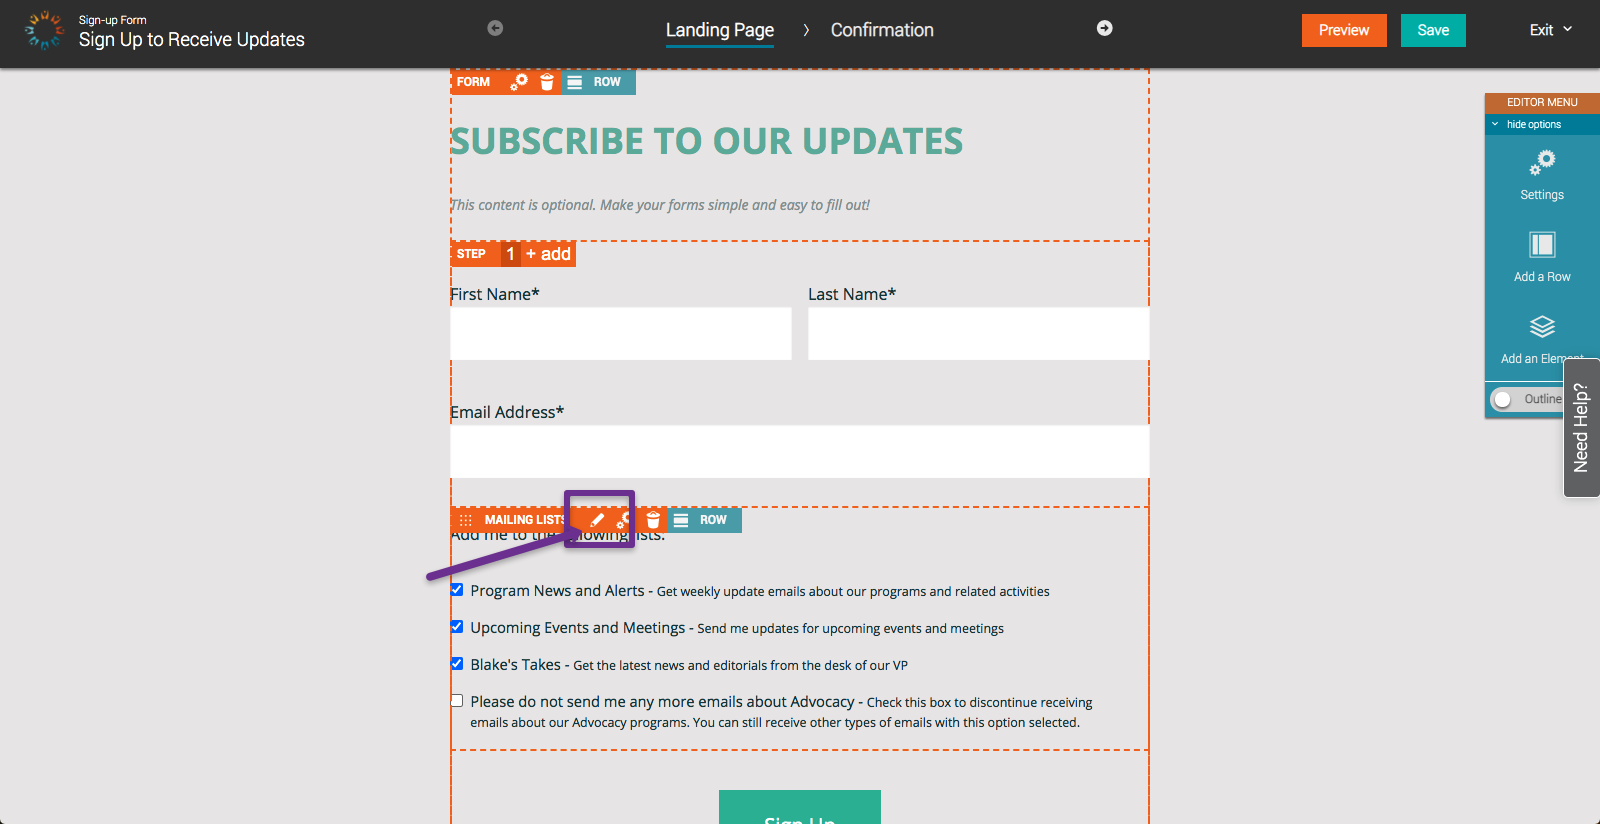
- Choose the option to display “Only certain Mailing Lists that I choose”.
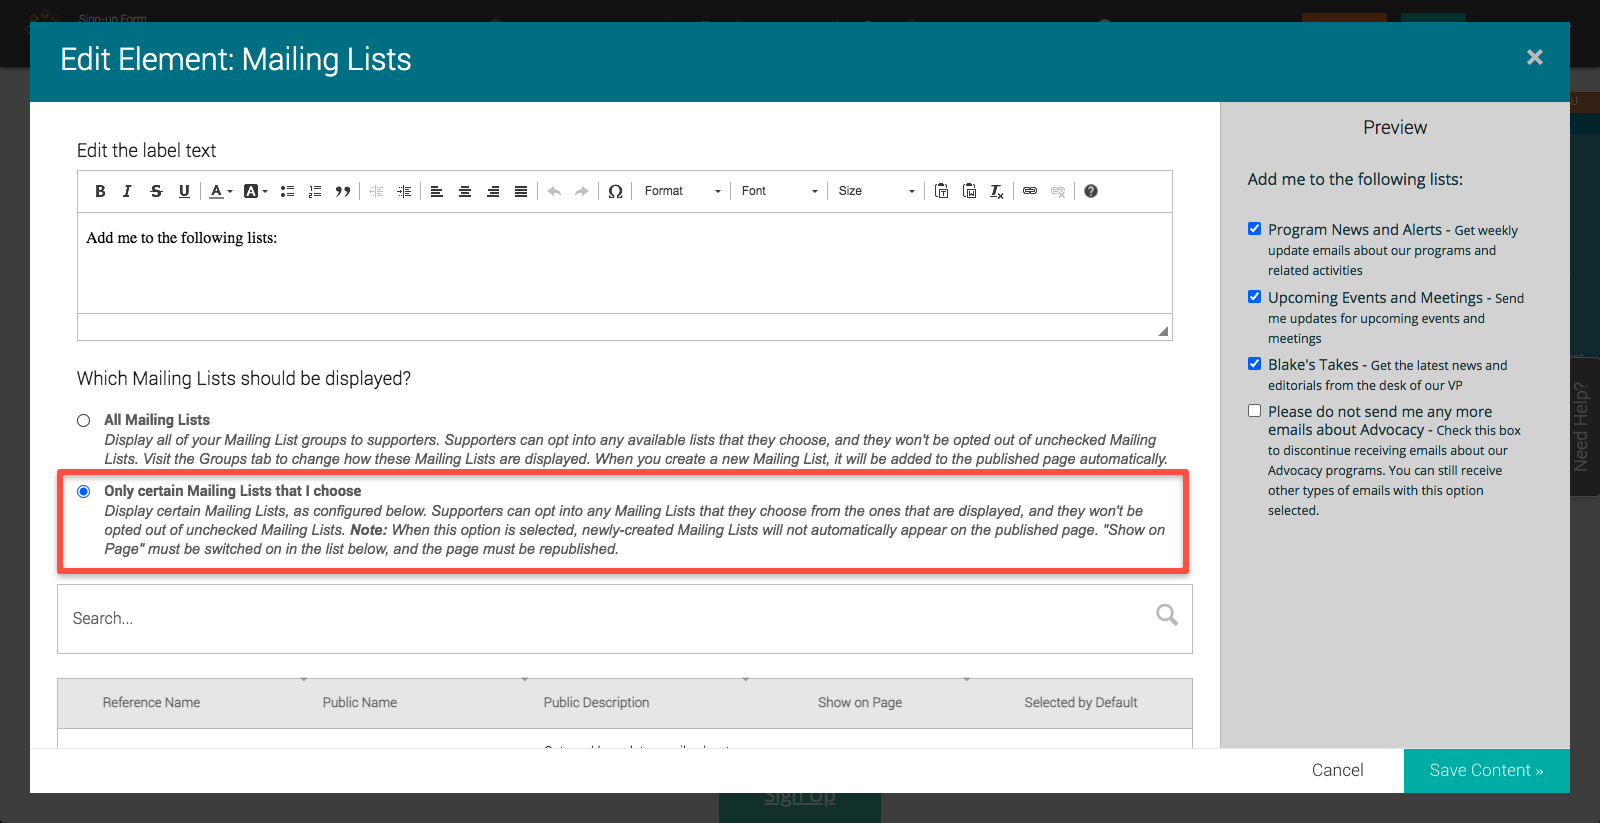
- Deselect the suppression groups that you created earlier, so that supporters do not see them as options to opt into.
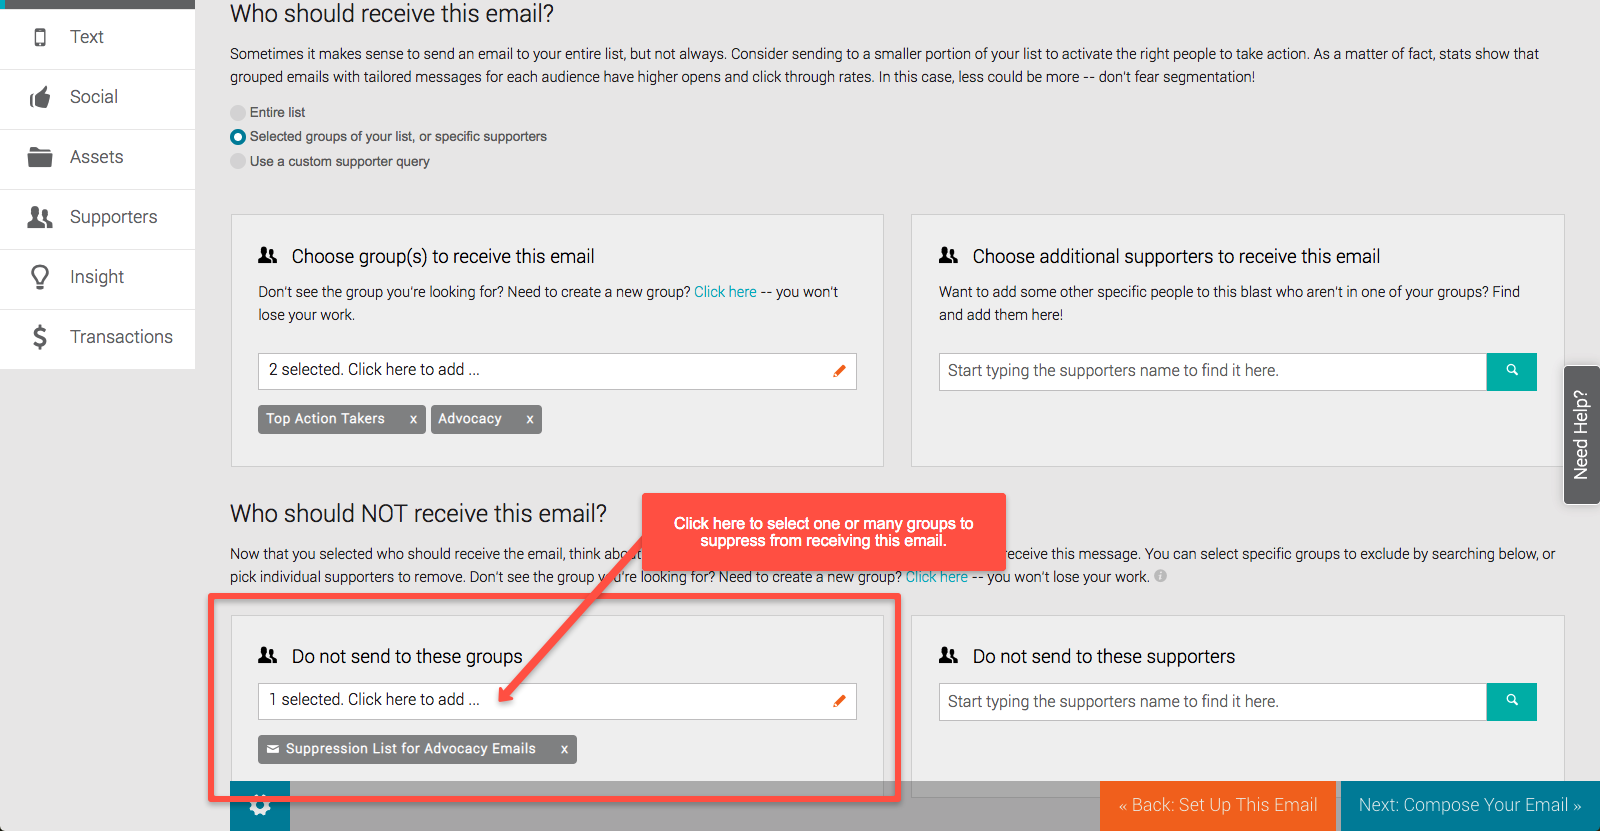
Using Suppression Lists in Email Audiences
If you are using some Mailing List groups as suppression lists, the key is to remember that supporters who are in the group have indicated that they do not want to receive a certain type of email. You will add them to the “do not send” area of your email audience.
When you are selecting an email audience, add your suppression list to the “Do not send to these groups” selection box. The supporters who are in this group will not receive the email. NOTE: this takes precedence over any group membership in the “Choose group(s) to receive this email” box.