Build your own query from scratch, for situations when our built-in reports may not be sufficient for your purposes. This option provides you the source data you need for your own custom report. For an overview of the Advanced Query Wizard, see Advanced Query Wizard Overview. To start a new query for general purposes...
- From the main menu, choose Reports > Queries > Advanced Query Wizard. The Advanced Query Wizard launches.
- Click the Create New Query button at the top of the Query Wizard window. This opens a new browser tab for your new query. All output fields, filter fields, and sort fields will be blank.
- From the Query Type frame to the left of the window, choose a category of data that you wish to query. Scroll down to view all the Query Types. When you select a query type, an explanation of the highlighted item will appear in the Description frame across the bottom of the window.
Note: The Constituent type query contains a Donation Info node with basic donation information. This enables you to identify constituents who have not donated, without running multiple queries. The Conversion type query enables customers who were converted by Salsa Labs to view constituent and donation IDs from their previous database. - In the Purpose of this Query frame, choose General
- Click Next. The Step 2: Select Query Criteria window will open.
- Ensure that Output is selected at the bottom of the Available Fields frame. To add fields to the Filter Fields and Sort Fields frames, select Filter and Sort respectively, and then follow the rest of the steps below.
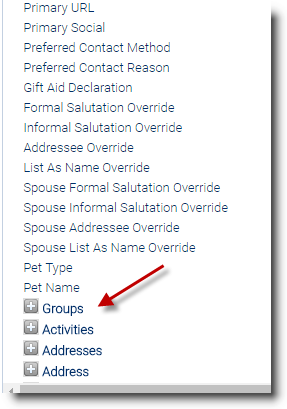
- Double-click the field you want to you to add it to the Output Fields frame. Note: You can use the
 to expand the list to reveal all of the available fields.

- Advanced users can perform calculations within a query. Click the Add Calculation bar at the bottom of the Output Fields frame. The Add Calculation Column window will open. See Advanced Query Wizard: Query Calculations for details about calculations.
- If you choose to add the Spouse name to the output for a mail merge (the spouse name fields are available through the Spouse table in the Available Fields list), select the Merge Spouses checkbox at the bottom of the Output Fields frame.
- if you want only one record returned for each constituent, select the Merge Duplicates checkbox located at the bottom of the Output Fields frame. Note: This is important when doing a mail merge so that you don’t print multiple letters or labels for the same household or business.
- Once the fields, sort order, and filters are set up the way you want them, click Next. The Step 3: Preview, Exclude, and Modify Data screen will open. It will be populated with the data from your query.
PRO TIP: Select the Back button to go back one step in the Wizard if you want to change query parameters to get a different result. The Gear button provides for additional functionality. See Advanced Query Wizard Overview for details.
Records that do not have complete address information in the database for the type of query you selected will be highlighted in pink. You can un-check the checkbox next to each of these records to remove them from your finished product. Alternately, you can click the Back button to go back a step in the Wizard and edit Filter Fields to exclude records with incomplete addresses. - Click Next. The Post-Query Options window will open.
- Choose the type of output that you desire. Once you choose an option, you can return to the Post-Query Options screen to select additional options. If you have not used Save... to save your query or its results, the query and your results will be lost if you click Restart Wizard or Finish.
- Click the Finish button.