Forms allow you to track information specific to your organization and store this information to individual constituents’ records. Forms also allow you to record information that may constantly change and retain a copy of all of the forms so that you can refer to past information. This functionality combines the best features of Custom Fields and Notes functions. Create an unlimited number of forms within Salsa CRM. Create an unlimited number of fields within each form.
For an overview of the Advanced Query Wizard and its controls, see Advanced Query Wizard Overview.
- From the main menu, choose Reports > Queries > Advanced Query Wizard. The Advanced Query Wizard launches.
- Click the Create New Query button at the top of the Query Wizard window. This opens a new browser tab for your new query.
- From the Query Type panel along the left side of the window, choose Forms.
- In the Purpose of this Query section, ensure that General is selected.
- All output fields, filter fields, and sort fields will be blank.
- Click Next. The Step 2 window of the Advanced Query Wizard opens.
- In the Available Fields frame to the left of the window, ensure that the Output radio button is selected.
- Double-click a form that you would like to query. It will appear in the Output Fields frame in the center of the window.
- Click the Sort radio button at the bottom of the Available Fields frame.
- Double-click the criteria you want to you to sort on. The criteria that you selected will appear in the Sort Fields frame to the right of the window.
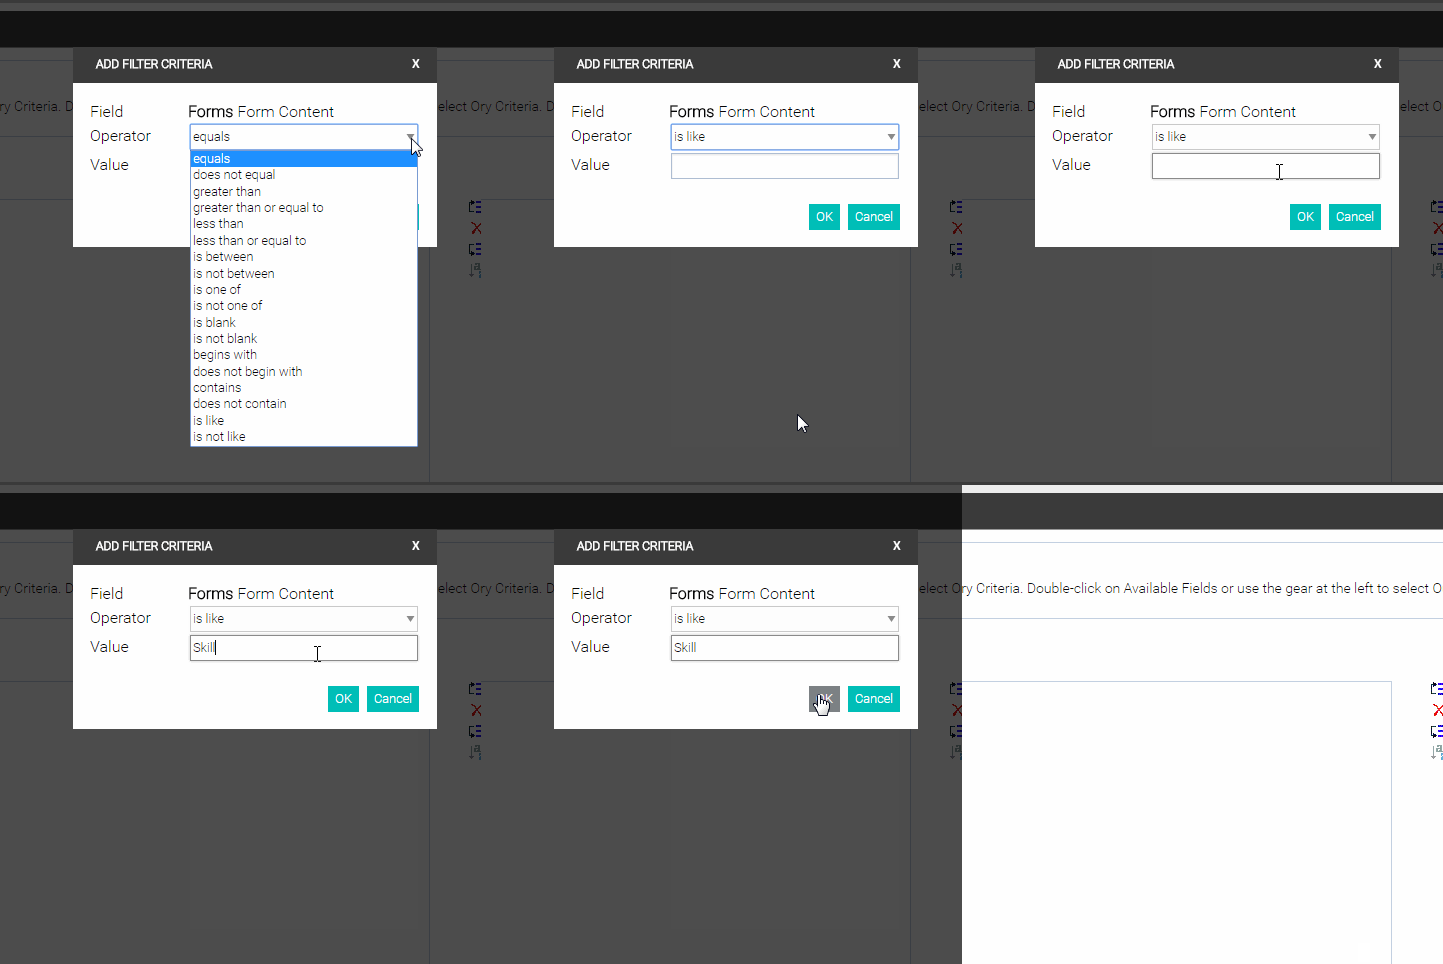
- To filter on Form Content data other than the keywords, click the Filter radio button; then, click the Form Content field. The Add Filter Criteria box will open.
- Choose the Operator that you want to use.
Note: Multiple filters are, by default, connected by the AND. For example, Donor Address Primary? Equals “Yes” AND Donation Received Date is between “01/01/2006”, “08/13/2008”. This means that the data returned must meet both of the parameters. To change the filter so that the data returned matches either filter “A” OR filter “B”, select the appropriate filter item in the Filter Fields list and choose the Or button. A good way to tell if the filter is going to return the data you expect is to read the filter statement to yourself to confirm that it makes sense before continuing.
- Enter the information you wish to filter on in the Value field in the following manner:
*Name of Field??fieldValue
For example, “*Year Founded??2000” would return forms with the Field Name of “Year Founded” and an entry of 2000.
The criteria you enter will appear in the Filter Fields frame to the right of the window. - The only Form data in the Available Fields panel that you can filter on are the 10 keywords you assigned when creating the form.
- Click OK in the Add Filter Criteria dialog box to add the filter. The field is listed in the Filter Fields section in the top right corner of the wizard screen.
- Add any additional filters following the steps above.
- Once the fields, sort order, and filters have been properly set, click Next. The data is returned on Step 3 of the wizard.
Note: Select the Back button to go back one step in the Wizard if you make a mistake. - Click Next. The Step 4: Post-Query Options window will open.
- Click the Save... button at the top of the list of buttons.
- Click Save Query Criteria.
- Enter a query description you will remember when you add it to the Smart Group designation.
- Click the Finish button.
