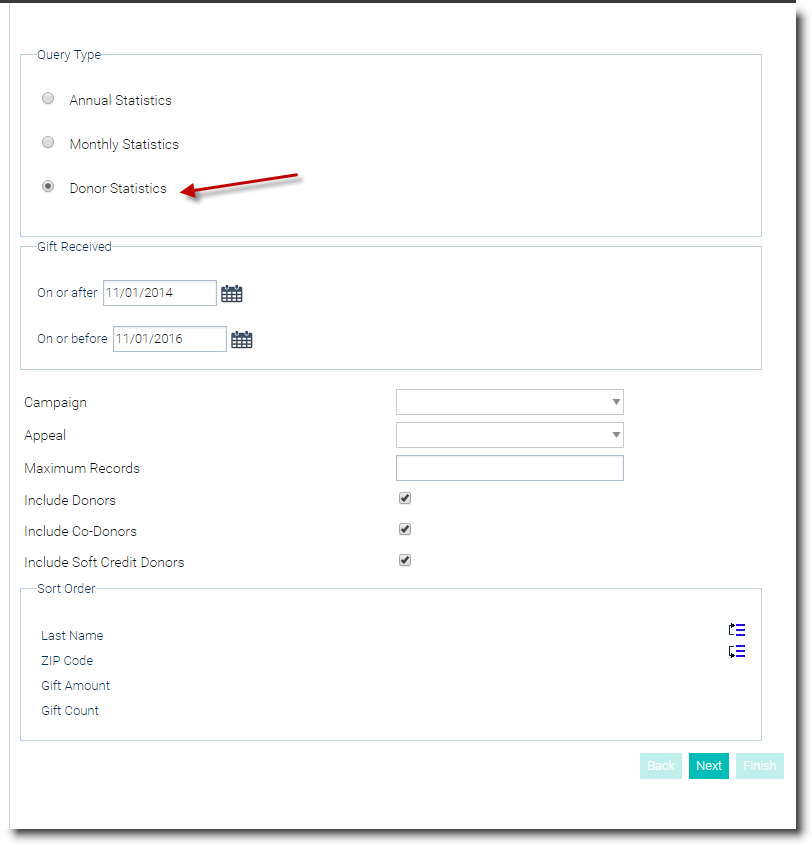
- On Step #1 of the Donation Statistics Wizard, select Donor Statistics. Choose the appropriate dates, Campaign and Appeal.

- You may limit the number of records returned by entering a numeric value in the Maximum records field. Leave this field blank to return all records that meet the selection criteria.
- Choose whether or not you would like to include Donors, Co-Donors or Soft Credit Donors. For this example all donors have been included.
- To change the sort order for a Donor Statistics query type, select an item from the Sort Order list at the bottom of the screen. Use the Move Up or Move Down button to the right of the list to move that item to the desired position.
- Select Next.
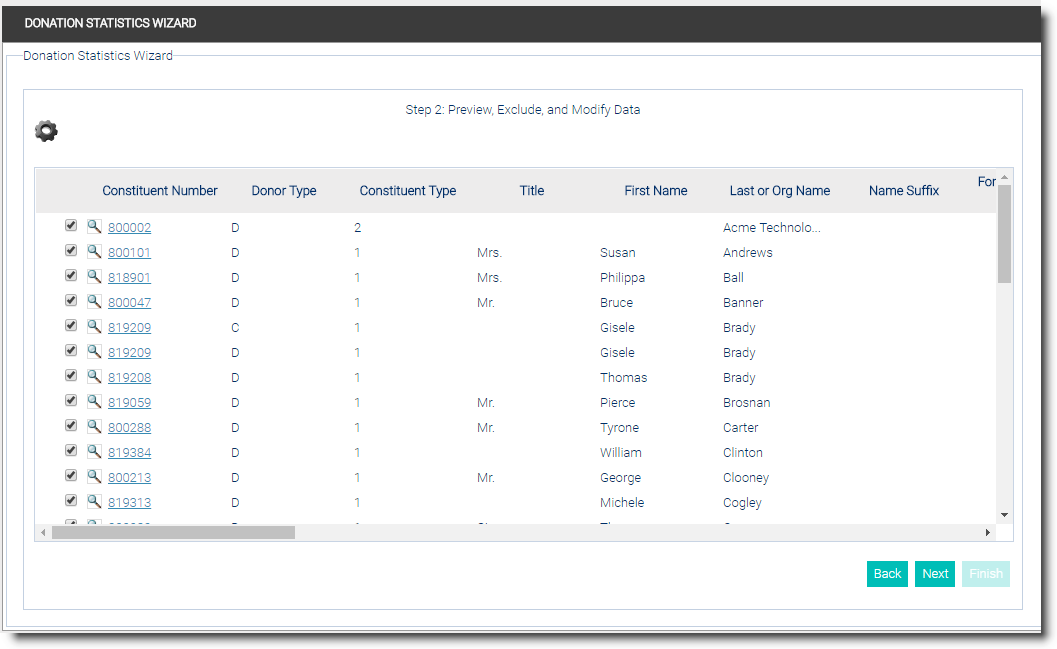
- The data is returned with all information that match the criteria defined in the previous steps. Confirm that you have included the correct criteria. NOTE: The results returned will list the Donor Type. D = Donors, C = Co-Donors and S = Soft Credit Donors. See example to the right. It is important to note that Co-Donors and Soft Credit Donors are marked as such and do not show to whom they are the Co-Donor or Soft Credit Donor.

- If changes to the criteria are needed, select the Back button.
- NOTE: Spouses are listed separately for their combined or individual gifts. In-kind gifts are always included in this listing, they cannot be excluded. Initial pledges and payments on the pledge are included as well.
- If you wish to exclude specific records, even though they meet the criteria defined, select the checkbox next to the appropriate record to deselect it.
- If you need to edit information, select the Details magnifying glass. NOTE: Adding or Editing information on the Query Detail screen will not permanently modify the record.
- After the results are returned, select the Next button.
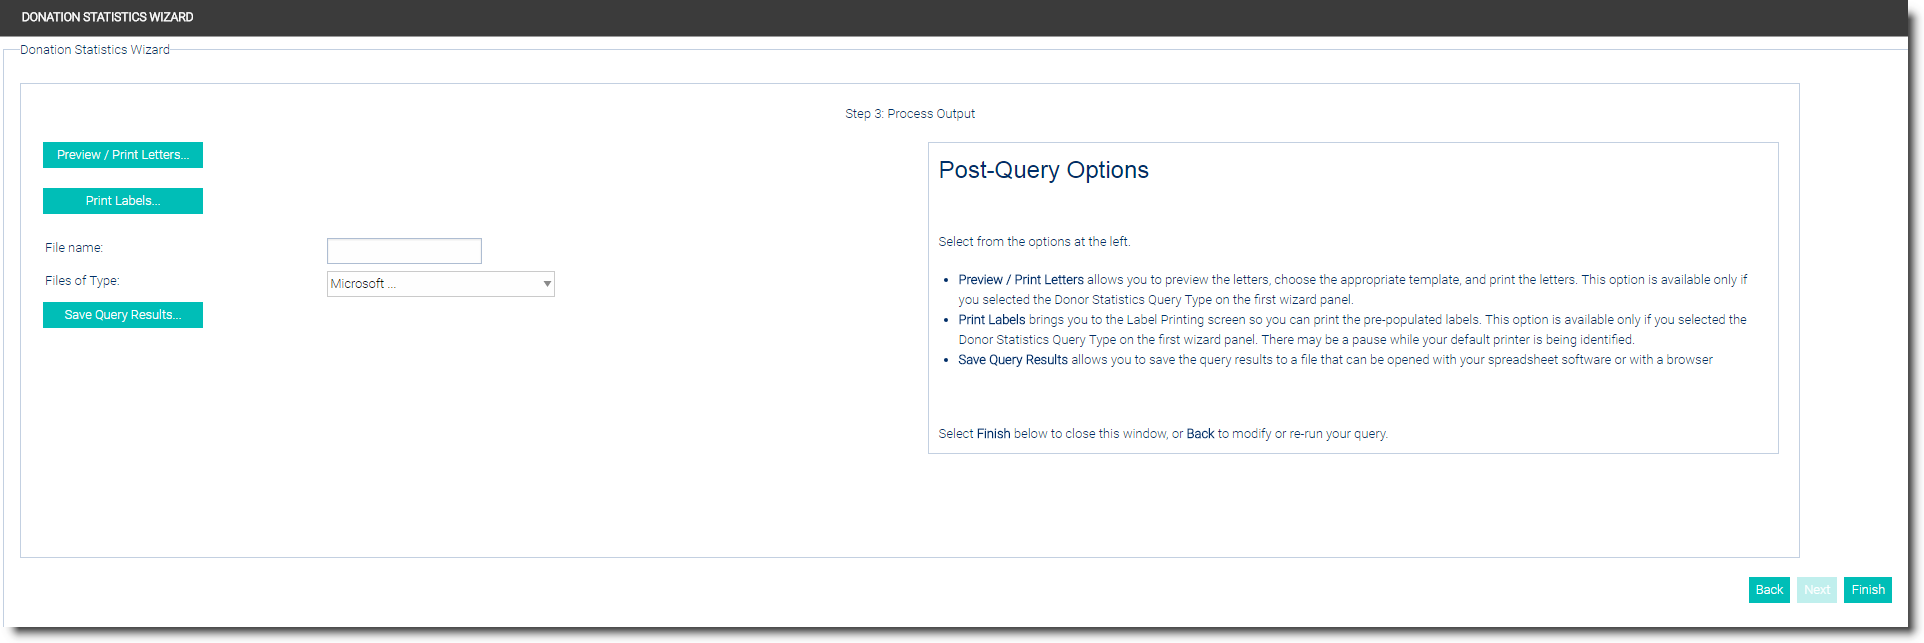
- Four options are available. Choose the desired option.
 Preview / Print Letters to preview the letters, choose the appropriate template, and print the letters. This option is available only if you selected the Donor Statistics Query Type on the (Step 1 Select Criteria screen)
 - Before you can use the Preview / Print Letters option - the letters must be created in the Word Processor. Select Manage > Configuration > Form Letters, save and then configure the letter as a donation letter. NOTE: The Donor Statistics Query Wizard works with Salsa CRM’s Built-in Word Processor only. For more information on creating documents for this feature, please refer to the Salsa CRM's Built-In Word Processor section and the article, Adding a Thank You Letter Template to the Donation Screen.
- Print Labels to print the pre-populated labels or envelopes. This option is available only if you selected the Donor Statistics Query Type on the first wizard panel. There may be a pause while your default printer is being identified.
- Save Query Results saves the query results to a file that can be opened with your spreadsheet software.
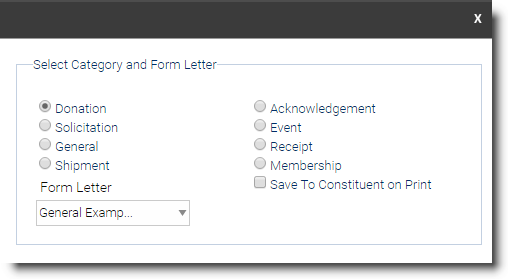
- If Preview / Print Letters was clicked, the Select Category and Form Letter popup displays.

- Click the radio button next to the desired Category, then click the down arrow to open the menu selections for the Form Letter. Click to select the form letter type.
- The Preview window opens as a separate browser tab.
- You can navigate through the pages by selecting either the First, Previous, Next, Last or View All buttons.

- Print or Print All buttons are available in this window.
- Close the browser tab to exit this screen and return to the Step 3 Process Output screen. Close teh Select Category and Form Letter pop-up by clicking the "X" located top right corner.
- Select Finish on the Step 3 Process Output screen.