
This article describes the common functions of all built-in reports. Find these reports on the CRM Toolbar under Reports > Built-in Reports.
Built-in Reports have been designed to provide a wealth of knowledge about your donors and their donations without having to build custom reports every time. Some built-in and custom criteria are the same from report to report.
Find individual report characteristics by following the links below:
- Cumulative Giving
- Donor Detail
- Finance Summary
- LYBUNT
- Payment Type
- Pledge Drive
- Pledge Reminder
- Pledge Status Report
- Pledge Summary
- Solicitation
- SYBUNT
- Cultivation Report
- Membership Report
Report Criteria
Each built-in report contains uniquely pre-defined criteria. See the individual articles above for details.
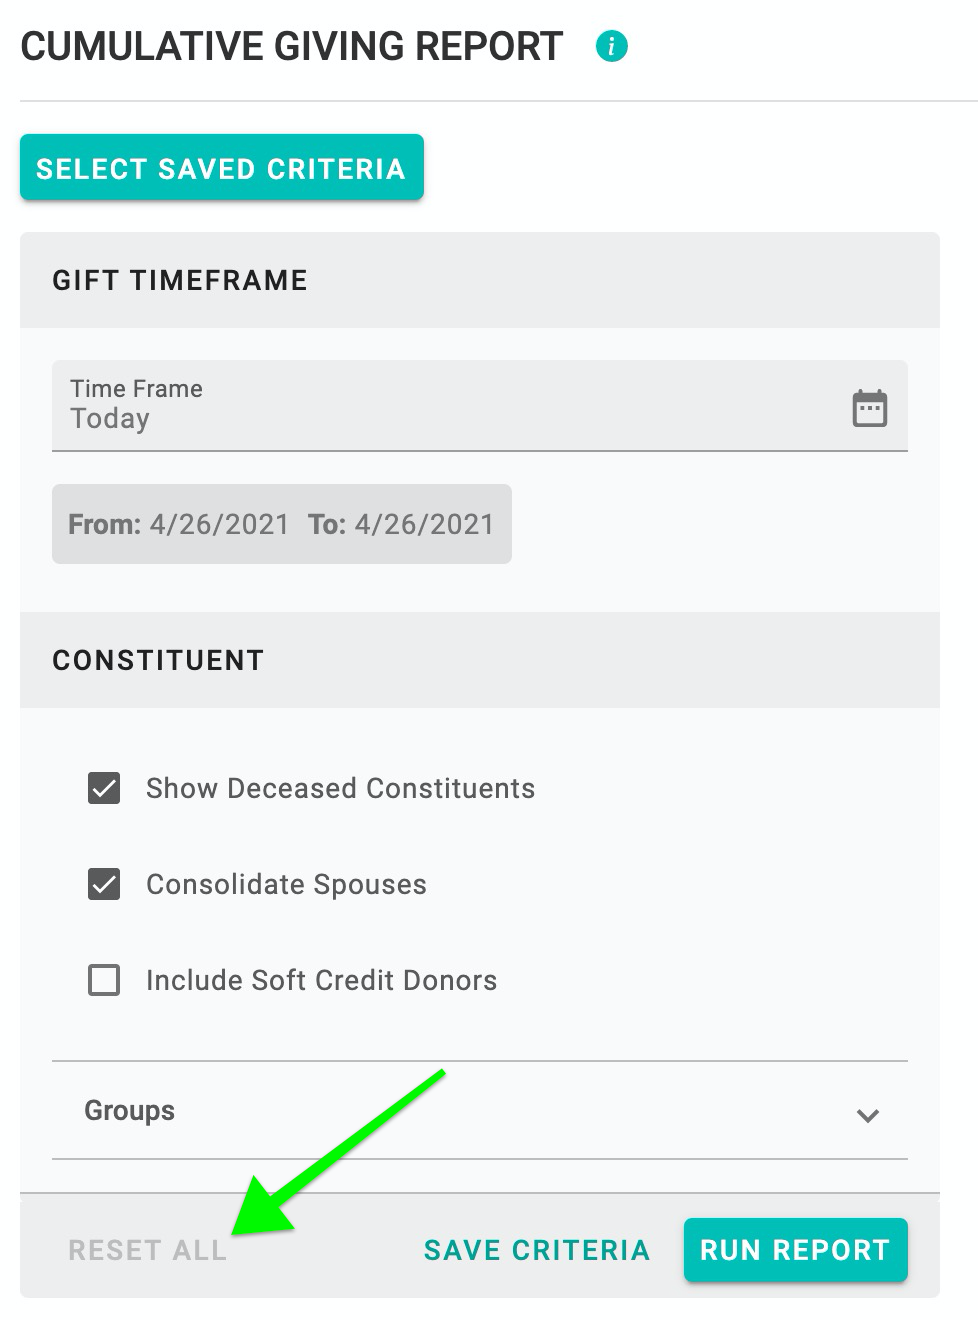
Select filtering criteria on the left side of the report window to determine what conditions include or exclude results in your report. Criteria labels indicate whether they are to include or exclude information from your report.
If you select any of these criteria, you will need to click the Run Report button on the lower left side of the window so the report reflects the change in criteria.
Gift Timeframe
You can customize most reports to show information for a specific date range. To be considered for the report, a gift must have a Received Date that falls in that date range.
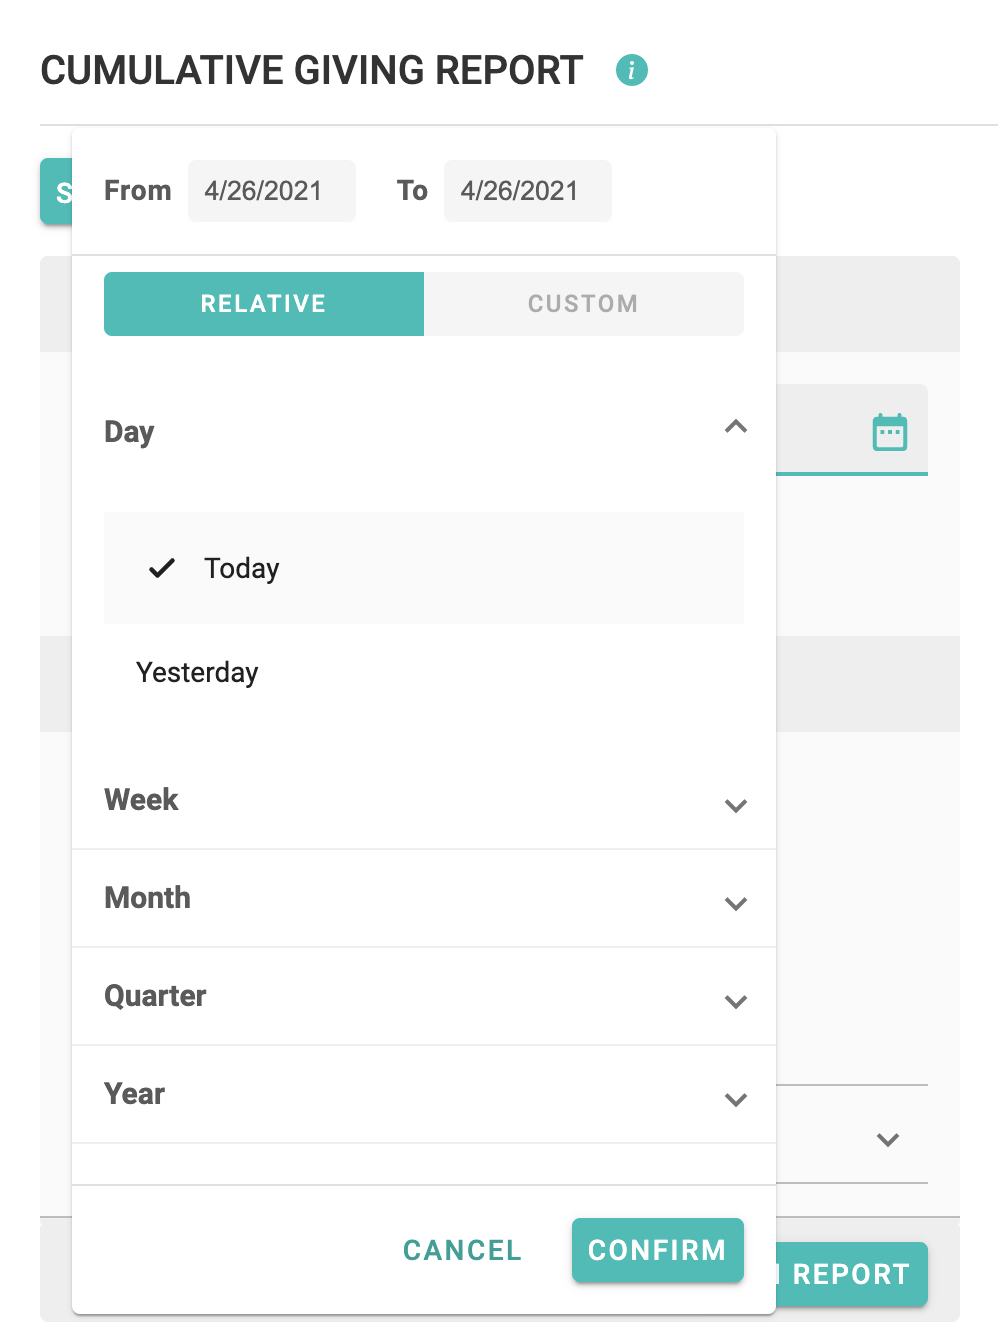
Select preset dates or custom date ranges for which you would like to view the report:
- Relative Dates—A period relative to the date the report is run. For example, the last full week (last week) or the current full month (this month), or the start of last fiscal year and 364 days after (last fiscal year).
-
- Day
- Today
- Yesterday
- Week
- This Week
- Last Week
- Month
- This Month
- Last Month
- Quarter
- This Quarter
- Last Quarter
- Year
- This Year
- This Fiscal Year
- Last Year
- Last Fiscal Year
- Day
-
- Custom Dates—Dates you specify by typing in the From and To dates delineate the beginning and end of your required timeframe. You can also put your cursor in the From field and select a beginning date from the calendars, then put your cursor in the To date and select an end date from the calendars.
Reset All Criteria
The Reset All link in the bottom left corner of the screen returns all criteria to the default state. This option is available once you've changed a filter from its default setting.
Save Report Criteria—So You Can Use It Again
The Save Criteria link in the bottom-left area of the screen gives you an option to save all your report criteria so that any user with report access permissions can pull them up again in the future. Saved criteria are unique to each report.

As an example, we could build a Donor Detail report that filters on recurring payments from last month and then save that report for re-use use next month (when we would change only the gift timeframe).
- Open your Donor Detail Report.
- Change the Gift Timeframe to Last Month.
- Change the Gift Criteria Type to only have Recurring Payments selected.
- Click the Run Report button.
- Click the Save Criteria link.
- Type the name that represents your new report filtering.
- Click Add Saved Criteria. Click Cancel if you wish to discontinue.
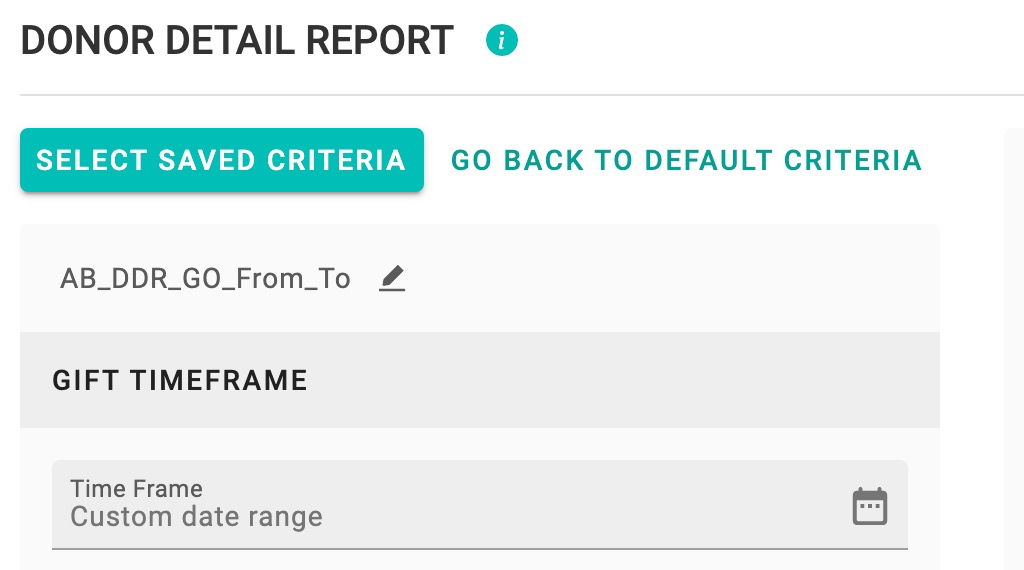
Load Saved Report Criteria (So you do not need to start from scratch)
Load previously saved report criteria using the Select Saved Criteria button in the top-left area of the screen. For example, in the Donor Detail report example above, you could select your saved criteria, change only the gift timeframe, and then run the new report. If you wanted to, you could update the Saved Criteria with the new gift timeframe.
- Click the Select Saved Criteria button.
- You will see links to Go back to default criteria or Search Criteria. All currently saved criteria are in alphabetical order, listed below the Search Criteria field. Click on the criteria you wish to load.
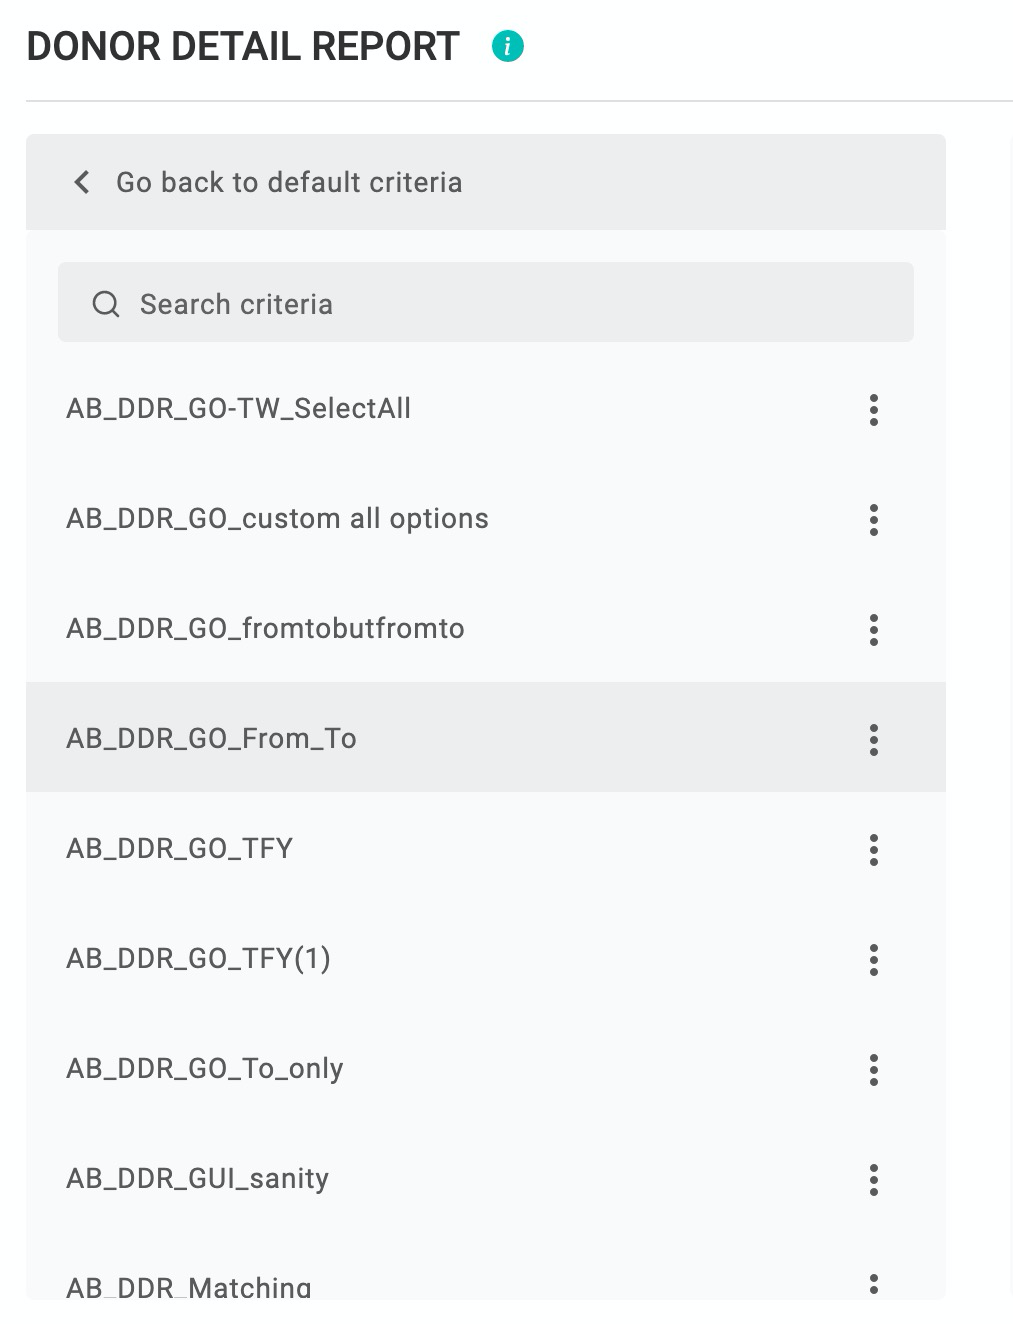
- Next to each saved criteria is a "more" icon that contains further options for your saved criteria:
- Rename
- Clone—This option copies saved criteria to new saved criteria.
- Delete
- Once you have loaded saved criteria, the options change at the top of the criteria window. A link to Go Back to Default Criteria appears to the right of the Select Saved Criteria button. The name of the saved criteria appears below. A pencil icon appears to the right of the saved criteria name, allowing you to rename the saved criteria.
- If you attempt to revert to default criteria without saving your changes, a window will appear, letting you know you have unsaved changes to your previously saved criteria. All changes will be discarded. You have three options:
- Leave Without Saving
- Save As
- Update Criteria
Update Existing Criteria
Make sure to update any filter changes you make to saved criteria by saving the stored configuration.
- Load the existing saved criteria.
- Edit your filters as needed.
- Click the Save button in the bottom left.
- Click Update. A pop-up notice indicates a successful update.
Save New Criteria from Existing Saved Criteria
An easy way to create new saved criteria is to start with criteria that were stored previously. Save any changes with a new name.
- Load the existing saved criteria.
- Edit your filters as needed.
- Click the Save button in the bottom left.
- Click Save As.
- Type a name for the new criteria.
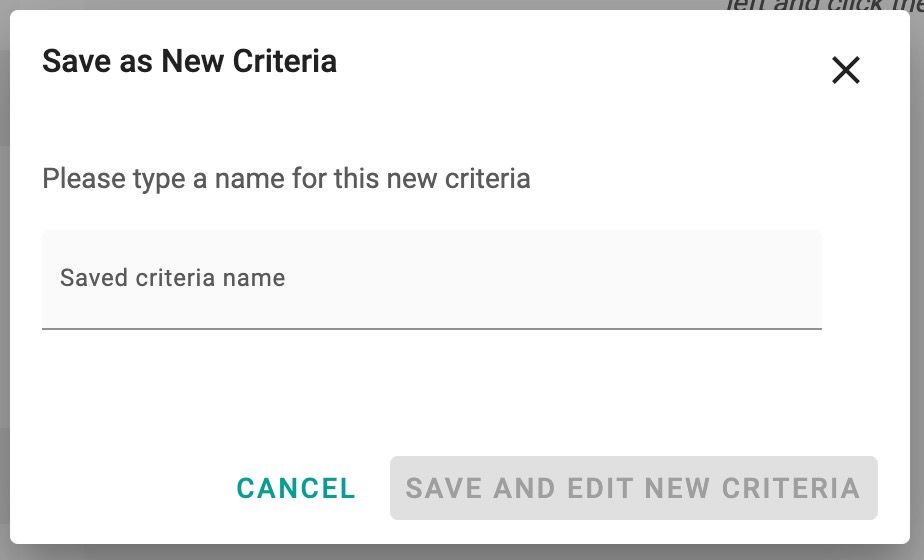
- Click Save and Edit New Criteria, or click Cancel to discontinue.
Download Report
Export your report results in either PDF or excel format by clicking the Download Report button in the top-right corner of the screen.
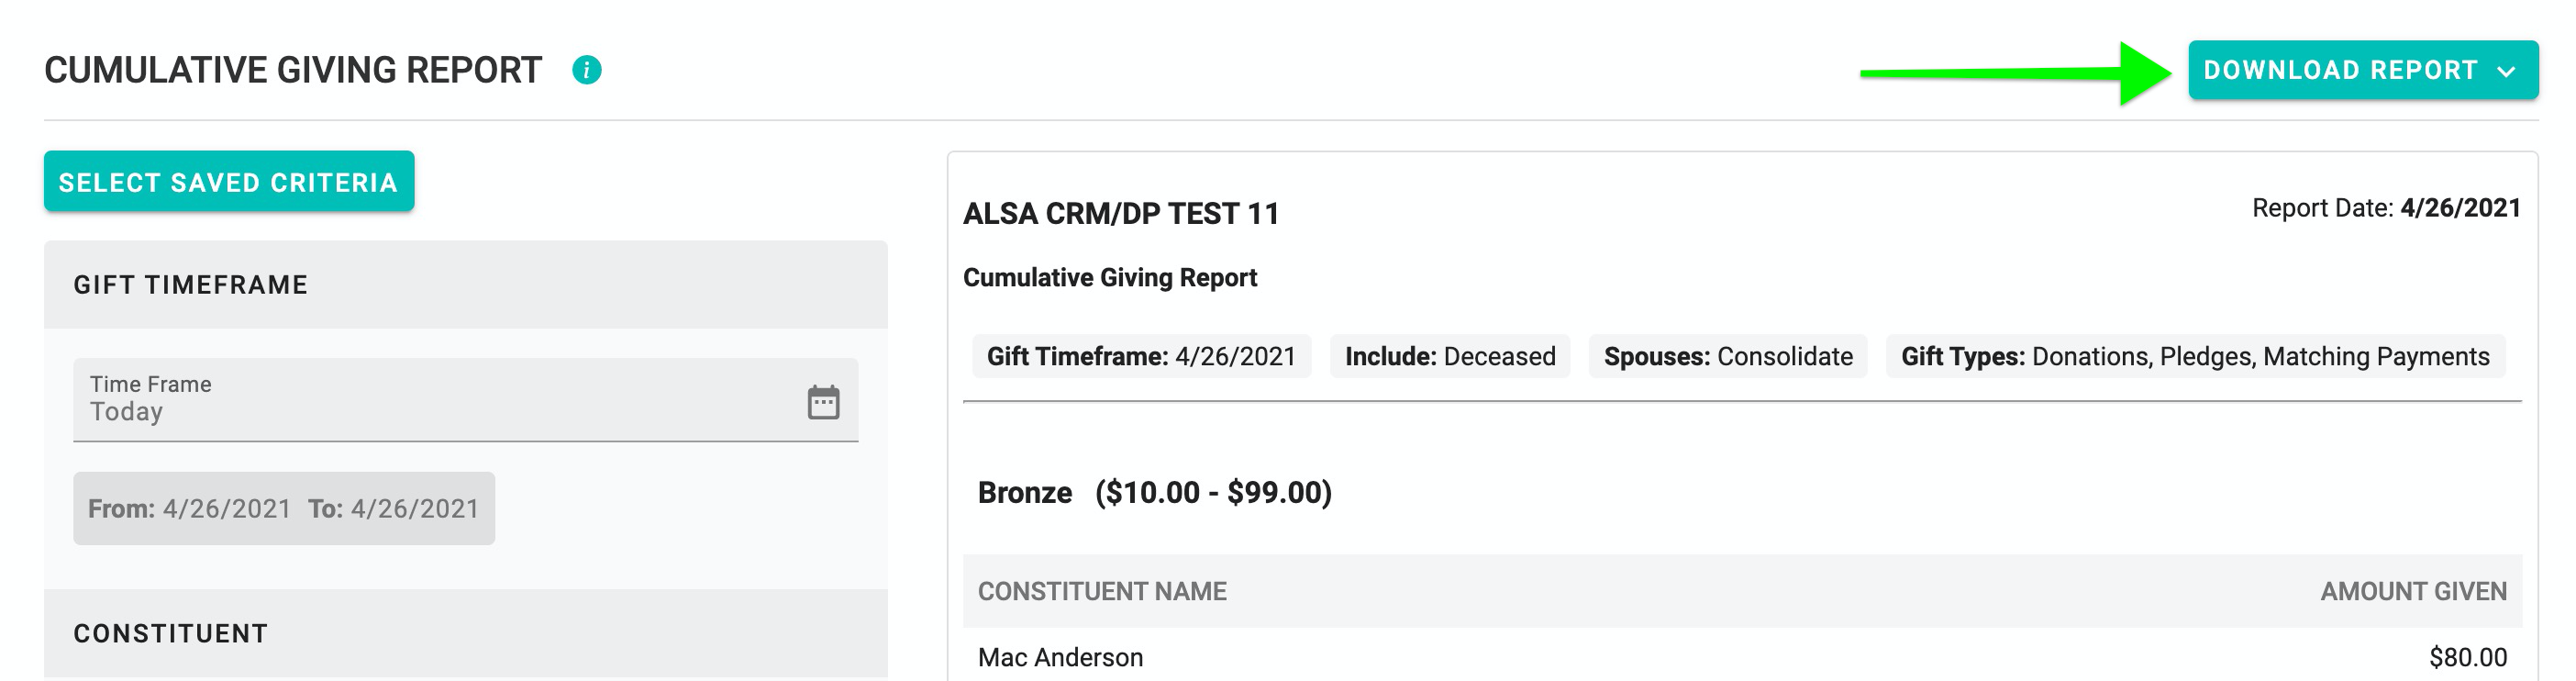
NOTE: the report has to be run first before you can download your results.
Depending on your version of Microsoft Excel, you may receive a notice that the file format of this report does not match the file type. This is an informational notice. You can safely disregard it and proceed with opening the file once it has been downloaded.
Other Report Actions
Now that you have your report criteria as you desire, there are further actions you can take on some reports.

- Start Mail Merge—When selected, the report results table opens within Salsa CRM’s word processor. In the word processor, you can create a mailing to the donors declared in your report. Any of the variables in the displayed table can be used in your letter by placing them in a document between two sets of curly brackets {{example}}. For more information on running a mail merge, please refer to the article Create from an Existing or Previously Run Query.
- View in Advanced Query—When selected, the Advanced Query report opens in a new browser tab. The report results display in Step 3 of the Advanced Query Wizard. At this step, you can see the results of your report. Here you can preview, exclude and modify data just as you would when you run a query. By proceeding to Step 4, all options of the Advanced Query Wizard are available to you. You can save the results of this query which would enable you to open them in the word processor, print labels, add to a group and perform many other global functions.
NOTE: The Advanced Query option in the Donor Detail Report displays a column showing Deceased Date and a column for Spouse Deceased Date. If a deceased date appears on a donor’s record, it will appear in this column. This screen allows you the opportunity to deselect that constituent row if you so choose. If you plan on eventually creating a mailing and you have consolidated spouses and a spouse returns with a deceased date, simply go back and change the relationship to the deceased spouse on the surviving spouse's record to Deceased Spouse. This would remove that deceased spouse from counting toward consolidated records and their name would not be added to the surviving spouse's name. Then, re-run your report. - View in Advanced Query, Grouped by Year—When selected, the Advanced Query report opens in a new browser tab. The report results display in Step 3 of the Advanced Query Wizard, with the addition of columns at the right showing a year-over-year difference.