
See this page for an overview of CRM forms.
Design very elaborate, multiple-page forms for data entry staff to complete. Set very specific editing requirements on each form field, such as whether may be required or could be left blank; what type and length of content is allowed, etc. There is no limitation on the number of fields or pages within a form and no limit to the number of forms you can create. Once you have designed the form, there is no limit to the number of form instances you can assign to any constituent. Like the Notes function, this allows you to keep track of many year's worth of history for every form.
Create a New Form
- Create a new form by selecting Tools > Forms > Form Manager.
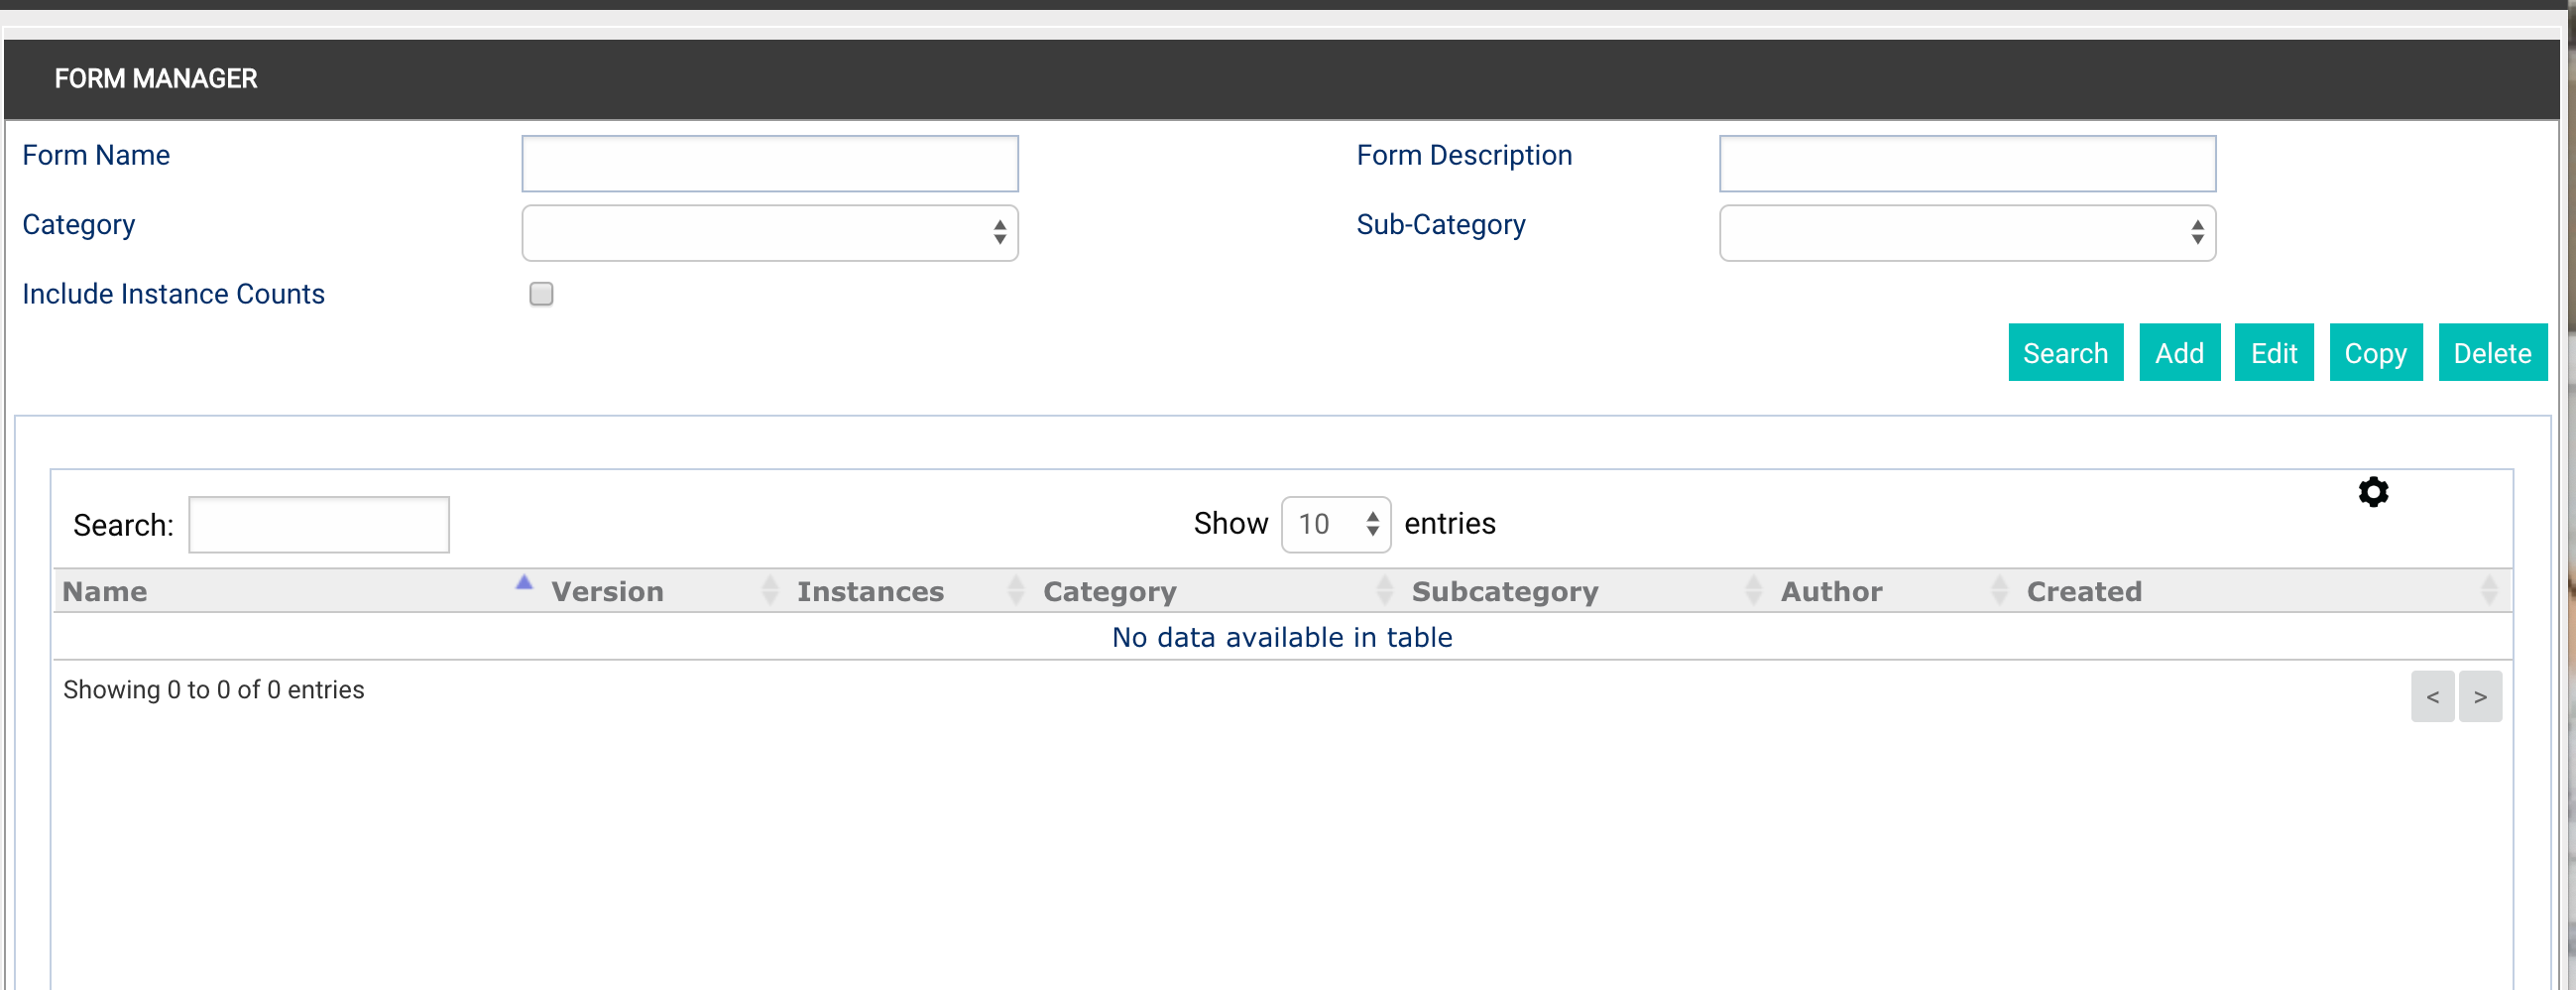
- Choose the Add button at the top right side of the screen. The Form Details pop-up box opens.
- In the Template Name line enter the name of your form. You may use your Tab key to move from field to field.

NOTE: When creating the fields and keywords of your form or entering information into the text fields, avoid using symbols such as: & ' / \ * > ; . - Major Version identifies the form as to which version had major alterations. For example, Version 1.0 or 2.0. The extent to which you consider alterations to be major or minor is up to you. For example, you could use major and minor versioning when you want to differentiate between which form is currently in use and draft content that is not yet ready for use.
- Minor Version is a decimal form of the Major Version. For example, Version 1.1 .
- Select the Category and Subcategory from the drop down boxes. These choices were configured during Form Configuration.
- Choose the OK button when finished. The Form Designer screen will open.
Form Designer
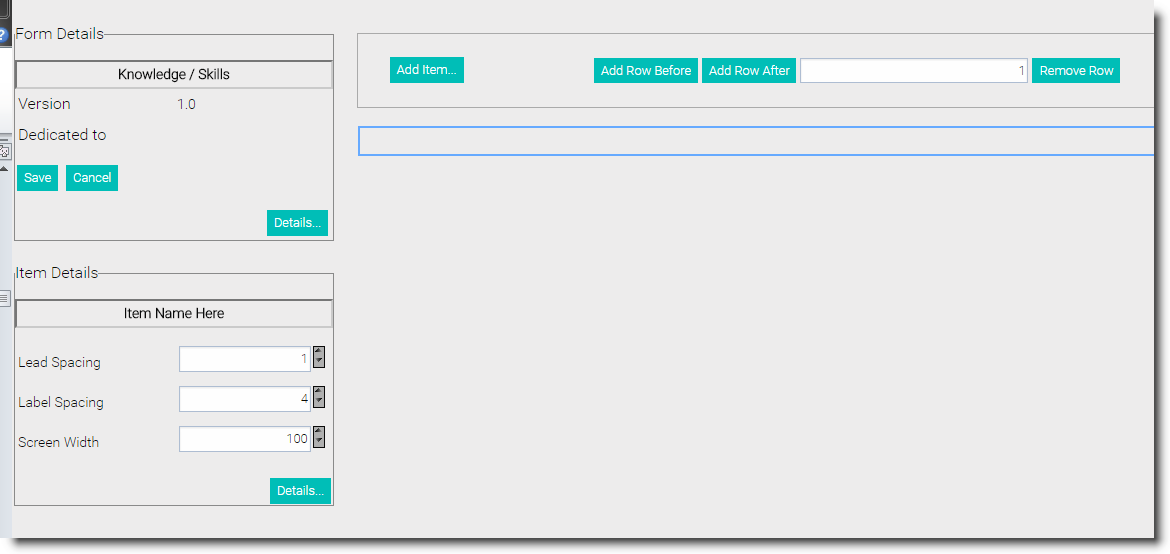
The Form Designer screen is separated into three areas:
- Form Designer—Add and organize the fields you need for your form in this area. See explicit instructions below.
- Form Details—Review and edit items configured during form creation: Template Name, Version numbers, category, subcategory, and Keywords.
- Item Details—Review and edit a specific field's configurable items here.
Create New Fields on a New Form
To add a new field to the new form you are creating...
- Click Add Item. The Item Editor window opens.
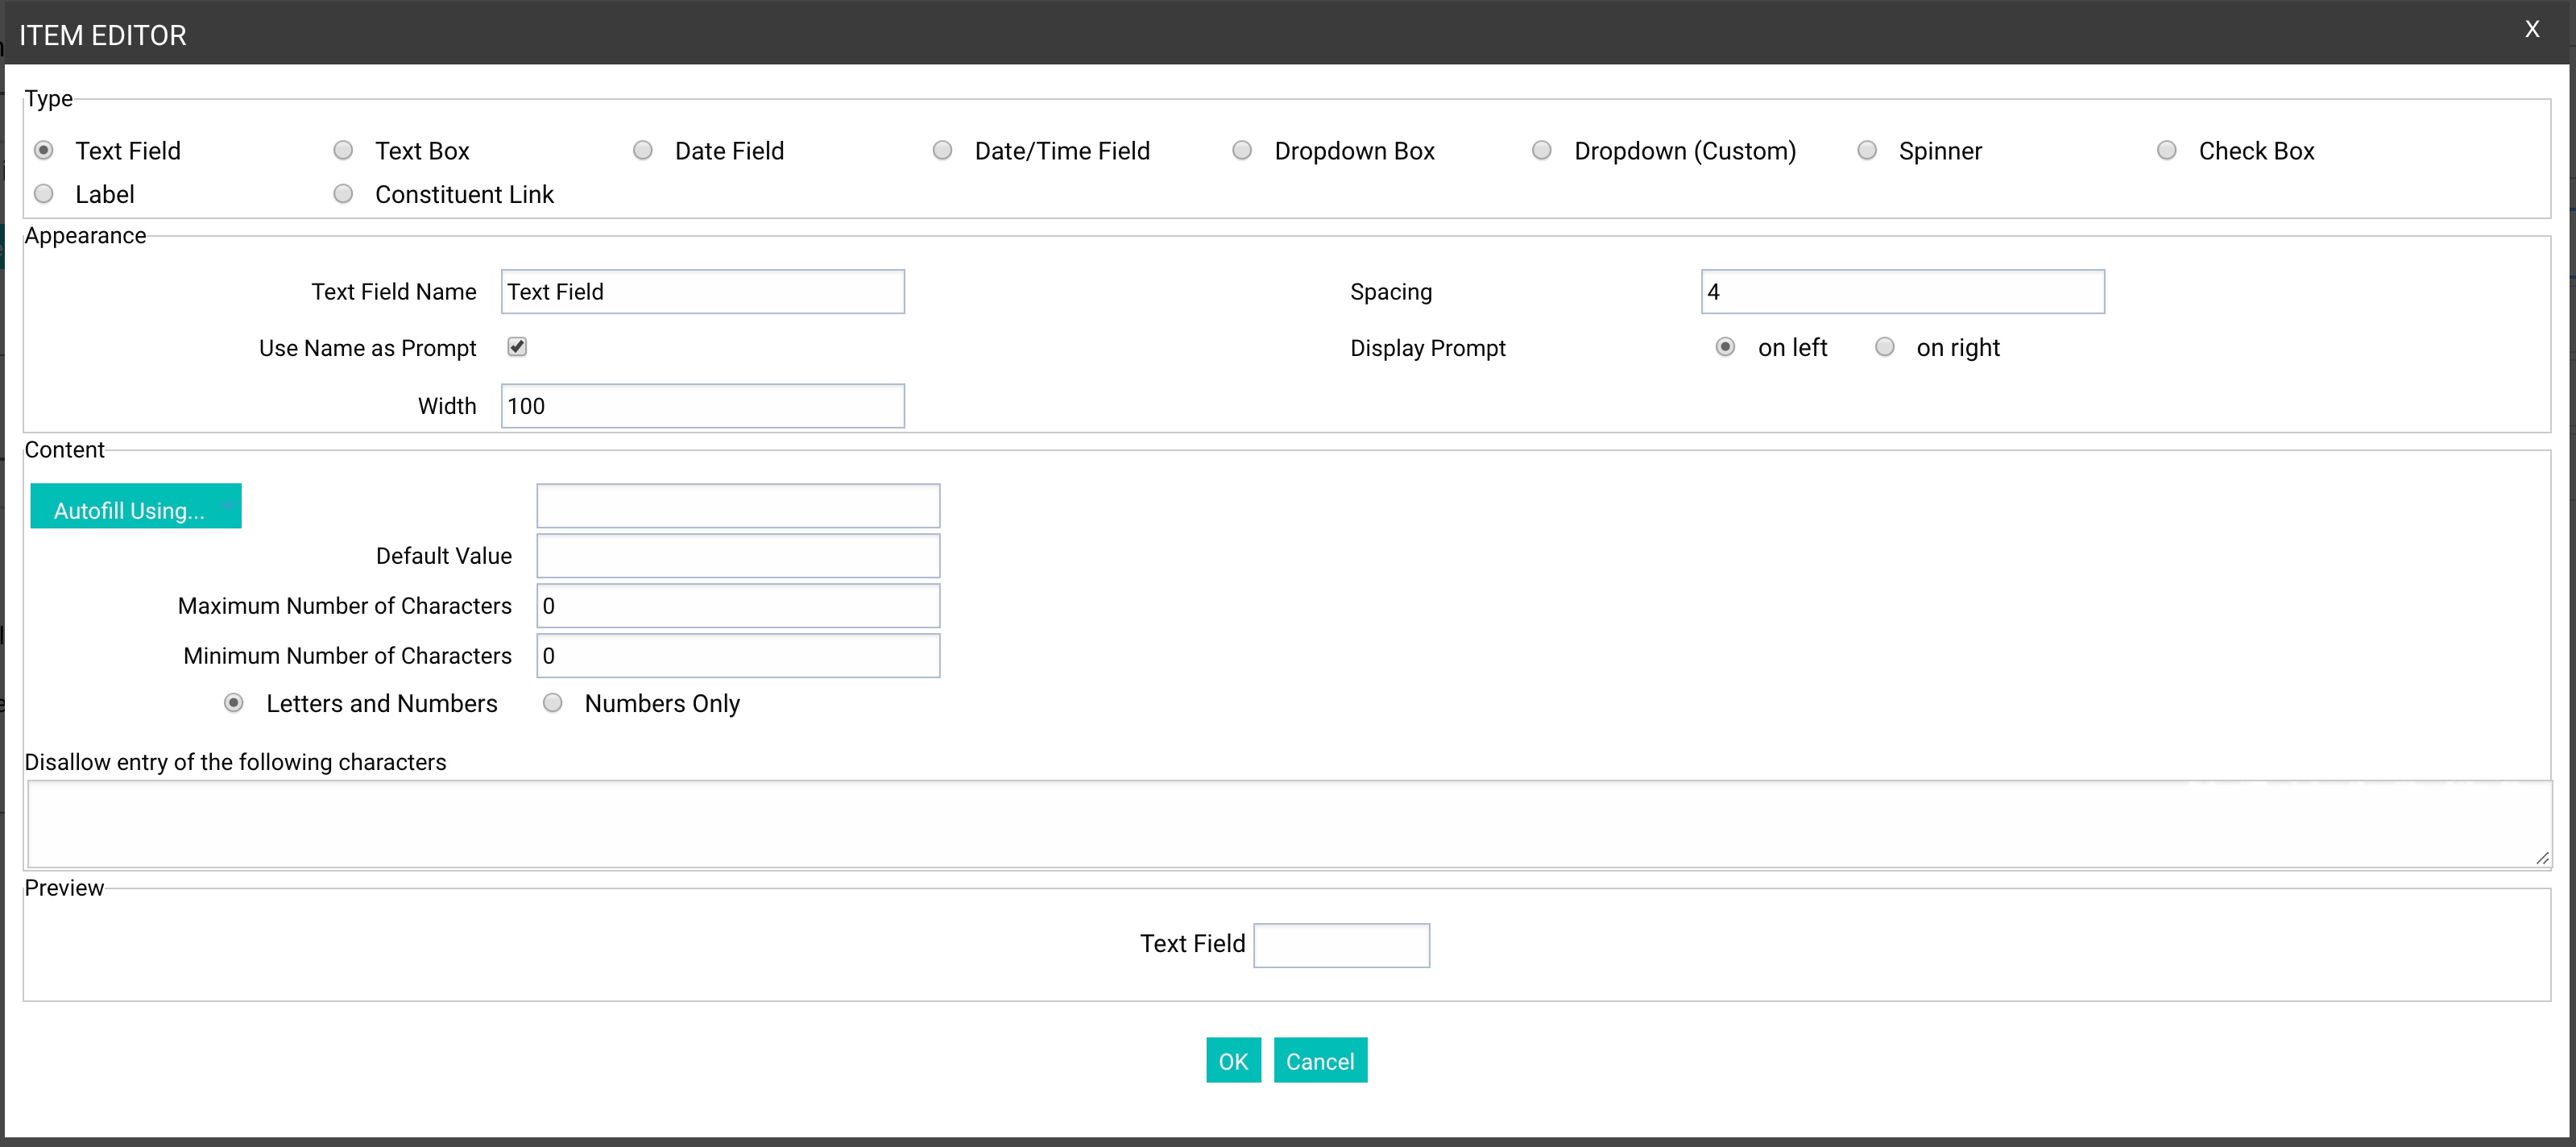
- The top part of the Item Editor screen lets you choose the field Type. Choose the desired item type (Type) you wish to add. There are ten available options. Each option has different properties to further customize the field.
- Text Field- Enter a short amount of text, typically about 30 characters or less.
- Text Box- Enter a larger amount of text, such as a narrative on a scholarship application.
- Date Field- Enter a date.
- Date/Time Field- Enter the date, plus the hour and minute, plus AM or PM.
- Dropdown Box- Choose from a list of fields that already have dropdown lists associated with them so that you may use that same list in your form. For example, you could choose Constituent Title to have the same list of titles in your form that are available when adding a new constituent.
- Dropdown (Custom) - Create a field with a custom drop-down list.
- Spinner - Create a numeric field in which an up and a down arrow button will be available to increase or decrease the number in the field.
- Checkbox- Create a Yes/No field. The box will be checked for a Yes and left blank for a No.
- Label- Add text such as instructions to the person who is completing the form, mailing information, or fax information.
- Constituent Link- Place a button on your form which will allow you to search for a constituent and place a hyperlink to the selected constituent on an instance of the form.
NOTE: When creating the fields and keywords of your form or entering information into the text fields, avoid using symbols such as... & ' / \ * > ; . - The Appearance section controls aspects of the field you are adding, such as label text and placement, and the size of the item. Some items only have adjustable width, while some also have adjustable height.
- The Content section defines what is allowed in this field. Some components allow default values. If a default is specified, it will pre-fill on the screen as the user adds this form to a constituent's record. Each component has its own editing for allowed values.
- See an Example of the component you have selected at the bottom of the screen. In most cases, this preview changes its appearance if you change appearance or content parameters.
- After setting all of the desired item properties, click OK. You are returned to the Form Designer.
- Save your work in the Form Details section in the top left of the Form Designer.
Repeat the previous steps for each item you wish to create in the first row.
Remove Fields From Your New Form
Click the red X to the right of the field you wish to delete in order to remove it from that row. There is no confirmation step. The field is removed immediately. If this was done in error. Click Cancel in the Form Details panel and restart the Form Manager.
Add Rows to Your Form
To add (or subsequently remove) additional rows to your form, click the Row button. Your options include...
- Add Row Before
- Add Row After
- Remove Row
Remove Rows from Your Form
To remove an entire row from your form...
- Click once in a blank area of the row you wish to remove.
- Click the Remove Row button.
There is no confirmation step. The row is removed immediately. If this was done in error. Click Cancel in the Form Details panel and restart the Form Manager.
Move Fields Within the Same Row
Fields cannot be switched in position. They would have to be replaced.
Resize Fields Within the Same Row
If fields in a row are too close together...
- Click the spinner box associated with Lead Spacing. This will adjust the distance between two fields.
- If the field box is too close to its own label, select the spinner box associated with Label Spacing. This will adjust the distance between the label and its associated field.
- Add any desired fields following the above instructions.
- Choose the Save button to save the designed form.
For information on setting the 10 Keywords, review the article, Set Keywords for Form Fields to Use in Queries.